Introduction
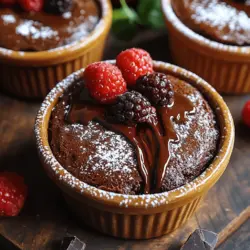
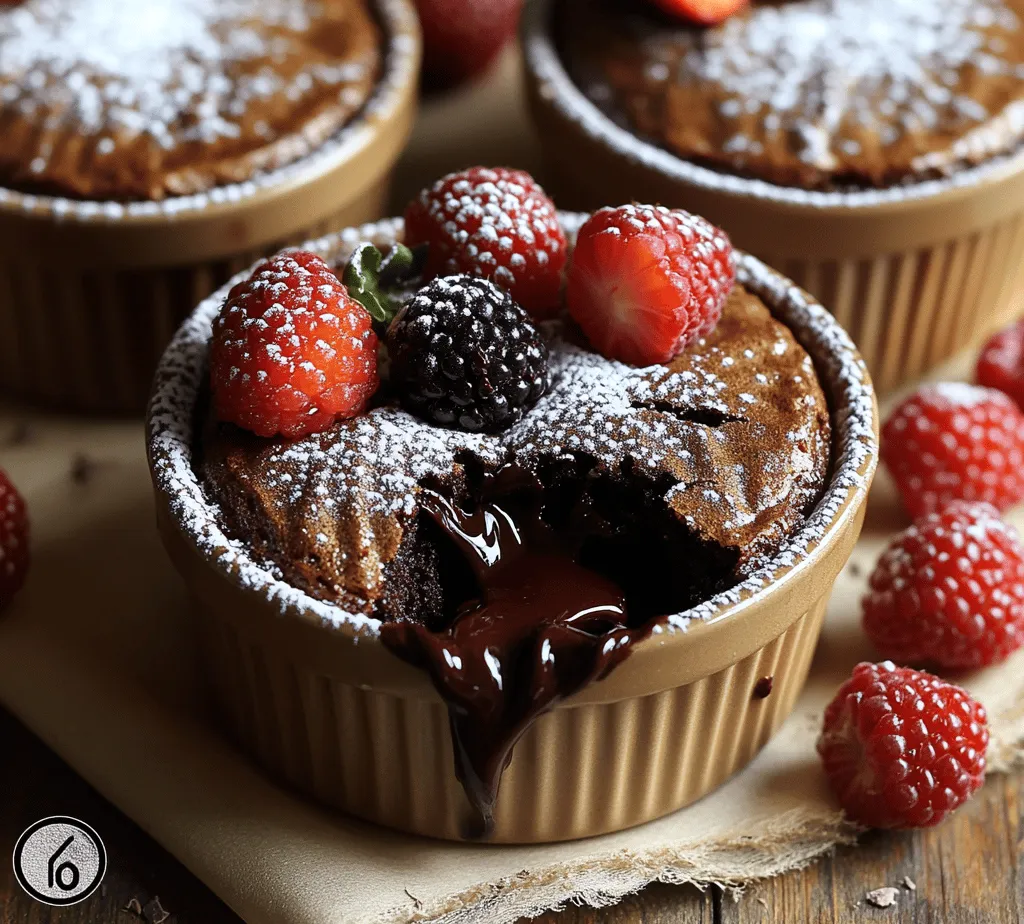
When it comes to desserts that evoke pure delight, few can rival the decadent allure of chocolate lava cake. This beloved treat, with its rich chocolate flavor and gooey, molten center, captures the hearts of chocolate lovers everywhere. Imagine cutting into a warm chocolate cake, and instead of a crumbly texture, you reveal a luscious flow of molten chocolate that spills out—an experience that is as thrilling as it is delicious. Whether served in a fine dining restaurant or made at home for a special occasion, chocolate lava cake is synonymous with indulgence and elegance.
The appeal of chocolate lava cake lies not only in its taste but also in its presentation. It is a dessert that looks as good as it tastes, making it the perfect centerpiece for any gathering. In this article, we will delve into the world of chocolate lava cake, exploring its origins, the science behind its characteristic molten center, and the key ingredients that make it truly exceptional. Additionally, we will provide you with a comprehensive, step-by-step guide to creating your own ultimate chocolate lava cake at home, complete with serving suggestions to elevate your dessert experience.
Understanding Chocolate Lava Cake
Chocolate lava cake, also known as molten chocolate cake or chocolate fondant, is a dessert that has captured the culinary world’s imagination since its invention. The cake typically consists of a rich chocolate cake with a gooey, liquid center that flows out when cut. The origins of this dessert can be traced back to the early 1980s when French chef Michel Bras is credited with its creation. Since then, it has become a staple on dessert menus around the globe.
The science behind the molten center of chocolate lava cake is fascinating. The key to achieving that perfect lava effect lies in the baking time and temperature. When baked correctly, the outer layer of the cake sets, while the inner layer remains soft and molten. The combination of eggs and flour creates a delicate structure that stabilizes the cake, allowing for that oozy core. Timing is crucial; bake for too long, and you risk losing the molten center, while underbaking can lead to an overly runny consistency.
Moreover, chocolate lava cake has inspired numerous variations worldwide. From the addition of liqueurs to unique flavor combinations like raspberry or peanut butter, there are endless creative possibilities to explore. However, at its core, the classic chocolate lava cake remains a timeless favorite that highlights the simplicity and richness of chocolate.
Key Ingredients for the Ultimate Chocolate Lava Cake
Creating the ultimate chocolate lava cake requires a careful selection of ingredients, each playing a critical role in the final outcome. Here’s a closer look at the essential components and how they contribute to the dessert’s success:
Unsalted Butter
Butter is a crucial ingredient in chocolate lava cake, providing the rich fat content that enhances the flavor and texture of the cake. Using unsalted butter allows for better control over the salt content in the recipe, ensuring that the sweetness and chocolate flavor are not overpowered.
Semi-Sweet Chocolate Chips
The choice of chocolate is paramount in achieving the desired flavor profile. Semi-sweet chocolate chips are ideal for this recipe as they strike the perfect balance between sweetness and richness. When melted, they create the luxurious, smooth chocolate base that defines the cake.
Powdered Sugar
Powdered sugar, also known as confectioners’ sugar, is used to sweeten the batter without compromising its texture. Its fine consistency allows for easy incorporation into the mixture, ensuring a smooth batter. Additionally, powdered sugar helps in achieving the desired melt-in-your-mouth quality.
Eggs and Egg Yolks
Eggs are fundamental in providing structure and moisture to the cake. The combination of whole eggs and additional egg yolks contributes to a tender crumb while ensuring a rich and luscious texture. The proteins in the eggs coagulate during baking, helping to stabilize the cake’s form.
Vanilla Extract
Vanilla extract is a must-have for enhancing the chocolate flavor. The aromatic notes of vanilla complement the richness of the chocolate, elevating the overall taste of the dessert. Always opt for pure vanilla extract for the best flavor results.
All-Purpose Flour
Flour is essential for providing structure to the cake. However, it is important to use it in moderation to maintain the delicate balance between a cake-like exterior and a molten center. Too much flour can lead to a dense cake, while too little may prevent the cake from holding its shape.
Salt
While it may seem counterintuitive to add salt to a dessert, it plays a crucial role in enhancing the flavors of the ingredients. A pinch of salt can elevate the sweetness of the chocolate, making the overall flavor more pronounced and complex.
Optional Garnishes
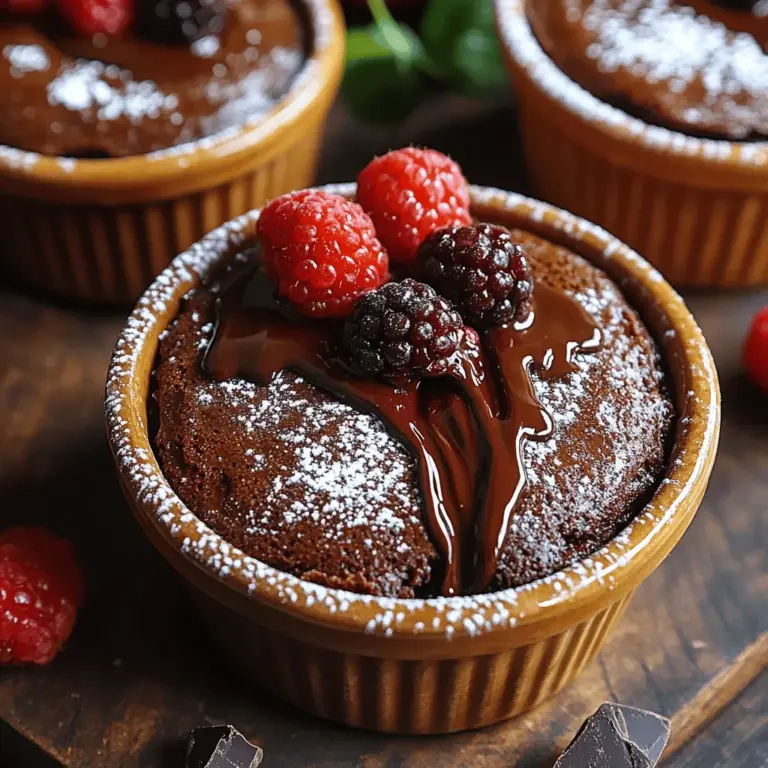
To elevate the presentation and enjoyment of your chocolate lava cake, consider adding optional garnishes. A dusting of powdered sugar on top can create an elegant finish, while fresh berries such as raspberries or strawberries provide a tart contrast to the rich chocolate. Whipped cream or a scoop of vanilla ice cream can also complement the dessert beautifully, adding creaminess to each bite.
Step-by-Step Instructions for Perfect Lava Cake
Now that we have covered the enticing background and key ingredients for the ultimate chocolate lava cake, it’s time to get started with the preparation. One of the most important steps in making this dessert is properly preparing the ramekins to ensure the cakes release easily after baking. Here’s how to do it:
1. Choose Your Ramekins: Select 6-ounce ramekins, which are the perfect size for individual servings of chocolate lava cake.
2. Grease the Ramekins: Generously coat the insides of each ramekin with unsalted butter. Use a pastry brush or your fingers to ensure that every part of the interior is covered. This step is crucial to prevent the cake from sticking.
3. Dust with Cocoa Powder: After greasing, sprinkle a small amount of cocoa powder into each ramekin, rotating it to coat the sides evenly. Tap out any excess cocoa powder. This will not only prevent sticking but also add an extra layer of chocolate flavor to the exterior of the cake.
4. Preheat the Oven: Preheat your oven to 425°F (220°C). This high temperature is essential for achieving a beautifully baked cake with a molten center.
5. Prepare the Batter: In a medium heatproof bowl, combine the unsalted butter and semi-sweet chocolate chips. Melt them together using a microwave or a double boiler, stirring until smooth. Allow the mixture to cool slightly before proceeding.
As we prepare to delve deeper into the step-by-step instructions for mixing and baking the batter, readers can look forward to learning how to achieve that sought-after molten center and create a dessert that is sure to impress. Stay tuned for the continuation of this ultimate chocolate lava cake recipe, where we will guide you through every essential step to ensure your success in the kitchen.
Melting Chocolate and Butter
To achieve a smooth and luscious chocolate and butter mixture for your Ultimate Chocolate Lava Cake, it is crucial to melt them properly. First, use high-quality chocolate that contains at least 60% cocoa solids for the richest flavor. Break the chocolate into small pieces to promote even melting.
Place the chocolate and butter in a heatproof bowl set over a pot of simmering water, creating a double boiler. This method helps control the temperature and prevents the chocolate from seizing or burning. Stir the mixture gently and continuously until both the chocolate and butter are completely melted and combined into a glossy mixture. This technique is essential for achieving that velvety texture we desire in our lava cake. Alternatively, you can melt the chocolate and butter in the microwave in short bursts of 20-30 seconds, stirring after each interval to avoid overheating.
Mixing the Batter
Once your chocolate and butter mixture has cooled slightly, it’s time to mix the batter. In a separate bowl, whisk together the eggs and sugar until the mixture becomes pale and slightly frothy. This step is crucial as it incorporates air into the batter, resulting in a lighter texture. Aim for a fluffy consistency; this can take about 3-5 minutes of vigorous whisking.
Gradually add the melted chocolate mixture to the egg and sugar blend while continuously stirring to prevent the eggs from scrambling. It is important to ensure that the chocolate is not too hot when you add it to the eggs; otherwise, it could curdle the mixture.
Folding in Dry Ingredients
With the wet ingredients well combined, it’s time to incorporate the dry ingredients. Gently sift together the flour, cocoa powder, and a pinch of salt into the bowl. Using a spatula, carefully fold in the dry ingredients until just combined. The key here is to mix gently and avoid overworking the batter. Overmixing can lead to a dense cake instead of the desired light and airy texture.
When folding, use a motion that lifts the batter from the bottom of the bowl and around the sides, ensuring the dry ingredients are evenly incorporated without deflating the air bubbles created earlier.
Filling Ramekins
For perfect lava cakes, filling the ramekins evenly is essential. Grease each ramekin with butter or non-stick spray to prevent the cakes from sticking. Then, dust with cocoa powder to create a barrier that enhances the chocolate flavor and makes for an easy release.
Using a ladle or measuring cup, fill each ramekin about three-quarters full with the batter. This allows enough room for the cakes to rise without spilling over. Ensure that the batter is distributed evenly among the ramekins for consistent baking results.
Baking Time and Temperature
Baking your chocolate lava cakes at the right temperature and for the right amount of time is crucial to achieving that iconic molten center. Preheat your oven to 425°F (220°C) and place the filled ramekins on a baking sheet for stability.
Bake the cakes for about 12-14 minutes. Start checking at the 12-minute mark; the edges should be firm while the center remains soft and slightly jiggly. Avoid overbaking, as this will result in a cake that lacks the gooey center you’re aiming for. If you’re unsure, a toothpick inserted into the edge of the cake should come out clean, while the center will still be undercooked.
Cooling and Inverting the Cakes
Once the baking time is complete, remove the cakes from the oven and allow them to cool for 1-2 minutes. This brief cooling period helps the cakes set slightly, making them easier to invert.
To serve, gently run a knife around the edges of each ramekin and carefully invert onto individual plates. Tap the bottom of the ramekin lightly to release the cake, and lift it off gently to reveal the perfectly formed lava cake.
Serving Suggestions and Pairings
For the ultimate chocolate lava cake experience, serve it immediately while it’s still warm. The ideal serving temperature allows the molten center to flow out beautifully when cut into.
Consider garnishing your lava cake with a dusting of powdered sugar, fresh berries, or a scoop of vanilla ice cream to balance the richness of the chocolate. The contrast of temperatures between the warm cake and cold ice cream is particularly delightful.
Pairing your lava cake with beverages can elevate the experience. A strong cup of coffee complements the chocolate flavor beautifully, while a glass of dessert wine or sweet red wine can enhance the cake’s richness. For a non-alcoholic option, chilled milk or a creamy chocolate drink can provide the perfect pairing.
Common Mistakes to Avoid When Making Chocolate Lava Cake
When making chocolate lava cake, it’s important to steer clear of several common pitfalls:
1. Overmixing the Batter: This can lead to a dense and chewy cake rather than the light, airy texture desired. Always fold gently and only until the dry ingredients are just incorporated.
2. Incorrect Baking Time: To avoid cutting into the cake to check for doneness, watch the edges closely. They should be set, but the center should remain soft. Trust your instincts and the visual cues from the baking process.
3. Using Too Much Flour: A common error is not measuring flour accurately. Too much flour will absorb the moisture needed for the gooey center. Use a kitchen scale for the best accuracy or spoon the flour into a measuring cup and level it off with a knife.
Storage and Reheating Tips
If you happen to have leftover chocolate lava cakes (which we doubt, but just in case), proper storage is key. Allow the cakes to cool completely, then cover them with plastic wrap or transfer them to an airtight container. They can be stored in the refrigerator for up to 2 days.
For reheating, the best method is to use the oven. Preheat your oven to 350°F (175°C), place the cakes on a baking sheet, and heat for about 10-12 minutes. This method will help maintain the molten center without overcooking the cake. If you’re in a hurry, you can also microwave the cakes for about 30 seconds, but be cautious not to overheat them, as this can cause the center to solidify.
Conclusion
Making the Ultimate Chocolate Lava Cake is not only a rewarding experience but also a delightful way to indulge in one of the most beloved desserts. The combination of rich chocolate and that ooey-gooey center creates a moment of joy in every bite. We encourage you to try this recipe at home, whether for a special occasion or simply to treat yourself.
Share the experience with loved ones and enjoy the satisfaction that comes with creating a classic dessert that impresses. The act of baking and the pleasure of enjoying your homemade lava cake is a testament to the joy of cooking and the sweet memories it can create. Indulge in this chocolate delight and relish every moment of this decadent treat.