Introduction
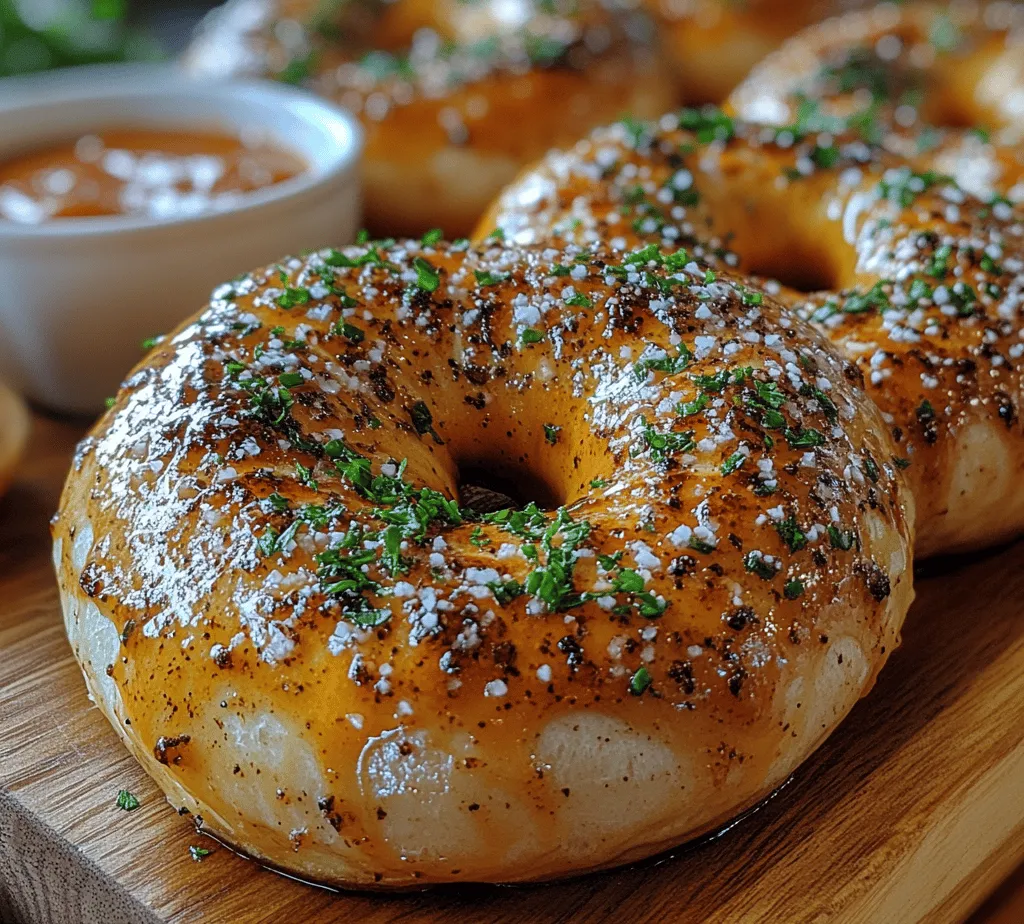
There’s something undeniably satisfying about the aroma of fresh-baked soft pretzels wafting through your home. The joy of homemade pretzels transcends mere flavor; it encapsulates a warm, comforting experience that invites family and friends to gather around. Soft pretzels have gained immense popularity as a snack, loved for their chewy texture and delightful taste. Whether you’re snacking at a local fair, enjoying game day with friends, or simply indulging in a cozy evening at home, soft pretzels are a timeless treat that can elevate any occasion.
These delightful snacks are not just popular in the United States but have a rich history that spans across cultures. From the streets of Germany to the ballparks of America, soft pretzels have become a staple food item that many cherish. The great news is that making homemade soft pretzels is not only achievable but also a fun and rewarding experience for both novice and experienced bakers alike. This recipe will guide you through the process of crafting these twisted delights from scratch, ensuring a delicious result that will impress everyone at your table.
Understanding Soft Pretzels
Soft pretzels have a fascinating history that dates back to ancient times. The origins of pretzels can be traced to early European monks who created twisted bread dough as a way to symbolize arms crossed in prayer. They were often given as rewards to children who learned their prayers, leading to the belief that pretzels were a symbol of good fortune and prosperity. Over the centuries, pretzels evolved in various forms and flavors, solidifying their place in different cultural celebrations, particularly in Germany, where they are often enjoyed with beer and mustard.
In addition to their deep historical roots, soft pretzels hold significant cultural significance in various cuisines. In Germany, for example, they are a traditional accompaniment to beer, commonly served in beer gardens, while in the United States, pretzels have found their place as a beloved snack at sporting events and fairs. Their versatility allows for endless variations, from classic salted pretzels to gourmet versions topped with cheese or herbs.
While many people might be tempted to grab a bag of store-bought pretzels, there are numerous reasons why homemade pretzels are superior. First and foremost, the freshness of homemade pretzels is unmatched. You can control the ingredients, ensuring quality and flavor that commercial varieties often lack. Additionally, the process of making pretzels at home allows for creative freedom; you can experiment with different toppings and flavors to suit your preferences. Finally, there’s a certain pride that comes from crafting something from scratch, making every bite that much more rewarding.
Ingredients Breakdown
To embark on your homemade soft pretzel journey, it’s essential to understand the role of each ingredient in your recipe. A successful soft pretzel is all about the balance of flavors and textures, and each component contributes to the overall experience.
– All-Purpose Flour: The foundation of your pretzel, all-purpose flour provides the necessary structure and texture. It has the right protein content to create a chewy, yet tender dough. As you knead the dough, the gluten in the flour develops, contributing to the elasticity and chewiness characteristic of soft pretzels.
– Active Dry Yeast: This ingredient is crucial for fermentation and dough rising. Yeast is a living organism that ferments the sugars present in the dough, producing carbon dioxide gas that causes the dough to rise. Using active dry yeast requires an extra step of activation, but this ensures a well-risen dough with a nice airy texture.
– Warm Water: The temperature of the water is vital for activating the yeast. Using warm water (typically around 110°F) creates an ideal environment for the yeast to thrive. Warm water also helps to achieve the desired dough consistency, making it easier to mix and knead.
– Granulated Sugar: Sugar plays a dual role in this recipe. It not only enhances the overall flavor of the pretzels but also aids in the activation of the yeast. Yeast feeds on sugar, which contributes to the fermentation process, resulting in a better rise.
– Salt: Salt is essential for balancing flavors in baked goods. In addition to enhancing taste, it strengthens gluten, helping to create a sturdy dough. It’s important to use the right amount of salt to avoid overpowering the other flavors.
– Baking Soda: This ingredient comes into play during the boiling process of the pretzels. A baking soda bath gives the pretzels their distinctive dark brown color and chewy crust. The alkaline nature of baking soda also affects the pretzel’s texture, making it firmer.
– Egg Wash: An egg wash is brushed onto the pretzels before baking to create a beautiful golden-brown crust. The proteins in the egg help to caramelize the surface, giving the pretzels their appealing appearance.
– Coarse Sea Salt: The finishing touch for your pretzels, coarse sea salt adds texture and flavor. It enhances the overall experience with each bite, providing a delightful contrast to the soft, chewy interior.
– Optional Melted Butter: For those who want to elevate their pretzel experience, brushing the finished pretzels with melted butter adds richness and gloss. It enhances the flavor and gives the pretzels a more indulgent quality.
Step-by-Step Instructions
Activation of Yeast
The first step in making delicious homemade soft pretzels is activating the yeast. This process is crucial for ensuring a light and airy dough. Begin by measuring out warm water (about 1 cup) into a mixing bowl. The water should feel warm to the touch but not hot, as excessive heat can kill the yeast.
Once you have the warm water, add in a tablespoon of granulated sugar. This will feed the yeast as it activates. Next, sprinkle the active dry yeast over the surface of the warm water and let it sit for about 5-10 minutes. During this time, the yeast will begin to bubble and froth, indicating that it is activated and ready to work its magic in your dough.
Mixing the Dough
After the yeast has activated, the next step is to combine the dry ingredients with the yeast mixture. In a separate bowl, combine 4 cups of all-purpose flour and 1 teaspoon of salt. Mixing the dry ingredients beforehand ensures that the salt is evenly distributed throughout the dough.
Gradually pour the yeast mixture into the bowl of dry ingredients. Using a wooden spoon or spatula, mix the ingredients together until they begin to form a cohesive dough. This step is essential for achieving the right dough consistency. If the dough feels too sticky, you can add a little extra flour, but be careful not to add too much, as this can lead to tough pretzels.
Kneading Techniques
Once the dough has come together, it’s time to knead. Turn the dough out onto a lightly floured surface and begin to knead it by pushing it down and away from you with the heel of your hand, then folding it back over itself. Rotate the dough a quarter turn and repeat this process. Kneading helps develop the gluten, which gives the pretzels their chewy texture.
Knead the dough for about 5-7 minutes, or until it becomes smooth and elastic. You should feel a slight resistance as you knead, but the dough should not be overly sticky or dry. If necessary, sprinkle a little more flour on the work surface to prevent sticking, but again, keep the amount minimal.
Once the dough is well-kneaded, shape it into a ball and place it in a lightly greased bowl. Cover the bowl with a damp cloth or plastic wrap and allow it to rise in a warm place for about 1 hour, or until it has doubled in size. This rising period is essential for achieving the perfect pretzel texture, so don’t rush it.
This marks the beginning of your soft pretzel journey. Stay tuned for the next installment, where we will explore the fun and creative process of shaping your pretzels, boiling them, and finally, baking them to golden perfection.

Kneading the Dough: The Heart of Pretzel Making
Kneading is a pivotal step in the pretzel-making process that transforms your simple ingredients into a cohesive dough. This technique develops gluten, which provides the structure and chewiness characteristic of a soft pretzel. As you knead, aim for a smooth and elastic texture, which indicates that the gluten has been sufficiently developed.
Visual Cues for Dough Readiness
When your dough is ready, it should feel smooth to the touch and bounce back slightly when pressed. Additionally, it should not stick excessively to your hands or the countertop. A good rule of thumb is to knead for about 8-10 minutes until these visual and tactile cues are achieved. If you find the dough is too sticky, sprinkle a little flour as needed, but be cautious not to add too much, as this can lead to a dry pretzel.
The First Rise: The Importance of Fermentation
Once kneaded, your dough needs to undergo its first rise, a crucial fermentation stage that enhances flavor and texture. During this time, the yeast ferments, producing gas that causes the dough to expand.
Ideal Conditions for Dough Rising
For optimal fermentation, place your dough in a warm, draft-free environment. An ideal temperature is around 75-80°F (24-27°C). You can create a warm environment by turning on your oven for a few minutes, then turning it off and placing the dough inside covered with a clean kitchen towel. Allow the dough to rise until it has roughly doubled in size, typically taking about 1 to 1.5 hours.
Understanding Dough Doubling and Texture Changes
Monitoring the dough’s growth is essential. It should double in size, which signifies that the yeast is active. Additionally, observe the texture; when you gently press your finger into the dough, the indentation should remain, indicating proper fermentation. This step is critical as it enhances the pretzel’s flavor profile, providing a subtle tang.
Shaping Pretzels
With your dough ready, it’s time to shape your pretzels. This stage allows for creativity, and there are several techniques to mold your dough into various pretzel forms.
Techniques for Rolling Dough into Pretzel Shapes
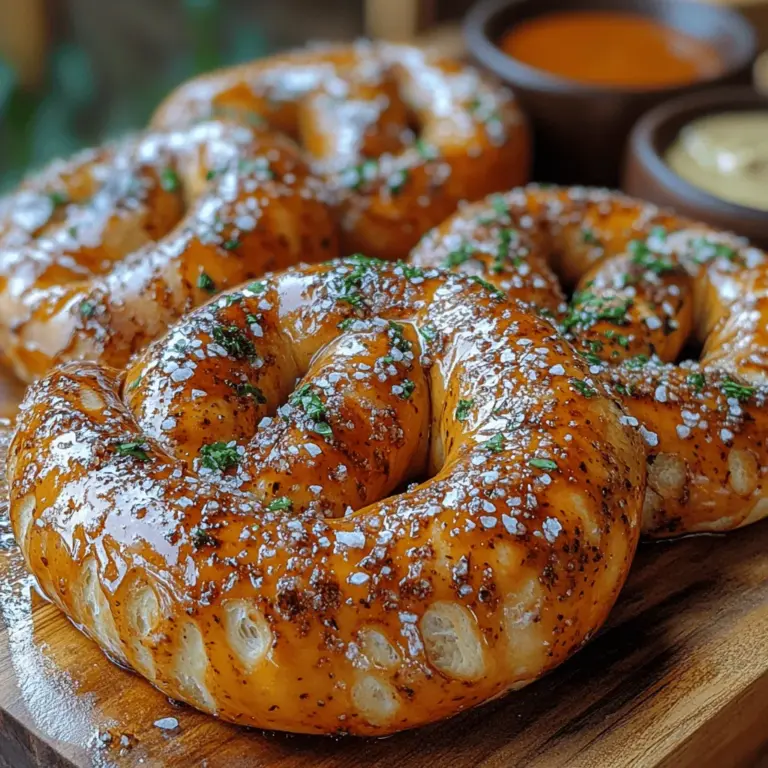
To shape your pretzels, divide the dough into equal portions, typically about 8 pieces for traditional-sized pretzels. Roll each piece into a long rope, about 24 inches in length. The thickness should be uniform, approximately ½ inch thick. To form the classic pretzel shape, create a U with the rope, twist the ends together, and then fold them back down to the bottom of the U.
Creative Variations on Traditional Pretzel Shapes
Feel free to experiment with different shapes! You can create pretzel bites by cutting the rolled dough into smaller pieces or try knots, spirals, or even letters for a fun twist. The versatility of pretzel dough allows you to cater to any occasion or personal preference.
Visual Examples of Different Pretzel Forms
For visual inspiration, consider looking at pretzel shaping tutorials online. Photographs can help clarify the shaping process and showcase the variety of forms you can create, making it easier for you to execute your vision.
The Baking Soda Bath
Before baking, your pretzels will undergo a baking soda bath, a vital step that affects their final texture and color.
Science Behind the Baking Soda Bath
The baking soda bath serves multiple purposes. It raises the pH of the surface of the pretzels, which contributes to their characteristic dark brown color and distinctive flavor once baked. This alkaline treatment also creates a chewy crust, distinguishing soft pretzels from other bread types.
How It Affects the Pretzel’s Final Texture and Color
When the pretzels are submerged in the baking soda solution, they undergo a brief cooking process. This not only enhances color development but also contributes to a chewy texture, making each bite enjoyable.
Safety Tips for Handling Boiling Water
When preparing the baking soda bath, be careful as you’ll be working with boiling water. To ensure safety, use a large pot and keep the water at a simmer rather than a rolling boil to minimize splashing. Always use long tongs or a slotted spoon to handle the pretzels when transferring them in and out of the water.
Egg Wash and Topping
An egg wash is essential for achieving that beautiful, shiny finish on your pretzels.
Why Egg Wash is Crucial for a Shiny Finish
The egg wash creates a glossy exterior that not only enhances the appearance but also helps toppings adhere to the pretzels. For a vegan alternative, you could use a mixture of water and aquafaba (chickpea brine) for a similar effect.
Alternatives to Coarse Sea Salt for Topping
While coarse sea salt is the traditional topping for pretzels, consider experimenting with other toppings for variety. Options include garlic powder, onion flakes, sesame seeds, or even a sprinkle of cinnamon sugar for a sweet twist. The choice of topping can elevate your pretzel experience, catering to different taste preferences.
Baking Pretzels to Perfection
Now it’s time to bake your pretzels to perfection.
Ideal Baking Temperature and Time for Soft Pretzels
Preheat your oven to 450°F (232°C). Line a baking sheet with parchment paper or a silicone baking mat to prevent sticking. Bake the pretzels for about 12-15 minutes until they are golden brown and fragrant.
How to Tell When Pretzels are Perfectly Baked
A perfectly baked pretzel should have a deep golden color and a slightly crispy exterior. If you tap the bottom, it should sound hollow, indicating that the inside is cooked through.
Optional Butter Brushing for Enhanced Flavor
For an added flavor boost, consider brushing the pretzels with melted butter immediately after they come out of the oven. This step adds richness and enhances the overall taste, making them even more irresistible.
Cooling and Serving Suggestions
After baking, it’s crucial to cool your pretzels properly to maintain their texture.
Best Practices for Cooling Pretzels to Maintain Texture
Allow the pretzels to cool on a wire rack for at least 5-10 minutes. This prevents moisture from building up underneath, which can make them soggy.
Creative Serving Ideas: Dipping Sauces and Pairings
Serve your homemade pretzels with an array of dipping sauces for a delightful experience. Popular options include cheese sauce, mustard, or even a sweet chocolate dip. Pair them with a refreshing beverage, like craft beer or homemade lemonade, to complement their savory flavor.
Suggestions for Storing Leftover Pretzels
If you have any pretzels left over, store them in an airtight container at room temperature for up to two days. For longer storage, consider freezing them. Place them in a freezer bag, and when you’re ready to enjoy them, simply reheat in the oven for a few minutes for that fresh-baked taste.
Conclusion
Making homemade soft pretzels is a joyful experience that brings together the art of baking and the pleasure of indulging in a delicious snack. The process, from kneading to shaping and baking, allows for creativity and experimentation with flavors and shapes.
As you embark on your pretzel-making journey, don’t hesitate to explore different toppings and shapes. Invite family and friends to join in, making it a fun and shared culinary adventure. Making pretzels isn’t just about the end product; it’s about the joy of creating something special together. Embrace the process, enjoy the delicious results, and savor the satisfaction of homemade soft pretzels.

