Introduction
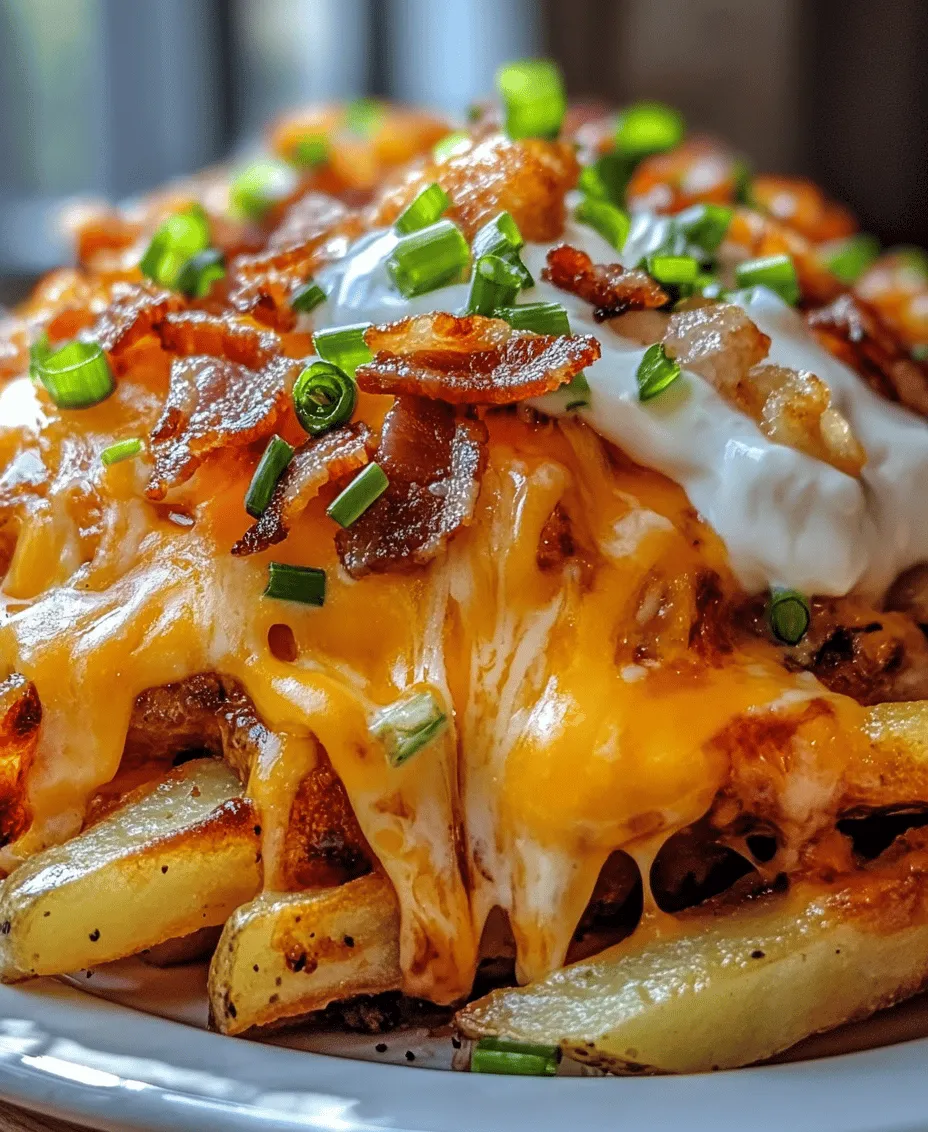
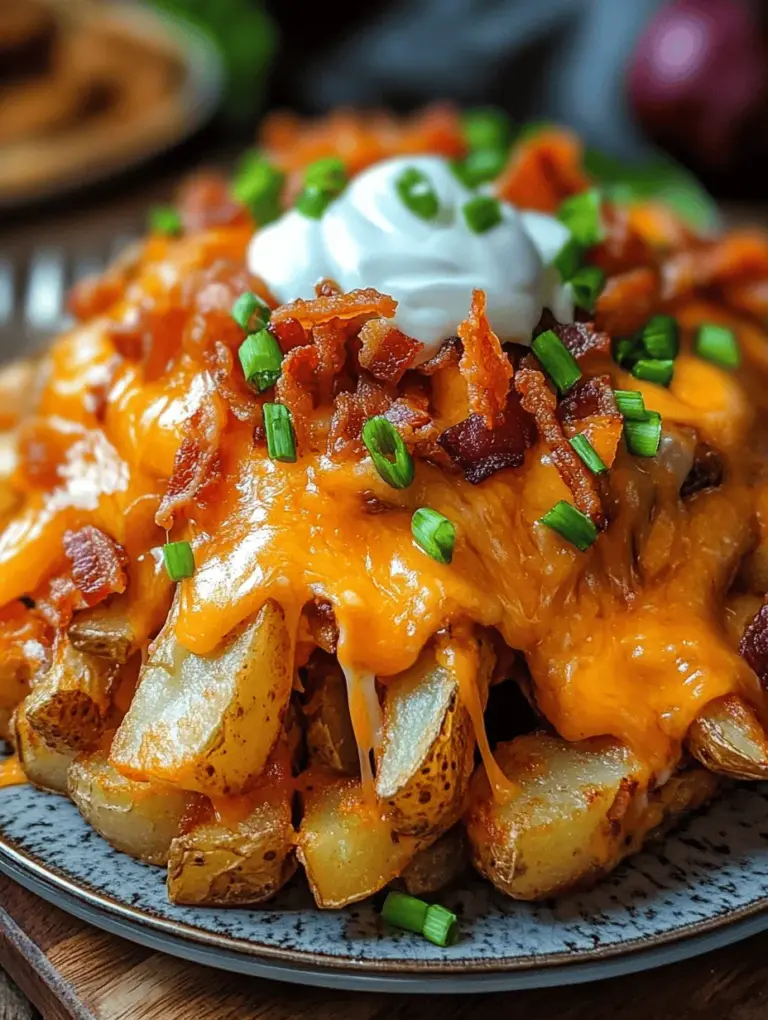
Loaded fries have taken the culinary world by storm, evolving from a simple side dish to a beloved comfort food. Their growing popularity stems from the endless variety of toppings and flavors that can be combined to create a delightful experience in every bite. Among the multitude of options, Cheesy Bacon Bliss Loaded Fries stand out for their indulgent blend of flavors that strike a perfect balance between savory and creamy, with a satisfying crunch that elevates the entire dish.
Imagine a plate of golden, crispy fries generously topped with rich, melted cheddar cheese, crispy bacon bits, and sweet caramelized onions. The combination of these ingredients creates a taste sensation that is hard to resist, making them an ideal choice for gatherings, movie nights, or casual meals. Whether you’re hosting friends for a game day or simply satisfying a late-night craving, these loaded fries are sure to impress.
Making Cheesy Bacon Bliss Loaded Fries at home is not only simple but also rewarding. With just a few quality ingredients and straightforward steps, you can whip up a dish that rivals your favorite restaurant’s offering. In this article, we’ll explore the ingredients needed, offer preparation tips for perfect fries, and provide a detailed step-by-step guide on how to create this mouthwatering dish. Let’s dive into the world of loaded fries!
Understanding the Ingredients
To truly appreciate the flavor and texture of Cheesy Bacon Bliss Loaded Fries, it’s essential to understand the role each ingredient plays in enhancing the overall dish. Here’s a closer look at the star components:
Russet Potatoes: The Ideal Base for Fries
Russet potatoes are the gold standard for making fries due to their high starch content, which results in a fluffy interior and crispy exterior when cooked. Their thick skin adds additional texture, making them perfect for holding up under the weight of toppings. When selecting russet potatoes, look for those that are firm, free from blemishes, and have a uniform shape.
Quality Cheddar Cheese: Melting and Flavor
Cheddar cheese is the crown jewel of this loaded fries recipe. It not only melts beautifully, creating a gooey and luscious topping but also adds a rich, tangy flavor that complements the other ingredients. For the best results, opt for sharp or extra-sharp cheddar cheese, as it provides a more pronounced taste. Avoid pre-shredded cheese if possible, as it often contains anti-caking agents that can affect the melting quality.
Cooked Bacon: Savory Richness
No loaded fries are complete without crispy bacon. Cooked bacon adds a salty, savory richness that elevates the dish to new heights. The key to achieving the perfect bacon is to cook it until it’s crispy yet not overly burnt, as this will enhance its flavor while contributing a satisfying crunch. Feel free to use traditional pork bacon or explore alternatives like turkey bacon for a lighter option.
Caramelized Onions: Sweetness and Depth
Caramelized onions bring a touch of sweetness and depth to the dish, balancing the richness of the cheese and bacon. The slow cooking process transforms the onions into a golden, sweet, and fragrant topping that enhances the overall flavor profile. When caramelizing, patience is key; allow the onions to cook slowly to develop their natural sugars fully.
Seasoning Mix: Flavorful Essentials
A well-seasoned fry is essential to the success of this dish. The seasoning mix, which includes garlic powder, paprika, salt, and pepper, adds depth and enhances the flavors of the potatoes. Garlic powder provides a subtle hint of garlic without overwhelming the dish, while paprika adds a mild smokiness and a vibrant color. Adjust the quantities according to your taste preferences for a personalized touch.
Finishing Touch: Sour Cream and Green Onions
To finish off your Cheesy Bacon Bliss Loaded Fries, a dollop of sour cream adds creaminess and a refreshing tang. It complements the richness of the cheese and bacon perfectly. Chopped green onions bring a burst of color and a mild onion flavor, adding freshness and making the dish visually appealing.
Preparation Tips for Perfect Loaded Fries
Achieving perfectly loaded fries requires some preparation and attention to detail. Here are some valuable insights to ensure your fries turn out crispy and delicious:
Selecting the Right Type of Russet Potatoes
When it comes to making loaded fries, not all potatoes are created equal. Russet potatoes are preferred for their starchy content, but ensure you choose ones that are fresh and free from blemishes. Look for potatoes that are firm to the touch and have a smooth skin. The size of the potatoes doesn’t matter much, as you will be cutting them into fries, but uniformity in size will help them cook evenly.
Importance of Drying Potatoes Before Seasoning
After washing and peeling your russet potatoes, it’s crucial to dry them thoroughly before seasoning. Excess moisture can prevent the fries from crisping up in the oven. Use a clean kitchen towel or paper towels to pat the potatoes dry, ensuring they are moisture-free. This step is essential for achieving that coveted crispy texture.
Tips for Cutting Fries Uniformly
Uniformity in size is vital for even cooking. Aim for fries that are about 1/4 to 1/2 inch thick. Use a sharp knife and a steady hand to cut the potatoes into even strips. If you prefer a more rustic look, you can leave the skin on for added texture and flavor. Alternatively, you can use a mandoline slicer for precision and consistency.
Recommended Olive Oil Brands for Flavor and Health
Olive oil not only helps the fries crisp up but also adds flavor. Choose a high-quality extra virgin olive oil for the best results. Some recommended brands include California Olive Ranch, Colavita, and Pompeian. Drizzling the fries with olive oil before baking gives them a rich flavor and helps to achieve a golden-brown color.
Step-by-Step Guide to Making Cheesy Bacon Bliss Loaded Fries
Now that you understand the ingredients and preparation tips, it’s time to dive into the step-by-step process of making Cheesy Bacon Bliss Loaded Fries. Follow these detailed instructions to create a delicious batch that will have everyone coming back for more.
Preparing the Potatoes
1. Wash and Peel: Start by washing the russet potatoes thoroughly to remove any dirt. Using a vegetable peeler, peel the potatoes to your desired thickness. If you prefer skin-on fries, simply wash them well and leave the skin intact.
2. Cutting the Fries: Once peeled, slice the potatoes into even strips, aiming for a thickness of about 1/4 to 1/2 inch. For crinkle-cut fries, use a crinkle cutter to add texture. Take your time with this step to ensure uniformity, as it leads to even cooking.
3. Soaking (Optional): For extra crispy fries, consider soaking the cut potatoes in cold water for at least 30 minutes. This step removes excess starch and helps achieve a better texture.
4. Drying: After soaking, drain the fries and pat them dry with a clean kitchen towel or paper towels. Ensure they are dry to the touch to avoid sogginess during baking.
Preheating the Oven
Preheating the oven is an essential step in achieving crispy fries. Set your oven to 425°F (220°C) and allow it to preheat fully while you prepare the other ingredients. A hot oven ensures that the fries begin to crisp up immediately upon entering, enhancing their texture.
Seasoning the Fries
1. Coating with Olive Oil: In a large mixing bowl, add the dried potato fries and drizzle them with olive oil—about 2-3 tablespoons should suffice. Toss the fries in the oil until they are evenly coated. The oil will help them achieve that golden-brown color and crispy texture.
2. Adding Seasonings: Sprinkle the garlic powder, paprika, salt, and pepper over the oiled fries. Use about 1 teaspoon of garlic powder, 1 teaspoon of paprika, and salt and pepper to taste. Toss the fries again to ensure that the seasoning is distributed evenly.
3. Optional Flavor Variations: For those looking to customize their loaded fries, consider adding alternative seasonings such as cayenne pepper for heat, Italian seasoning for an herbaceous twist, or even a sprinkle of Parmesan cheese for an extra layer of flavor.
Baking the Fries
1. Arranging on a Baking Sheet: Line a baking sheet with parchment paper for easy cleanup. Spread the seasoned fries in a single layer, ensuring they are not overcrowded. Overcrowding can lead to steaming instead of baking, resulting in soggy fries.
2. Baking Time: Place the baking sheet in the preheated oven and bake for about 25-30 minutes, flipping the fries halfway through to ensure even cooking. Keep an eye on them, as cooking times may vary based on the thickness of the fries and your oven.
3. Checking for Doneness: The fries are done when they are golden brown and crispy on the outside. If you prefer them extra crispy, feel free to leave them in the oven for an additional 5-10 minutes, but be cautious not to burn them.
With the fries prepared and baked to perfection, you’re just a few steps away from assembling your Cheesy Bacon Bliss Loaded Fries. In the next section, we’ll delve into the final steps of adding toppings and creating a dish that’s sure to be a crowd-pleaser. Stay tuned for the delicious finish!

Baking the Fries
To achieve the perfect texture for your Cheesy Bacon Bliss Loaded Fries, baking them properly is essential. Begin by preheating your oven to 425°F (220°C). Spread your prepared fries in a single layer on a baking sheet lined with parchment paper. This step is crucial because overcrowding the pan can lead to steaming instead of crisping.
Tips for Achieving Crispy Fries: Spacing and Flipping
One of the most important factors for crispy fries is proper spacing. Ensure that each fry has room to breathe. This allows hot air to circulate around each piece, creating that desired crunch. After about 15 minutes in the oven, take the baking sheet out and give the fries a gentle flip using a spatula. This not only promotes even cooking but also allows both sides to brown beautifully. Return the fries to the oven for an additional 15-20 minutes, checking for that perfect golden-brown color.
Signs That Fries Are Perfectly Cooked
Perfectly cooked fries should be golden brown and crispy on the outside, with a tender interior. You can test them by piercing one with a fork; if it goes through easily without being mushy, you’re on the right track. Additionally, the fries should sound crisp when you tap them lightly.
Cooking the Onions
While your fries are baking, turn your attention to the onions, as they will add a sweet, savory component to your loaded fries. Start by slicing two medium onions thinly for even cooking. Heat 2 tablespoons of butter or olive oil in a skillet over medium heat. Once the oil is shimmering, add the sliced onions.
Techniques for Caramelizing Onions: Timing and Heat Control
Caramelizing onions requires patience. Keep the heat at medium to low; if it’s too high, the onions will burn rather than caramelize. Stir the onions occasionally, allowing them to cook evenly. This process typically takes about 20-30 minutes. You’re looking for a deep golden brown color and a sweet aroma that fills your kitchen.
Flavor Enhancements During Onion Sautéing
To elevate the flavor of your onions, consider adding a pinch of salt as they cook. This helps draw out moisture and encourages the onions to soften. For an extra layer of depth, you can sprinkle in a teaspoon of balsamic vinegar or a tablespoon of brown sugar during the last few minutes of cooking. This will enhance the sweetness of the onions, making them a delightful topping for your fries.
Assembling the Loaded Fries
Once your fries are out of the oven and your onions are beautifully caramelized, it’s time to assemble your Cheesy Bacon Bliss Loaded Fries. Start by layering the crispy fries on a serving platter.
Layering Techniques for Optimal Flavor Distribution
To ensure every bite is packed with flavor, begin by sprinkling half of the cheese on the fries. Follow this by evenly distributing the bacon bits and caramelized onions. Then, top with the remaining cheese. This layering technique ensures that each fry is covered in cheesy goodness, while the bacon and onions add savory notes throughout.
Timing for Returning the Fries to the Oven
After you’ve assembled your loaded fries, return the dish to the oven for an additional 5-10 minutes, just long enough for the cheese to melt beautifully. Keep an eye on them; you want the cheese to be bubbly and slightly golden, but not burnt.
Serving Suggestions
Presentation is key when serving your Cheesy Bacon Bliss Loaded Fries. Transfer the loaded fries to a large platter for sharing, or serve them in individual portions for a more personalized touch. Consider garnishing with freshly chopped chives or parsley for a pop of color.
Presentation Ideas for an Appealing Dish
For a truly eye-catching display, you can serve the fries in a rustic wooden bowl or on a slate platter. A drizzle of sour cream or a dollop of guacamole on the side can provide a refreshing contrast to the rich flavors of the fries.
Importance of Serving Fresh Garnishes
Fresh garnishes not only add visual appeal but also enhance the overall flavor profile of the dish. A sprinkle of freshly chopped herbs or a squeeze of lime can brighten the richness of the cheese and bacon, elevating your dish to new heights.
Nutritional Information
Understanding the nutritional aspects of your loaded fries can help you enjoy them even more, especially if you are mindful of dietary needs.
– Calories per Serving: A serving of Cheesy Bacon Bliss Loaded Fries contains approximately 500-600 calories, depending on the portion size and specific ingredients used, such as the type of cheese and the amount of bacon.
– Breakdown of Proteins, Fats, and Carbohydrates: Each serving typically contains around 15-20 grams of protein (from cheese and bacon), 30-35 grams of fat (largely from cheese and cooking oil), and 45-50 grams of carbohydrates (primarily from fries).
– Considerations for Dietary Restrictions or Modifications: For those looking to make this dish lighter, consider using sweet potato fries or air-fried potatoes. Opt for reduced-fat cheese or turkey bacon to cut down on calories and saturated fats while still enjoying the flavors you love.
Why Cheesy Bacon Bliss Loaded Fries are Perfect for Any Occasion
Cheesy Bacon Bliss Loaded Fries are incredibly versatile, making them suitable for various events and gatherings.
– Ideal for Game Day Gatherings: These loaded fries are a perfect finger food for football and other sporting events. They can easily be made in large batches, ensuring everyone has plenty to enjoy.
– Perfect for Family Movie Nights: Set up a cozy movie night at home and serve these loaded fries as a fun snack. Pair them with your favorite dipping sauces for an interactive dining experience.
– A Satisfying Dish for Casual Celebrations: Whether it’s a birthday party or a casual get-together, loaded fries can be a crowd-pleaser. Their indulgent flavors and warm, comforting nature make them a hit.
– Options for Personalizing for Different Tastes or Dietary Needs: Customize your loaded fries by incorporating different toppings, such as jalapeños for spice, or substituting vegetarian bacon for a meatless option. The possibilities are endless, allowing you to cater to various palates.
Conclusion
Making Cheesy Bacon Bliss Loaded Fries at home is not only a delightful culinary adventure, but it also allows you to customize a truly comforting dish. Whether you’re sharing them with friends during the big game or enjoying them during a cozy family movie night, these loaded fries are sure to satisfy. The joy of cooking and sharing this dish enhances the experience, bringing people together over delicious flavors. So gather your ingredients, unleash your creativity in the kitchen, and indulge in the blissful combination of cheese, bacon, and crispy fries. Every bite is a celebration of comfort food at its finest, perfect for any occasion. Enjoy the process and the delicious results that follow!

