Introduction
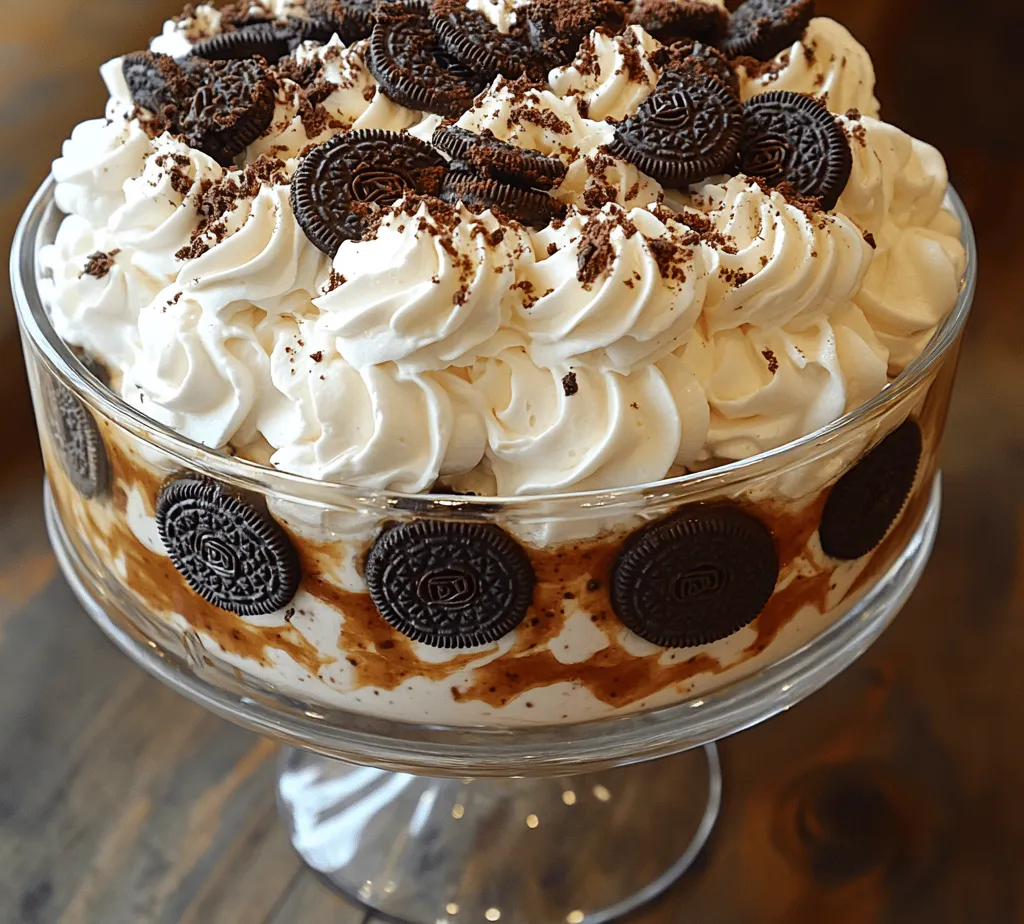
In the realm of desserts, few creations can rival the charm and ease of no-bake options, especially when it comes to the beloved Oreo Delight Icebox Cake. This decadent dessert combines the rich, familiar flavors of Oreo cookies with the luscious creaminess of whipped cream, resulting in a treat that is as delightful to make as it is to eat. Whether you’re hosting a summer barbecue, celebrating a birthday, or simply indulging in a sweet craving, this icebox cake is sure to impress.
What makes the Oreo Delight Icebox Cake particularly appealing is its simplicity. With minimal preparation and no need for baking, it’s a recipe that invites both novice and seasoned bakers to get creative in the kitchen. The creamy layers interspersed with crunchy Oreo cookies create a satisfying texture that melts in your mouth, evoking nostalgic memories of childhood treats. As you embark on this culinary journey, prepare to be captivated by the ease and flavor of this crowd-pleasing dessert.
Understanding Icebox Cakes
The concept of icebox cakes has its roots in American culinary history, dating back to the early 20th century. Originally, these cakes were created as a convenient solution for home cooks who lacked modern refrigeration technologies. The term “icebox” refers to the early refrigerators that kept food cool, and these cakes were designed to be assembled and chilled until set, making them a popular choice for warm-weather gatherings.
At their core, icebox cakes are built on the principle of layering cookies and cream. The moisture from the cream soaks into the cookies, softening them and creating a dessert that is both rich and fluffy. This unique texture is what sets icebox cakes apart from traditional baked cakes, offering a delightful contrast between the creamy filling and the softened cookies. As the years have gone by, icebox cakes have evolved, with a myriad of flavor combinations and variations emerging, but the classic cookie-and-cream concept remains a cherished favorite.
The Oreo Delight Icebox Cake is a perfect representation of this dessert style, showcasing the iconic flavor of Oreos while embracing the ease of no-bake preparation. Its ability to satisfy cravings without the need for baking makes it an ideal choice for any occasion, allowing you to focus more on enjoying the moment with family and friends.
Ingredients Breakdown
To create a delectable Oreo Delight Icebox Cake, you’ll need to gather a few key ingredients. Each component plays a vital role in achieving the perfect balance of flavor and texture, ensuring that every bite is a delightful experience.
Oreo Cookies
At the heart of this recipe are the iconic Oreo cookies. Known for their chocolatey exterior and creamy filling, Oreos bring a unique flavor profile that pairs beautifully with whipped cream. While classic Oreos are the traditional choice, this dessert offers an opportunity to explore various Oreo flavors, such as Double Stuf, Peanut Butter Creme, or even seasonal varieties like Pumpkin Spice. Each type of Oreo can introduce a new twist, allowing you to customize the cake to suit your preferences.
Heavy Whipping Cream
The foundation of the creamy filling in this icebox cake is heavy whipping cream. Using heavy cream is essential for achieving a thick, stable whip that holds its shape well. When whipped, heavy cream transforms into clouds of fluffy goodness, providing a luxurious texture that complements the Oreos perfectly. It’s important to chill your mixing bowl and beaters before whipping the cream to ensure optimal volume and stability.
Powdered Sugar
To sweeten the whipped cream without adding any graininess, powdered sugar is the go-to choice. Unlike granulated sugar, powdered sugar dissolves easily, resulting in a smooth and silky cream. Additionally, the cornstarch present in powdered sugar helps stabilize the whipped cream, ensuring that your filling maintains its texture when layered with the cookies.
Vanilla Extract
Vanilla extract is a staple in many dessert recipes, and for good reason. In the Oreo Delight Icebox Cake, it serves to enhance the overall flavor profile, complementing the chocolatey notes of the Oreos and adding depth to the cream. A splash of pure vanilla extract elevates the whipped cream, making it even more delicious.
Milk
Milk plays a crucial role in the assembly of the cake. It is used to soak the Oreo cookies, allowing them to soften and absorb moisture. This soaking process is what transforms the crunchy cookies into melt-in-your-mouth layers of goodness. Using whole milk will yield the best results, as it provides the right balance of creaminess without being overly rich.
Optional Garnishes
While the Oreo Delight Icebox Cake is stunning on its own, a few optional garnishes can take it to the next level. Consider topping the cake with crushed Oreo cookies for added texture, drizzling a chocolate sauce for a rich finish, or garnishing with fresh berries for a pop of color. Whipped cream dollops or chocolate shavings can also add an elegant touch, making your dessert visually appealing and inviting.
Step-by-Step Instructions
Now that you’ve gathered all your ingredients, it’s time to dive into the step-by-step process of creating your Oreo Delight Icebox Cake. This simple yet rewarding recipe will have you layering and chilling your way to dessert perfection.
1. Prepare Your Tools: Before you begin, gather your mixing bowls, a hand mixer or stand mixer for whipping the cream, and a 9×13 inch baking dish for assembling your cake. Having everything ready will streamline the process and make it more enjoyable.
2. Whip the Cream: Start by pouring the heavy whipping cream into a large mixing bowl. Add the powdered sugar and vanilla extract. Using your mixer, whip the cream on medium speed until soft peaks form. Be careful not to overwhip, as this can lead to a grainy texture or even butter. The cream should be fluffy and hold its shape when the beaters are lifted.
3. Soak the Oreos: In a shallow bowl, pour in the milk. Take each Oreo cookie and briefly dip it into the milk, ensuring it is soaked but not overly soggy. The goal is to soften the cookie just enough to achieve that melt-in-your-mouth quality without losing its structure.
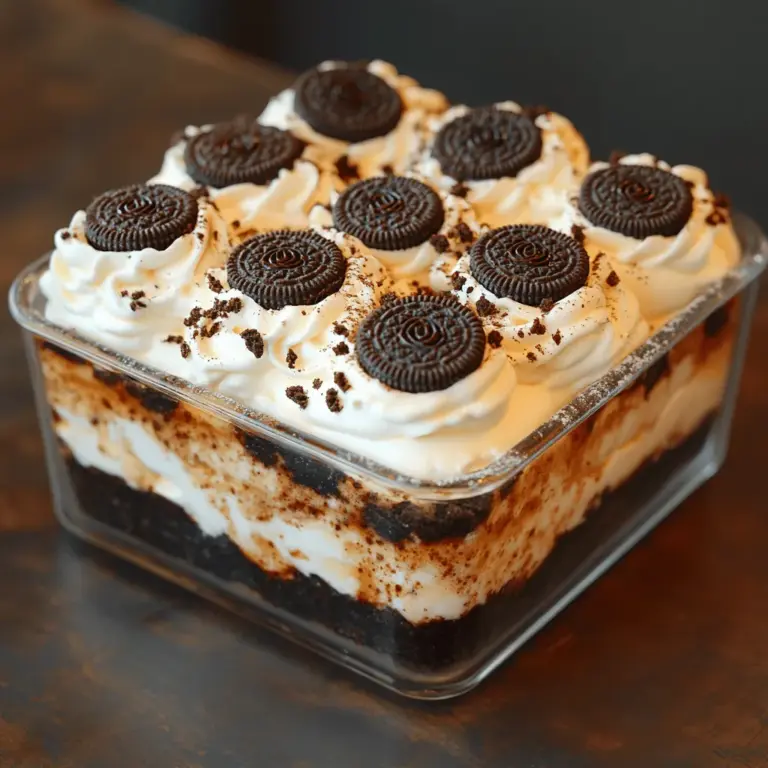
4. Layer the Ingredients: Begin assembling your cake by placing a layer of soaked Oreos at the bottom of the baking dish. Spread a layer of the whipped cream mixture over the cookies, smoothing it out with a spatula. Repeat this process, alternating between layers of soaked Oreos and whipped cream, until you reach the top of the dish, ending with a layer of whipped cream.
5. Chill the Cake: Once assembled, cover the baking dish with plastic wrap or a lid and place it in the refrigerator. Allow the cake to chill for at least 4 hours, but overnight is even better. This chilling period allows the flavors to meld, and the cookies to soften perfectly.
6. Garnish and Serve: Before serving, consider adding your chosen garnishes to the top of the cake for a finishing touch. Slice into squares, and watch as your guests delight in the creamy layers and familiar flavors of the Oreo Delight Icebox Cake.
As you delve into the delightful process of creating this no-bake dessert, you’ll likely find that the Oreo Delight Icebox Cake becomes a staple in your dessert repertoire. Its simplicity, paired with the nostalgic taste of Oreos, makes for a dessert that’s not only enjoyable to prepare but also to share with loved ones during special occasions or casual gatherings. Get ready to impress your friends and family with this classic dessert that never goes out of style!

Preparing the Cream Mixture
To create the luscious cream that holds the Oreo Delight Icebox Cake together, begin by whipping the cream. For this recipe, you’ll want to use heavy whipping cream, which contains a higher fat content, resulting in a rich and stable texture. Start by chilling your mixing bowl and beaters in the refrigerator for about 10-15 minutes before beginning. Cold tools help the cream whip faster and reach stiff peaks more easily.
1. Whipping the Cream: Pour the cold heavy cream into the chilled mixing bowl. Using an electric mixer, start on low speed to prevent splattering, then gradually increase to medium-high speed. As the cream begins to thicken, keep a close watch. You’ll transition through the stages of soft peaks—when the cream holds its shape but gently falls over when the beaters are lifted—to stiff peaks, where the cream stands firmly upright. This typically takes 3-5 minutes.
2. Avoid Over-Whipping: One of the most common pitfalls when whipping cream is over-whipping, which can turn the cream into butter. To avoid this, stop the mixer once you achieve stiff peaks and check the consistency frequently in the last minute of whipping. If you notice any graininess or separation, you’ve gone too far. If this happens, you can usually salvage it by gently folding in a little unwhipped cream until it smooths out.
3. Adding Flavor: For the cream mixture, you can enhance the flavor by adding powdered sugar and vanilla extract. The powdered sugar not only sweetens the cream but also stabilizes it, preventing the mixture from separating. A teaspoon of vanilla extract will give the cream a delightful flavor that complements the Oreos. Mix these in just until combined to keep the peaks intact.
Soaking the Oreos
The soaking process is vital to achieving the perfect texture in your Oreo Delight Icebox Cake. Oreos are crunchy by nature, so they need a little help to soften without becoming overly mushy.
1. Soaking Technique: Pour milk into a shallow bowl—about a cup should suffice. The milk should be at room temperature to allow the cookies to absorb the liquid more evenly. Dip each Oreo into the milk for just a few seconds on each side. Avoid letting them soak too long, as this can lead to a soggy mess.
2. Timing is Key: A quick two seconds on each side is generally sufficient. You want the Oreos to be soft enough to blend with the cream but still retain some structure. A good rule of thumb is to practice touching the cookie after soaking; it should feel slightly moist but not falling apart.
Layering Technique
Layering is where your Oreo Delight Icebox Cake starts to come together beautifully. Following a systematic approach will ensure that each slice reveals those gorgeous layers.
1. Start with the Base: Begin by spreading a thin layer of the whipped cream mixture at the bottom of your serving dish—this prevents the Oreos from sticking to the bottom.
2. First Layer of Oreos: Arrange the soaked Oreos in a single layer over the cream. You can lay them out in a grid pattern, ensuring they are closely packed but not overlapping excessively.
3. Building Layers: Repeat the process by adding another layer of the whipped cream mixture over the Oreos. Use an offset spatula to smooth the cream evenly across the cookies. Continue alternating layers of soaked Oreos and whipped cream until you reach the top of your dish, finishing with a layer of the cream.
4. Visual Cues for Success: Make sure each layer is even and smooth for an aesthetically pleasing final product. You can use a spatula to create swirls on top for added visual appeal. If desired, crush a few Oreo cookies and sprinkle them on the top layer for garnish.
Chilling Process
Once assembled, chilling the cake is crucial in developing its flavor and texture.
1. Why Chilling Matters: The chilling process allows the flavors to meld together, making each bite a harmonious blend of creamy and crunchy. The chilling time also helps the cream set, making it easier to slice when served.
2. Chill Time: Cover your dish with plastic wrap or a lid and refrigerate for at least 4 hours, though overnight is ideal. This extended time allows the Oreos to absorb the cream properly, achieving that delightful softness while maintaining their iconic taste.
Presentation and Serving Suggestions
Presentation can elevate the experience of enjoying the Oreo Delight Icebox Cake. Here are some ideas to serve this delectable dessert:
1. Serving Sizes: Depending on your dish size, cut the cake into generous squares that allow each slice to showcase the beautiful layers. A sharp, warm knife will help you achieve clean cuts.
2. Creative Serving Ideas: Serve the cake on decorative dessert plates. Consider adding a dollop of whipped cream or a sprinkle of crushed Oreos on top of each slice for an elegant touch. You might also want to incorporate fresh mint leaves or berries for a pop of color and freshness.
3. Pairing Suggestions: To complement the rich flavors of the cake, consider serving it with a scoop of vanilla ice cream or a drizzle of chocolate sauce. Beverages like cold brew coffee, milkshakes, or a sweet dessert wine can also enhance the overall experience.
Nutritional Information
For those mindful of their dietary intake, here’s a breakdown of the nutritional content per serving of the Oreo Delight Icebox Cake:
– Calories: Approximately 300-350 calories
– Total Fat: 20 grams (Saturated Fat: 10 grams)
– Carbohydrates: 30 grams (Sugars: 15 grams)
– Protein: 3 grams
Dietary Modifications
If you’re looking to make healthier choices, there are several substitutions you can consider:
– Low-Fat Options: Use low-fat cream cheese or whipped topping instead of heavy cream to reduce fat content.
– Sugar Substitutes: Consider using sugar substitutes or natural alternatives like agave syrup or honey to lower sugar levels.
– Gluten-Free Oreos: For those with gluten sensitivities, gluten-free Oreos are widely available and can easily be substituted in this recipe without compromising on taste.
Conclusion
The Oreo Delight Icebox Cake is a delightful treat that embodies the essence of comfort food and nostalgia. Its simple preparation, combined with the rich flavors of cream and chocolate, makes it a perfect dessert for gatherings, celebrations, or a sweet indulgence at home. The versatility of this recipe allows you to explore your creativity in the kitchen, whether by experimenting with different flavors of cream or incorporating seasonal ingredients.
Encouraging readers to engage with this recipe is vital—try it at home, make it your own, and share it with loved ones. This icebox cake is not just a dessert; it’s an experience, one that brings joy and satisfaction with each bite. Savor the flavors and enjoy the process of creating something delicious!

