Introduction
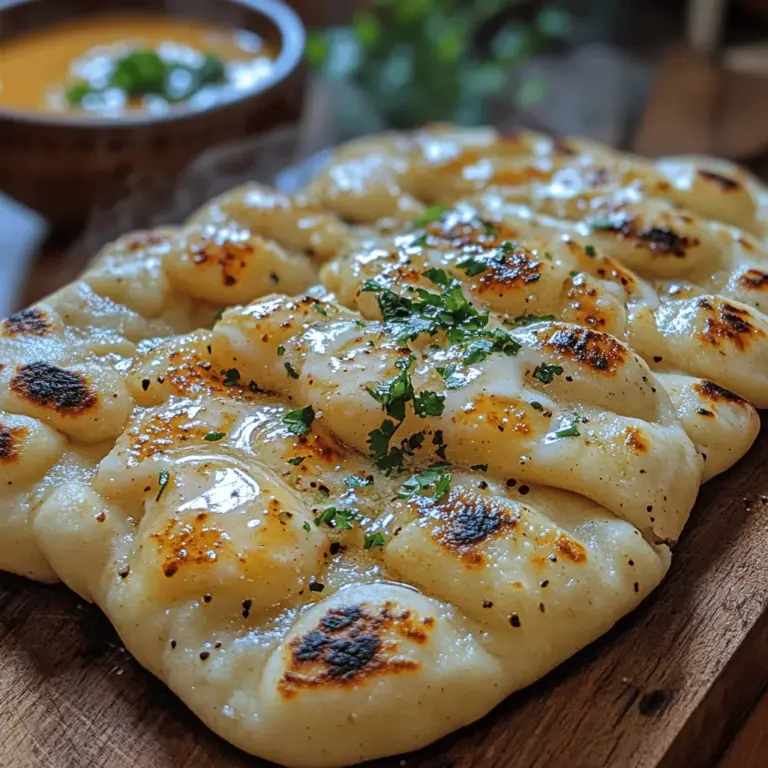
Naan bread, a staple of Indian cuisine, is beloved for its soft and pillowy texture, making it an ideal accompaniment to a variety of dishes, from rich curries to flavorful grilled meats. Among the many varieties of naan, garlic naan stands out as a fan favorite due to its aromatic infusion of garlic, which elevates the flavor profile and adds a delightful twist to this traditional bread. Whether served at a bustling Indian restaurant or made at home, garlic naan has a special place in the hearts of food lovers around the world.
Making naan at home not only allows you to enjoy this delicious bread fresh out of the oven, but it also offers the chance to customize flavors and ingredients according to your preferences. Homemade garlic naan can be tailored to suit dietary needs, ensuring that you have complete control over the quality of ingredients. Unlike store-bought options, which may contain preservatives and artificial flavors, homemade naan is made with love and fresh ingredients, resulting in a product that is not only tastier but also healthier.
In this guide, we will walk you through the process of making homemade garlic naan, from understanding the origins of this delightful bread to crafting a perfect dough that puffs up beautifully when cooked.
Understanding Naan Bread
Definition and Origin of Naan
Naan is a type of leavened flatbread that is traditionally baked in a tandoor, a cylindrical clay oven that reaches high temperatures, imparting a unique char and flavor to the bread. Originating in the Indian subcontinent, naan has a rich history that dates back centuries. Its name is derived from the Persian word “nān,” which means “bread.” Over time, naan has transcended cultural boundaries, becoming a beloved bread not only in India but also in several Middle Eastern and Central Asian countries.
Different Types of Naan and Their Variations
While garlic naan is a popular variant, there are numerous types of naan, each offering a different taste experience. Some common variations include:
– Plain Naan: The simplest form, often brushed with ghee or butter.
– Butter Naan: Rich and indulgent, this naan is slathered with melted butter for a decadent flavor.
– Cheese Naan: Stuffed with gooey cheese, this variation is a hit among cheese lovers.
– Stuffed Naan: Filled with ingredients like potatoes, paneer, or minced meat, these naans offer a heartier option.
– Peshawari Naan: A sweet version filled with nuts and dried fruits, perfect for those who enjoy a touch of sweetness in their bread.
Each type of naan serves a unique purpose and pairs well with different dishes, showcasing the versatility of this beloved bread.
The Cultural Significance of Naan in Indian and Middle Eastern Cuisines
Naan is more than just a side dish; it plays a significant role in culinary traditions. In Indian households, naan is often enjoyed with a variety of curries, lentils, and vegetables, serving as a vehicle to scoop up flavorful sauces. In Middle Eastern cultures, naan is frequently used to accompany grilled meats and dips, such as hummus or baba ghanoush. Its universal appeal and adaptability have made naan a cherished bread across various cuisines, symbolizing hospitality and togetherness.
Ingredients for Homemade Garlic Naan
Creating the perfect garlic naan starts with using the right ingredients. Here’s a detailed list of what you will need:
– All-Purpose Flour: The backbone of the naan, all-purpose flour provides the necessary structure and texture. Its high gluten content helps achieve the soft and chewy qualities characteristic of naan.
– Active Dry Yeast: This ingredient is essential for leavening the dough, allowing it to rise and develop a light texture. Be sure to check the expiration date to ensure its effectiveness.
– Sugar: A small amount of sugar not only enhances the flavor of the naan but also helps activate the yeast, promoting a successful rise.
– Salt: As a crucial flavor enhancer, salt balances the sweetness of the dough and contributes to the overall taste.
– Warm Water: The temperature of the water is vital for yeast activation; it should be warm to the touch but not hot, ideally around 110°F (43°C).
– Yogurt: Adding yogurt to the dough increases moisture and tenderness, resulting in a richer texture.
– Olive Oil: This ingredient contributes to the richness of the naan and helps keep it soft.
– Garlic: The star flavor component of garlic naan, fresh minced garlic infuses the bread with its aromatic essence.
– Fresh Cilantro (optional): Chopped cilantro can enhance both the flavor and presentation of the naan, adding a fresh herbaceous note.
– Melted Butter: Used for brushing the naan after cooking, melted butter adds richness and enhances the flavor profile.
Activating the Yeast
Before you can create delicious naan, it’s essential to activate the yeast. This process kick-starts fermentation, allowing the dough to rise. Here’s how to do it effectively:
1. Check the Freshness: Ensure your active dry yeast is fresh. Expired yeast will not rise properly, leading to dense naan.
2. Mix with Warm Water: In a small bowl, combine the yeast with warm water and a teaspoon of sugar. Let it sit for about 5-10 minutes until it becomes frothy. This indicates that the yeast is alive and well.
3. Temperature Matters: It’s crucial to use warm water, as temperatures too high can kill the yeast, while water that is too cold will not activate it effectively.
4. Patience is Key: Allowing the yeast to bloom properly ensures a successful rise. If your mixture doesn’t foam, it may be best to start over with new yeast.
Creating the Dough
Once your yeast is activated, it’s time to create the dough. Follow these steps to ensure a well-mixed and cohesive dough:
1. Mix the Dry Ingredients: In a large mixing bowl, combine the all-purpose flour, salt, and activated yeast mixture.
2. Create a Well: Make a well in the center of the flour mixture. This will help incorporate the wet ingredients more easily.
3. Add Wet Ingredients: Pour in the yogurt, olive oil, and any additional water needed to bring the dough together. Start with a small amount of water and gradually add more as needed.
4. Combine: Using a wooden spoon or your hands, begin to mix the flour into the wet ingredients. Continue until a shaggy dough forms.
Kneading the Dough
Kneading is a crucial step in developing gluten and achieving the perfect texture for your naan. Here’s how to knead effectively:
1. Flour Your Surface: Lightly flour your work surface to prevent sticking.
2. Knead by Hand: Turn the dough out onto the floured surface and begin kneading it with the heel of your hand. Fold the dough over itself, then push it down and away. Rotate it a quarter turn and repeat this process.
3. Knead Until Smooth: Continue kneading for about 8-10 minutes, or until the dough is smooth and elastic. If the dough is too sticky, add a little more flour as needed.
4. Rest the Dough: Once kneaded, shape the dough into a ball and place it in a lightly greased bowl. Cover it with a clean kitchen towel or plastic wrap, and let it rest in a warm place for about 1-2 hours or until it doubles in size.
By following these steps, you will create a flavorful and elastic dough that is perfect for making homemade garlic naan. Stay tuned for the next part, where we will cover shaping and cooking your naan to perfection.

Signs That the Dough is Ready
When making homemade garlic naan, knowing when your dough is ready can significantly enhance the overall texture and flavor of your final product. The first indication that your dough is ready is its elasticity. If you gently poke it with your finger, the dough should spring back slightly, indicating that the gluten has developed sufficiently.
Another sign to look for is the smoothness of the dough surface. A well-kneaded dough should feel soft and pliable, without any stickiness. If it sticks to your fingers, it may need a bit more kneading or a sprinkle of flour.
First Rise: Letting the Dough Prove
The first rise is a crucial step in making garlic naan. This process allows the yeast to ferment, creating air pockets that result in a light and fluffy texture. During the first rise, the dough also develops its flavor, contributing to the overall taste of the naan.
Ideal Conditions for Dough Rising
For optimal rising conditions, place the dough in a warm, draft-free area. A temperature between 75°F to 85°F (24°C to 29°C) is ideal. If your kitchen is cool, you can create a warm environment by turning on the oven to the lowest setting for a few minutes, then turning it off and placing the dough inside, covered with a damp cloth.
How to Know When the Dough Has Doubled in Size
The key to knowing when your dough has risen sufficiently is to observe its size. After about one to two hours, the dough should roughly double in size. An easy test to gauge this is to gently press your finger into the dough. If the indentation remains and does not spring back, your dough is ready for the next step.
Preparing the Garlic Mixture
The garlic mixture is what elevates your naan from simple bread to a flavorful accompaniment. To prepare this mixture, finely mince fresh garlic—about four to five cloves will do for a robust flavor.
Importance of Flavoring the Naan
Balancing the garlic and butter is crucial for achieving the desired taste. Melt unsalted butter and mix it with the minced garlic, allowing the flavors to infuse. If you want to enhance the flavor further, consider adding a pinch of salt, a sprinkle of dried herbs like parsley or oregano, or a dash of chili flakes for a hint of heat.
Shaping the Naan
Once your dough has completed the first rise, it’s time to shape the naan. Start by punching down the dough to release the air. Divide the dough into equal portions, typically around 6 to 8 pieces, depending on the desired size of your naan.
Techniques for Dividing and Shaping the Dough
To shape the naan, first, roll each piece into a ball. Let these balls rest for about 10 minutes under a damp cloth; this resting period helps relax the gluten, making it easier to roll out.
Tips on Achieving the Classic Naan Shape
To achieve the classic teardrop shape of naan, flatten the dough ball slightly with your fingertips before using a rolling pin. Roll it out into a flat, oval shape, ensuring that it is about ¼ inch thick. Avoid rolling it too thin, as this can lead to a crispy texture instead of the desired soft and chewy naan.
Rolling Out the Naan
Rolling the dough evenly is key to ensuring uniform cooking. Use gentle, even pressure and rotate the dough occasionally to maintain the shape. If your dough sticks to the surface, sprinkle a little flour as needed.
Importance of Thickness for Cooking and Texture
A thickness of about ¼ inch is ideal; this allows the naan to puff up while cooking, creating those delightful pockets of air. If you prefer a thicker naan, simply adjust your rolling technique accordingly.
Suggestions for Achieving the Desired Shape
If you want to create a more artisanal look, consider using your hands instead of a rolling pin. Gently stretch the dough outwards, turning it as you go to maintain an even thickness.
Cooking Techniques for Naan
There are several methods to cook naan, each offering different textures and flavors. The two most popular methods are using a skillet and a tandoor oven.
Overview of Different Cooking Methods (Skillet vs. Tandoor)
1. Skillet: Preheat a cast-iron skillet over medium-high heat. Once hot, place the rolled-out naan on the skillet. Cover it with a lid for about 1-2 minutes, allowing steam to cook the top. Flip and cook for an additional 1-2 minutes until golden brown.
2. Tandoor: If you have access to a tandoor, this method is traditional and yields incredible results. After rolling the dough, slap it onto the hot clay walls of the tandoor and cook for about 1-2 minutes. The high heat creates a perfectly charred exterior while keeping the inside soft.
Detailed Cooking Instructions with Timing Tips
Regardless of the method you choose, timing is essential. For skillet-cooked naan, look for bubbles forming on the surface as a sign that it’s ready to flip. The underside should have golden-brown spots. For tandoor-cooked naan, the naan will puff up and develop a slightly smoky flavor.
Keeping the Naan Warm
Once cooked, it’s important to keep the naan warm and soft until it’s time to serve.
Best Practices for Keeping Naan Warm
Place the naan on a plate and cover it with a clean kitchen towel. This will help retain moisture and prevent it from drying out.
Importance of Covering with a Cloth to Maintain Softness
The steam from the naan will be trapped under the cloth, ensuring that it stays soft and pliable. If you have multiple batches, layer them with parchment paper to keep them from sticking together.
Tips for Reheating Naan if Necessary
If you need to reheat naan, you can do so in a skillet over low heat for about 30 seconds on each side. Alternatively, wrap it in aluminum foil and warm it in the oven at 350°F (175°C) for about 10-15 minutes.
Serving Suggestions for Garlic Naan
Garlic naan pairs beautifully with a variety of dishes, making it a versatile addition to your meal.
Complementary Dishes to Serve with Garlic Naan
Consider serving garlic naan with rich, creamy curries like butter chicken, palak paneer, or dal makhani. It also pairs well with various dips such as hummus, tzatziki, or a spicy chutney.
Creative Ways to Present Naan for Gatherings
For gatherings, consider stacking the naan in a basket lined with a colorful cloth. This not only keeps the naan warm but also adds an inviting touch to your table setting.
Variations in Serving (e.g., Adding Toppings or Herbs)
You can elevate the flavor of your naan even further by adding toppings. Sprinkle some chopped cilantro or parsley before serving for a fresh touch, or drizzle some extra garlic butter on top for indulgence.
Conclusion
Making homemade garlic naan is not just about the final product; it’s about the satisfaction of crafting something delicious from scratch. The process allows you to engage with your ingredients and create a warm, flavorful bread that enhances any meal.
Experimenting with different flavors and pairings can elevate your naan experience, whether it’s adding herbs, spices, or serving it alongside various dishes. Enjoy the process, and relish the joy of sharing homemade naan with family and friends. Nothing compares to the satisfaction of serving freshly made bread, and garlic naan has a special place in the heart of every food lover. Embrace the art of homemade bread, and allow it to transform your meals into something truly special.

