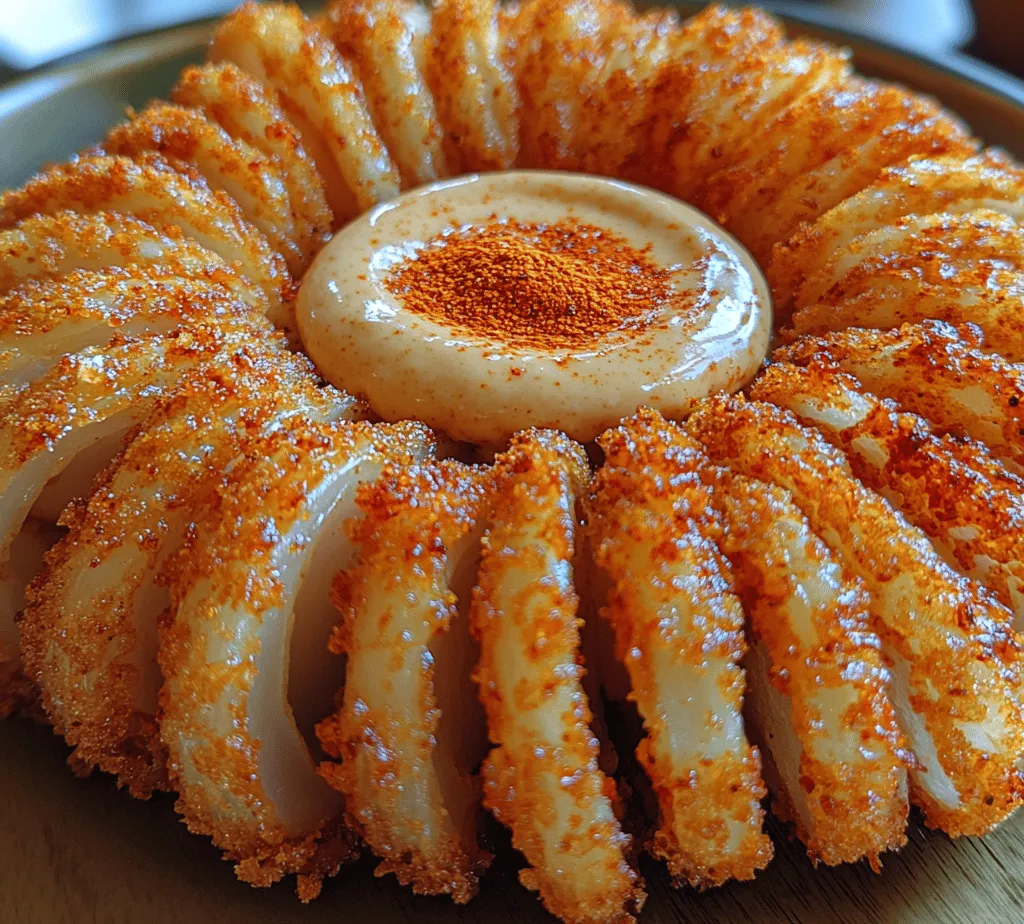
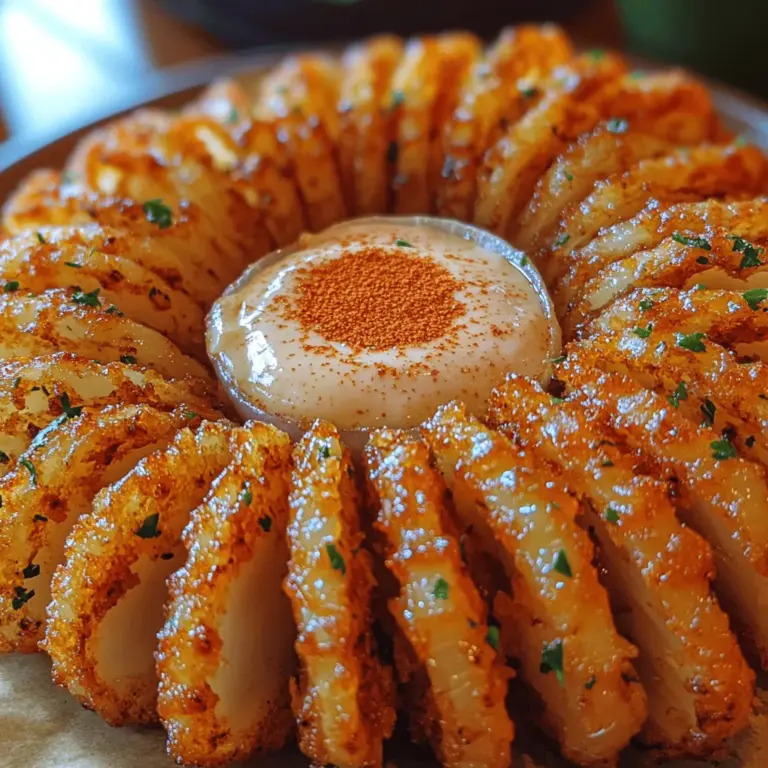
In the world of appetizers, few dishes capture the attention and taste buds quite like a Bloomin’ Onion. This stunning creation not only serves as a feast for the eyes but also delivers an explosion of flavor with every petal. The Bloomin’ Onion Delight is a delightful twist on the classic version, featuring a sweet onion perfectly battered and fried to golden perfection. It has become a beloved menu item across many restaurants, often enjoyed as a sharable appetizer that sparks joy in gatherings and parties.
Originating in the United States, the Bloomin’ Onion first gained fame in the 1980s thanks to a popular chain restaurant that introduced it as a signature dish. Over the years, it has evolved from a simple fried onion into a culinary masterpiece that showcases creativity in flavor combinations and presentation. The Bloomin’ Onion Delight takes this classic and elevates it through a blend of spices and a unique dipping sauce that brings an added layer of flavor to each bite.
In this article, we will guide you through the ingredients, preparation steps, and serving suggestions to ensure your experience making this dish is as enjoyable as eating it. Whether you’re planning a cozy night in with friends or hosting a vibrant party, this appetizer is sure to impress and satisfy.
Understanding the Ingredients for Bloomin’ Onion Delight
Exploring the Key Ingredients
To create a truly memorable Bloomin’ Onion Delight, it’s essential to select high-quality ingredients that contribute to both flavor and texture. Here’s a breakdown of the key components that make this dish extraordinary:
Sweet Onion Selection: The Importance of Vidalia or Walla Walla
Choosing the right onion is crucial to achieving the right sweetness and texture. Vidalia and Walla Walla onions are two varieties that stand out for their mild flavor and natural sweetness. These onions are known for their large, round shapes, which make them ideal for the “blooming” effect that characterizes this dish. When selecting onions, look for those that are firm and free of blemishes. The size is also important; a larger onion will provide more petals, making it perfect for sharing.
The Role of Flour and Spices in Creating Flavorful Batter
The batter is what gives the Bloomin’ Onion its iconic crunchy exterior. All-purpose flour is the primary ingredient, providing the structure needed to hold the onion together as it fries. However, it’s the spices that truly elevate the flavor of the batter. A blend of paprika, cayenne pepper, garlic powder, onion powder, and salt can add depth and a touch of heat, enhancing the overall eating experience. The right balance of spices is key to ensuring that the batter complements the sweetness of the onion without overpowering it.
Buttermilk and Eggs: The Secret to a Crispy Coating
To achieve that coveted crispy coating, a mixture of buttermilk and eggs is used to help the flour adhere to the onion. Buttermilk not only provides moisture but also adds a subtle tanginess that enhances flavor. Additionally, the acidity in buttermilk helps to tenderize the onion, ensuring that each petal is tender and flavorful. When combined with eggs, this mixture creates a sticky base that allows the dry ingredients to cling effectively, resulting in a perfect crunch when fried.
Oil Types for Frying: Why Vegetable Oil is the Best Choice
Frying the Bloomin’ Onion requires the right type of oil to achieve that golden-brown color and crispy texture. Vegetable oil is often recommended due to its high smoke point, making it suitable for frying at higher temperatures without burning. It also has a neutral flavor that won’t interfere with the taste of the onion or batter. Other options like canola oil or peanut oil can also work well, but it’s essential to avoid oils with strong flavors, as they can affect the overall taste of the dish.
Crafting the Perfect Dipping Sauce: Balancing Creaminess and Flavor
No Bloomin’ Onion Delight is complete without a delicious dipping sauce to accompany it. A classic choice is a zesty ranch or a spicy remoulade that complements the fried onion’s flavor. The dipping sauce should strike a balance between creaminess and a bit of tang or spice, providing a refreshing contrast to the crispy onion. Ingredients like mayonnaise, sour cream, mustard, and various herbs can be combined to create a sauce that not only enhances the dish but also adds another layer of flavor.
Step-by-Step Guide to Preparing the Bloomin’ Onion
Preparation of the Onion
Selecting and Cleaning the Onion
Before diving into the cooking process, the first step is selecting and preparing the sweet onion. As mentioned earlier, Vidalia or Walla Walla onions are excellent options due to their sweetness and size. Once you have selected your onion, it’s important to clean it thoroughly. Remove the outer skin and any loose layers, ensuring that the onion is free of dirt and debris. Rinse it under cold water to remove any remaining impurities and pat it dry with a clean towel.
Creating the Petal Effect: Techniques for Perfect Cuts
The signature characteristic of a Bloomin’ Onion is its petal-like appearance, which requires careful cutting. Begin by placing the onion root-side down on a cutting board. Using a sharp knife, make cuts from the top of the onion towards the base, being careful not to cut all the way through. Aim for about 12-16 cuts, spacing them evenly around the onion to create petals. The key is to angle the knife slightly to allow the petals to open up as they fry. After making the initial cuts, gently pull the petals apart to encourage them to bloom during frying.
Ensuring Structural Integrity: Keeping the Root Intact
To maintain the structural integrity of the onion, it’s essential to keep the root intact. This not only helps the onion hold its shape but also allows the petals to separate beautifully when fried. As you cut, be mindful to leave approximately half an inch of the root at the base. This will anchor the petals and prevent them from falling apart during the frying process.
Creating the Batter
Mixing Dry Ingredients: The Perfect Spice Blend
Once your onion is prepared, it’s time to create the batter. Start by gathering your dry ingredients, which typically include flour, paprika, cayenne pepper, garlic powder, onion powder, and salt. In a large mixing bowl, combine these ingredients thoroughly. This ensures that the spices are evenly distributed, which will enhance the flavor of the batter. For those who prefer a milder flavor, the amount of cayenne can be adjusted according to personal taste.
Preparing the Buttermilk Mixture: Tips for a Smooth Consistency
In a separate bowl, whisk together the buttermilk and eggs until well combined. The mixture should be smooth and free of lumps, as this will help the batter adhere to the onion more effectively. If you find that the mixture is too thick, a splash of water or additional buttermilk can help achieve the desired consistency. This wet mixture is crucial for creating that crispy coating when dredging the onion.
Dredging the Onion for Maximum Flavor
Coating Techniques: Achieving Even Coverage
With the onion and batter prepared, it’s time to dredge the onion for frying. Begin by dipping the prepared onion into the buttermilk mixture, ensuring that it is fully coated. Allow any excess liquid to drip off before moving on to the dry ingredient mixture. This is where the magic happens—carefully coat the onion in the flour mixture, making sure to get the batter into the crevices between the petals. Gently shake off any excess flour to prevent clumping, which can lead to uneven cooking.
Double Dipping for Extra Crunch: Why It Works
For those who crave an extra crunchy texture, double dipping is a game-changer. After the first coating, repeat the process by dipping the onion back into the buttermilk mixture, followed by another round in the dry ingredients. This additional layer of batter creates a thicker coating that results in a crunchier exterior once fried. Be sure to ensure even coverage during this process for the best results.
Frying the Bloomin’ Onion to Golden Perfection
With your Bloomin’ Onion Delight fully coated and ready to go, the next step is frying. Heating the oil to the right temperature is crucial for achieving that golden-brown finish. Use a deep frying thermometer to monitor the oil temperature, aiming for around 375°F (190°C). This ensures that the onion cooks evenly and develops a crispy exterior while remaining tender inside.
Once the oil is hot, carefully lower the battered onion into the fryer, taking care to avoid splashes. Fry for approximately 3-4 minutes on each side, or until the onion is golden brown and crispy. The blooming effect should be evident as the petals separate and open up beautifully. Once cooked, remove the onion from the oil and place it on a paper towel-lined plate to absorb any excess grease.
In the next part of this article, we will guide you through serving suggestions and how to craft the perfect dipping sauce to elevate your Bloomin’ Onion Delight experience further. Stay tuned as we explore the finishing touches that will make your homemade appetizer a hit!

Understanding Oil Temperature: The Importance of Accuracy
Achieving the perfect fry begins with understanding oil temperature. The right temperature ensures that your Bloomin’ Onion Delight becomes that golden-brown masterpiece you envision, while also being cooked thoroughly on the inside. Ideally, the oil should be heated to about 350°F (175°C). If the oil is too cold, the onion will absorb excess oil, resulting in a greasy texture. Conversely, if the oil is too hot, the outer layers may burn before the onion is fully cooked.
To accurately measure the oil temperature, a deep-fry thermometer is invaluable. Avoid the guesswork; instead, maintain the optimum heat by adjusting your stovetop burner as necessary. A steady temperature will not only yield the best results, but it will also enhance safety during the frying process.
Equipment for Safe Frying: Choosing the Right Pot or Fryer
Selecting the appropriate equipment is crucial for a successful frying experience. A heavy-bottomed pot or a deep-fryer is ideal for this recipe. If you choose a pot, ensure it has high sides to minimize splatter and can hold at least 4 quarts of oil. A deep-fryer simplifies the process, often featuring a temperature control setting that maintains the heat automatically.
Regardless of which option you select, always prioritize safety. Make sure your chosen vessel is stable and avoid overcrowding the pot, which can cause the oil temperature to drop. Additionally, keep a lid nearby to extinguish any flames that might arise if the oil overheats.
Frying Technique
Lowering the Onion Safely: Step-by-Step Instructions
With your oil heated to the perfect temperature and your equipment set up, it’s time to fry the onion. Here’s how to lower the onion safely:
1. Prepare the Onion: After coating your onion in the seasoned flour, it’s essential to ensure it’s dry enough to prevent excess oil from splattering.
2. Use a Slotted Spoon or Fry Basket: Carefully place a slotted spoon or a fry basket under the onion. This will help ease it into the hot oil without causing a splash.
3. Lower Slowly: Gently lower the onion into the hot oil, ensuring the tips of the petals go in first. This method prevents a violent splash and allows the onion to settle without disturbing the oil too much.
4. Monitor the Oil: Keep a close eye on the oil’s temperature during frying. If it drops below 350°F, adjust your heat to bring it back up.
Frying Time and Visual Cues for Doneness
Fry your Bloomin’ Onion for approximately 3-4 minutes, but the exact time may vary based on your stove and the size of your onion. Watch for visual cues indicating doneness:
– Color: The onion should turn a deep golden brown, indicating that it is crispy and cooked through.
– Bubbling: Active bubbling around the onion signifies that it’s frying properly. If the bubbling diminishes significantly, it may indicate that the oil temperature has dropped.
Once the onion is beautifully golden, it’s time to remove it.
Removing the Onion: Ensuring Crispiness Without Excess Oil
To ensure your Bloomin’ Onion Delight remains crispy after frying, follow these steps for removal:
1. Use the Slotted Spoon: Lift the onion out of the oil with the slotted spoon or fry basket, allowing excess oil to drain back into the pot.
2. Rest on Paper Towels: Place the fried onion on a plate lined with paper towels. This will absorb any remaining grease, keeping the onion crisp.
3. Sprinkle with Salt: Immediately sprinkle with salt while it’s still hot, enhancing the flavor and adding to that perfect crunch.
Crafting the Perfect Dipping Sauce
A Bloomin’ Onion Delight is not complete without a delicious dipping sauce. Here’s how to craft a sauce that will elevate your dish to the next level.
Ingredients Breakdown
Key Components:
– Mayonnaise: Provides a creamy base and balances flavors.
– Sour Cream: Adds tanginess and smoothness.
– Ketchup: Introduces a touch of sweetness and color.
– Worcestershire Sauce: Deepens the flavor with umami notes.
– Garlic Powder and Paprika: Add depth and a hint of spice.
These ingredients combine to create a rich, flavorful dipping sauce that complements the onion’s taste.
Adjusting Flavors: How to Personalize Your Dipping Sauce
Feel free to adjust the flavor profile to suit your personal taste. Consider adding:
– Hot Sauce: For a spicy kick.
– Chopped Fresh Herbs: Such as chives or parsley for freshness.
– Lemon Juice: To brighten the sauce and balance the flavors.
Experimenting with these additions can transform your dipping sauce into a signature blend that will impress your guests.
Mixing and Serving the Sauce
Proper Mixing Techniques for a Creamy Consistency:
1. In a medium bowl, add mayonnaise, sour cream, and ketchup in equal parts (approximately 1/2 cup each).
2. Whisk until smooth and creamy, ensuring all ingredients are well incorporated.
3. Gradually add Worcestershire sauce, garlic powder, and paprika, adjusting quantities to taste.
Presentation Tips: Serving Sauces with Style:
Serve the dipping sauce in a small bowl at the center of your serving platter. For an added touch, garnish with a sprinkle of paprika or freshly chopped herbs. This not only makes the dish visually appealing but also invites guests to dig in.
Serving Suggestions for Your Bloomin’ Onion Delight
Now that your Bloomin’ Onion Delight and accompanying dipping sauce are ready, let’s discuss how to present and serve this exquisite appetizer.
Presentation Ideas
Creating an eye-catching display can enhance the dining experience. Here are some suggestions:
– Platter Arrangement: Place the Bloomin’ Onion in the center of a large serving platter. Surround it with fresh veggies like carrot sticks, celery, or even chips for dipping.
– Garnishes: Add fresh herbs, such as parsley or cilantro, around the base of the onion to create a vibrant contrast against the golden petals.
Pairing Suggestions: Complementing with Other Appetizers
Consider serving your Bloomin’ Onion Delight alongside other appetizers to create a well-rounded meal. Here are some ideas:
– Cheesy Garlic Bread: A warm, buttery complement that enhances the overall flavor profile.
– Stuffed Mushrooms: Adding a savory touch that pairs well with the sweet onion flavor.
– Buffalo Wings: For those who enjoy a little heat, spicy wings create a perfect contrast to the onion.
Timing for Serving
Best Practices for Serving Hot:
The Bloomin’ Onion is best enjoyed fresh from the fryer while it’s still hot and crispy. Serve it immediately to ensure that your guests experience the ultimate flavor and texture.
Storing Leftovers: How to Keep Your Onion Fresh:
If you have any leftovers, store them in an airtight container in the refrigerator for up to two days. To reheat, place them in an oven preheated to 350°F (175°C) for about 10 minutes to restore some of their original crispiness. Avoid microwaving, as this can make the onion soggy.
Conclusion: The Ultimate Indulgence in Appetizers
The Bloomin’ Onion Delight is not just an appetizer; it is a culinary experience that brings friends and family together. With its visually striking presentation and irresistible flavor, this dish will certainly be the star of your next gathering. By following our detailed guide, you can prepare this delightful treat with confidence, ensuring that every bite is as delightful as the last.
Enjoy the process, savor the flavors, and embrace the joy of cooking with this iconic recipe. Indulge in the crispy, savory goodness of the Bloomin’ Onion Delight, paired perfectly with a personalized dipping sauce that enhances its appeal. Whether for a casual family dinner or a festive gathering, this dish promises to be a hit, creating memories around the table as everyone digs into the delicious layers of flavor.

