Heavenly Creamy Neapolitan Cake: A Slice of Italian Delight
Introduction
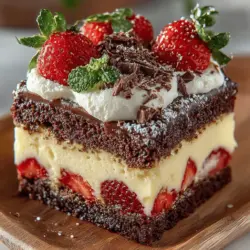
The Heavenly Creamy Neapolitan Cake is more than just a dessert; it is a celebration of Italian culinary tradition that beautifully encapsulates the vibrant flavors and colors of its namesake city, Naples. This exquisite cake has earned its place in the hearts of dessert enthusiasts around the world, thanks to its harmonious blend of chocolate, vanilla, and strawberry layers that can evoke nostalgia and delight in every bite. Each layer tells a story, reflecting the rich cultural tapestry of Italy, where food is not just sustenance but a deep-seated expression of community and passion.
What sets this cake apart is not only its striking appearance but also its creamy filling that binds the layers together, creating a luscious texture that captivates the senses. Topped with a delicate frosting and perhaps a sprinkle of fresh fruit or chocolate shavings, the Heavenly Creamy Neapolitan Cake is a feast for both the eyes and the palate.
Exploring the Components of the Neapolitan Cake
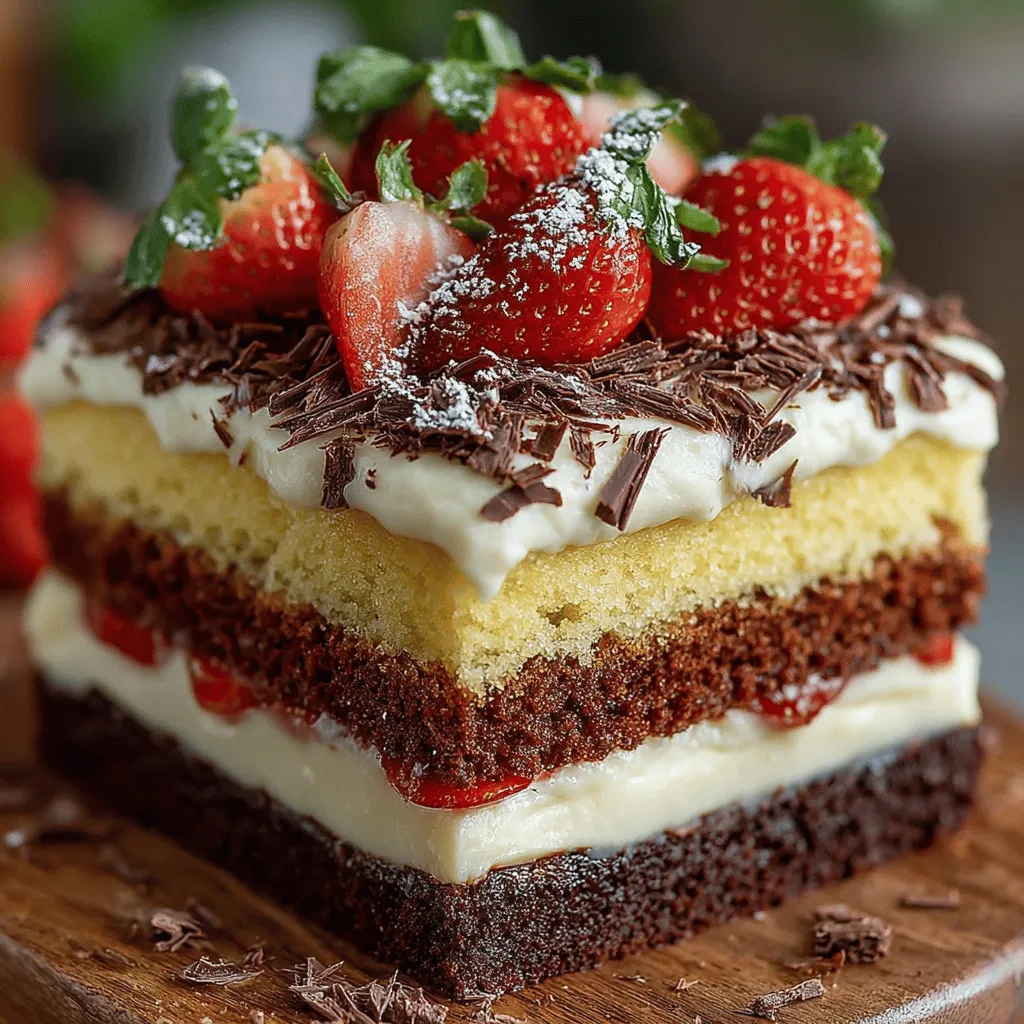
At the heart of the Heavenly Creamy Neapolitan Cake are its three distinct layers, each offering its own unique texture and flavor profile. The chocolate layer, rich and indulgent, provides a deep, satisfying base that contrasts beautifully with the light and airy vanilla layer. This vanilla layer serves as a perfect canvas, allowing the other flavors to shine while contributing a delightful creaminess. Finally, the strawberry layer brings a refreshing sweetness, completing the triad of flavors that make up this iconic cake.
The key to achieving the best flavors and textures lies in the quality of the ingredients used. Opting for high-quality cocoa powder, fresh strawberries, and pure vanilla extract can elevate your cake from ordinary to extraordinary, ensuring that each layer stands out while also harmonizing beautifully with the others. The creamy filling plays a crucial role in this delicate balance, acting as a unifying element that enhances the overall experience of the cake. It adds moisture and richness, making each slice a melt-in-your-mouth delight.
Ingredient Breakdown
To create the Heavenly Creamy Neapolitan Cake, you will need a selection of ingredients that are not just essential but also contribute significantly to the cake’s flavor and texture. Below is a detailed explanation of the key components:
For the Cake Layers:
1. All-Purpose Flour: The foundation of the cake, providing structure and stability. Ensure it’s sifted to prevent lumps and achieve a light texture.
2. Granulated Sugar: Sweetens the layers and helps in achieving a beautiful golden color when baked.
3. Unsweetened Cocoa Powder: For the chocolate layer, this ingredient is crucial. Choose a high-quality cocoa for a rich flavor.
4. Baking Powder and Baking Soda: These leavening agents are essential for creating a light and fluffy cake.
5. Salt: Enhances the flavors of the cake and balances the sweetness.
6. Eggs: Provide moisture, richness, and help bind the ingredients together.
7. Milk: Contributes to the cake’s moistness and flavor. Whole milk is recommended for the best results.
8. Butter: Adds richness and flavor. Using unsalted butter allows for better control of the saltiness in the cake.
For the Creamy Filling:
1. Heavy Cream: The base for the filling, it whips up to a luxurious texture that adds a decadent touch.
2. Mascarpone Cheese: A staple in Italian desserts, it provides a rich and creamy consistency, perfectly complementing the other layers.
3. Powdered Sugar: Sweetens the filling while also helping to stabilize the whipped cream.
For the Toppings:
1. Chocolate Ganache: Made from heavy cream and chocolate, this glossy topping adds a touch of elegance and richness.
2. Fresh Strawberries or Raspberries: For a pop of color and freshness, these fruits can be placed on top for decor and added flavor.
Substitutions and Variations:
For those with dietary restrictions or preferences, there are several substitutions that can be made without compromising the integrity of the cake. For a gluten-free option, consider using a gluten-free all-purpose flour blend. To make the cake dairy-free, substitute the butter with coconut oil or a vegan butter alternative, and replace the heavy cream with coconut cream. Additionally, using almond milk or oat milk can work well in place of regular milk.
Step-by-Step Instructions
Prepping the Kitchen
Before diving into the baking process, it’s crucial to set the stage for a successful cake-making experience. Start by preheating your oven to 350°F (175°C). This ensures that your cake layers bake evenly and rise properly. While the oven is heating, prepare your cake pans. For this recipe, you will need three 9-inch round cake pans, one for each layer.
To effectively grease and flour the pans, begin by applying a thin layer of butter or cooking spray to the bottom and sides of each pan. This will help prevent the cake from sticking. After greasing, sprinkle a small amount of flour into each pan, tilting and tapping to coat the surface evenly. This simple step is essential for easy removal of the cake layers once they are baked.
Creating the Cake Layers
With the kitchen prepped, you can now focus on creating the cake layers. Follow these step-by-step instructions for each flavor layer:
1. Chocolate Layer:
– In a large mixing bowl, combine the dry ingredients: sift together the flour, cocoa powder, baking powder, baking soda, and salt.
– In another bowl, cream together the softened butter and granulated sugar until light and fluffy. This may take about 3-5 minutes.
– Add the eggs one at a time, mixing well after each addition. Then, stir in the vanilla extract.
– Gradually add the dry mixture to the wet ingredients, alternating with the milk. Start and end with the dry ingredients to maintain a smooth batter.
– Pour the chocolate batter into one of the prepared pans and smooth the top. Bake for 25-30 minutes, or until a toothpick inserted into the center comes out clean.
2. Vanilla Layer:
– Repeat the same process as the chocolate layer, but exclude the cocoa powder. Replace it with extra flour to maintain the same dry-to-wet ratio.
– Follow the same baking instructions, ensuring that each layer is baked to perfection.
3. Strawberry Layer:
– For the strawberry layer, the process is similar, but you will need to incorporate fresh strawberries. Puree about 1 cup of fresh strawberries and fold this mixture into the batter after combining the wet and dry ingredients.
– Bake this layer in the same manner as the others.
Once all three layers are baked, allow them to cool in the pans for about 10 minutes before transferring them to a wire rack to cool completely. This ensures the layers are ready for assembly and prevents sogginess.
As you prepare to assemble the cake, keep in mind that each layer is not just a component but a crucial part of the overall experience that the Heavenly Creamy Neapolitan Cake offers. Stay tuned for the next steps in this delightful baking adventure, where we will delve into the creamy filling and the final assembly that will make this cake a showstopper at any gathering.
Visual Cues for Knowing When the Batter is Ready
To ensure your cake batter is perfectly prepared for the Neapolitan cake, it’s essential to look for specific visual cues. When mixing your batter, it should transition from a thick, chunky texture to a smoother, more homogeneous mixture. This process usually takes about 3-5 minutes of vigorous mixing. You want to ensure there are no flour pockets remaining, and the batter should fall from the spatula in a smooth ribbon.
For the cake layers to rise evenly, it’s crucial to incorporate air into the batter. This can be achieved by creaming the butter and sugar adequately until the mixture is light and fluffy. The addition of eggs should be done one at a time, allowing each egg to fully incorporate before adding the next. Over-mixing once the flour is added can lead to dense layers, so mix just until everything is combined.
Baking to Perfection
Once your batter is ready, it’s time for the baking stage. Preheat your oven to 350°F (175°C). Prepare your cake pans by greasing them with butter and lightly dusting with flour, or using parchment paper for easy removal.
Baking Times and the Toothpick Test
Bake the layers in the preheated oven for 25-30 minutes. To check for doneness, perform the toothpick test: insert a toothpick into the center of the cake. If it comes out clean or with a few moist crumbs attached, your cake is ready. If it comes out wet with batter, continue baking for an additional 5 minutes before checking again.
Cooling Techniques for Maintaining Moisture
Once baked, remove the cakes from the oven and allow them to cool in the pans for about 10 minutes. This resting period helps the layers firm up slightly, making them easier to remove without breaking. After 10 minutes, gently run a knife around the edges and invert the cakes onto a wire rack to cool completely.
To maintain moisture, consider wrapping the cooled layers in plastic wrap while they cool to trap steam. This will help keep the cake layers soft and prevent them from drying out.
Whipping Up the Creamy Filling
The filling of your Neapolitan cake is where the magic truly happens. For a light and airy whipped cream, start with chilled heavy cream; this ensures better volume and stability.
Instructions for Achieving Perfect Whipped Cream Consistency
In a mixing bowl, combine 2 cups of heavy cream with 1/4 cup of powdered sugar and 1 teaspoon of vanilla extract. Beat on medium-high speed until soft peaks form—this usually takes about 3-5 minutes. Be careful not to overwhip, as this can lead to grainy, butter-like consistency.
Folding Techniques to Maintain Airiness
To maintain the airy texture, gently fold in any additional ingredients like cocoa powder or melted chocolate using a spatula. Start by adding a small amount of whipped cream to lighten the mixture before folding in the rest. Use a figure-eight motion, lifting the mixture from the bottom of the bowl to incorporate air without deflating the cream.
Assembling the Cake
Now that your cake layers are cooled and your creamy filling is ready, it’s time to assemble your Heavenly Creamy Neapolitan Cake.
Step-by-Step Guidance on Layering and Frosting
1. Leveling the Layers: If your cake layers have domed on top during baking, use a serrated knife to level them for a more stable assembly.
2. Layering: Place the first layer of vanilla cake on a serving plate. Spread a generous layer of whipped cream filling over the top, making sure to reach the edges. Follow with the chocolate layer and repeat the process. Finish with the strawberry layer on top.
3. Frosting the Sides: Once all layers are stacked, apply a thin layer of whipped cream around the sides and the top of the cake. This is known as a crumb coat, and it helps to seal in any crumbs before the final frosting. Chill the cake for about 30 minutes to set this layer.
4. Final Frosting: After chilling, apply a thicker layer of whipped cream over the entire cake using an offset spatula for smooth finishing.
Techniques for Steady and Even Assembly
To achieve a steady assembly, make sure each layer is centered and use a cake turntable if available. This allows you to keep your frosting consistent and even while turning the cake for the perfect finish.
Decorating the Heavenly Neapolitan Cake
After assembling your cake, it’s time for the finishing touches that will make it visually striking.
Creative Ideas for Garnishing
Consider garnishing your cake with fresh strawberries on top, sliced and arranged in a fan shape for an elegant look. Shave some high-quality dark chocolate over the top for a touch of decadence. You can also add mint leaves for a pop of color and freshness.
Techniques for Achieving an Elegant Finish
To create a more polished finish, use a bench scraper to smooth the sides of the cake further. For a decorative pattern on top, you can create swirls with the spatula or pipe whipped cream rosettes around the edges.
Chilling and Serving the Cake
Once your cake is beautifully decorated, chilling is essential before serving.
Importance of Chilling the Cake
Chilling the cake allows the layers to set, ensuring that all components meld together beautifully. This step helps the whipped cream filling to firm up slightly, making it easier to slice and serve. Chill the cake for at least 2 hours, but it can be left overnight for optimal results.
Serving Suggestions
When it comes to serving, this Neapolitan cake pairs wonderfully with various beverages. Consider serving it alongside a cup of rich coffee, a light tea, or even a dessert wine for a luxurious touch. The cake’s layers of chocolate, strawberry, and vanilla harmonize beautifully with these drinks, enhancing the overall experience.
Conclusion
The Heavenly Creamy Neapolitan Cake captivates not only with its charming layers but also with its delightful flavors. Each slice reveals the harmonious blend of rich chocolate, sweet strawberry, and smooth vanilla, making it an ideal dessert for any occasion.
We encourage you to try this recipe and share the joy of baking with your loved ones. The process of creating this elegant dessert is as rewarding as savoring each bite. So gather your ingredients, unleash your creativity, and relish the satisfaction of serving a stunning homemade Neapolitan cake that will surely impress. Whether it’s a special celebration or a simple family gathering, this cake is bound to leave a lasting impression.