Introduction
Banana pudding is more than just a dessert; it’s a delicious slice of nostalgia that evokes fond memories of family gatherings, summer picnics, and lazy afternoon barbecues. This beloved treat, with its creamy texture and delightful layers, has captured the hearts of many, becoming a staple at various celebrations and everyday meals alike. With a history that intertwines with Southern hospitality, banana pudding has roots that can be traced back to the 19th century, making it a timeless classic that continues to bring joy to families today.
In our family, Grandma’s Classic Banana Pudding is a cherished recipe passed down through generations. Each time we gather around the table, the mere mention of her pudding brings smiles and sparks conversations about the many times we’ve savored her delicious creation. It’s not just the taste that makes it special; it’s the love and care that goes into making it. With every spoonful, you can almost feel the warmth of Grandma’s kitchen, filled with the sweet aroma of ripe bananas, creamy custard, and buttery wafers.
Homemade desserts like this banana pudding play an essential role in family traditions. They serve as a bridge that connects generations, reminding us of the simple joys in life. Whether it’s a holiday feast or a casual Sunday dinner, Grandma’s Classic Banana Pudding has a way of making every occasion feel extra special.
The Allure of Grandma’s Banana Pudding
What sets Grandma’s Classic Banana Pudding apart from other variations is its unique blend of flavors and textures. The creamy, rich pudding is perfectly complemented by the soft, ripe bananas and the subtle crunch of vanilla wafers. Each bite is a harmonious combination of sweetness and comfort that is hard to resist. The pudding has a silky texture that melts in your mouth, while the bananas add a delightful freshness, and the wafers provide a satisfying contrast. This trio creates a dessert that is both indulgent and comforting.
Banana pudding holds a special place in our hearts, often evoking memories of family gatherings where laughter and stories abound. It’s the dessert that brings us together, igniting conversations about past celebrations and cherished moments spent with loved ones. The anticipation of Grandma lifting the lid off the glass dish, revealing layers of creamy goodness, is a memory etched in our minds. It’s not just about the dessert itself; it’s the sense of belonging and warmth that comes with it.
This classic recipe stands out not only for its taste but also for its simplicity and accessibility. With just a handful of ingredients, it’s a dish that anyone can prepare, yet it never fails to impress. While there are many variations of banana pudding, Grandma’s recipe remains a favorite because it embodies the essence of homemade goodness—a reminder that the best things in life are often the simplest.
Ingredients for Grandma’s Classic Banana Pudding
To create this delectable dessert, you will need the following fresh and high-quality ingredients:
Ingredients List:
– 4 ripe bananas: The star of this dish, ripe bananas are essential for their natural sweetness and creamy texture. Look for bananas that are speckled with brown spots for optimal flavor.
– 1 cup granulated sugar: This adds sweetness and helps balance the flavors in the pudding.
– 1/3 cup all-purpose flour: This acts as a thickening agent, providing the pudding with its creamy consistency.
– 1/4 teaspoon salt: A pinch of salt enhances the overall flavor profile.
– 2 cups whole milk: Whole milk contributes to the richness of the pudding, making it velvety and satisfying.
– 3 large egg yolks: The yolks add creaminess and richness to the pudding base.
– 1 teaspoon vanilla extract: For a hint of warmth and flavor, vanilla extract is a must-have in this recipe.
– 1 box (11 oz) vanilla wafers: These provide a delightful crunch and sweetness, complementing the creamy pudding and bananas.
– Additional banana slices for layering: For added freshness and presentation.
Importance of Ripe Bananas
Using ripe bananas is crucial for achieving the best flavor and texture in your pudding. As bananas ripen, their starches convert into sugars, making them sweeter and more flavorful. This natural sweetness reduces the need for added sugar in the pudding and enhances the overall taste. Additionally, ripe bananas are softer and easier to slice, allowing them to blend seamlessly into the pudding layers.
Common Substitutions or Alternatives
If you have dietary restrictions or preferences, there are several substitutions you can consider while still maintaining the essence of Grandma’s Classic Banana Pudding:
– Dairy-Free Option: Substitute whole milk with almond milk, coconut milk, or any other plant-based milk.
– Gluten-Free Variation: Use a gluten-free all-purpose flour blend instead of regular all-purpose flour.
– Lower Sugar Version: Reduce the sugar quantity or use a natural sweetener like maple syrup or agave nectar to achieve the desired sweetness.
– Vegan Adaptation: To make a vegan version, use plant-based milk, flaxseed meal as a thickening agent, and a vegan vanilla wafer alternative.
Step-by-Step Instructions for Making the Pudding
Now that you have gathered all the necessary ingredients, it’s time to dive into the step-by-step instructions for creating Grandma’s Classic Banana Pudding. Follow these detailed instructions to ensure a smooth and successful pudding-making experience.
Preparing the Pudding Base
1. Combine Dry Ingredients: In a medium saucepan, whisk together the granulated sugar, flour, and salt until well combined. This mixture will serve as the base for your pudding.
2. Add Milk: Gradually add the whole milk to the dry ingredients, whisking continuously to avoid lumps. It’s crucial to whisk thoroughly at this stage to ensure a smooth pudding base.
3. Cook the Mixture: Place the saucepan over medium heat and continue to whisk the mixture as it heats. This prevents it from sticking to the bottom of the pan and allows for even cooking. Keep stirring until the mixture thickens and begins to bubble, which should take about 5-7 minutes. The consistency should be similar to a thick custard.
Tempering the Egg Yolks
Tempering the egg yolks is a critical step that ensures your pudding is creamy without the risk of curdling the eggs.
1. Prepare Egg Yolks: In a separate bowl, whisk the egg yolks until well blended. This will help them incorporate smoothly into the hot pudding base.
2. Temper the Yolks: Once the pudding mixture has thickened, remove it from the heat. Slowly drizzle about half of the hot pudding mixture into the bowl with the egg yolks while continuously whisking. This gradual addition raises the temperature of the yolks without cooking them.
3. Combine Mixtures: After tempering the yolks, pour the yolk mixture back into the saucepan with the remaining pudding base, whisking constantly. Return the saucepan to low heat and cook for an additional 2-3 minutes until the mixture is thickened to your desired consistency.
Tips for Ensuring a Smooth Mixture
– Whisk Continuously: Whisking is key to a smooth pudding. Make sure to keep the whisk moving at all times to prevent any lumps from forming.
– Avoid High Heat: Cooking the mixture over medium or low heat is essential. High heat can cause the eggs to scramble, resulting in a grainy texture.
– Monitor Consistency: The pudding should coat the back of a spoon when it’s ready. You can test this by dipping a spoon into the mixture and running your finger along the back. If the line holds, it’s thick enough.
Combining the Mixtures
Once your pudding base is silky and smooth, it’s time to combine everything together for the final assembly.
1. Add Vanilla Extract: Stir in the vanilla extract for that classic flavor that elevates the pudding.
2. Layering the Pudding: In a serving dish, start by adding a layer of the pudding mixture at the bottom. Follow with a layer of banana slices and then a layer of vanilla wafers. Repeat the layering process until you run out of ingredients, finishing with a layer of pudding on top.
3. Chill: Cover the dish with plastic wrap and refrigerate for at least 4 hours, allowing the flavors to meld and the pudding to set perfectly.
By following these steps meticulously, you will create a creamy, dreamy dessert that embodies the love and care of Grandma’s kitchen. The anticipation of the final product will make every moment spent preparing this classic banana pudding worthwhile, as it promises to deliver a delightful experience for you and your loved ones.

Grandma’s Classic Banana Pudding is not just a dessert; it’s a memory wrapped in a creamy, comforting embrace. With each layer of smooth pudding, fresh bananas, and crunchy wafers, this recipe brings nostalgia to the forefront. However, the secret to achieving that perfect balance of flavors and textures lies in careful attention to cooking time, layering techniques, and the chilling process. Let’s dive deeper into these essential components to ensure your banana pudding turns out just like Grandma’s.
Importance of Cooking Time for Thickening and Flavor Development
Cooking time is crucial in developing the right texture and flavor in your banana pudding. When preparing the pudding, it’s essential to cook the mixture until it thickens properly. This typically takes about 10-15 minutes over medium heat while continuously stirring. The heat activates the cornstarch, which is responsible for thickening the pudding. If you rush this step, your pudding may end up too runny, lacking the velvety consistency that makes it enjoyable.
Moreover, cooking the pudding long enough allows the flavors to meld together harmoniously. The heat enhances the natural sweetness of the bananas and the richness of the vanilla extract, creating a mouthwatering dessert that tantalizes the taste buds.
Role of Vanilla Extract and Butter in Enhancing the Pudding’s Taste
Vanilla extract is a key ingredient in Grandma’s Classic Banana Pudding, providing a depth of flavor that elevates the entire dessert. Opt for pure vanilla extract for the best results, as imitation vanilla can lack the complexity that real vanilla brings. This subtle yet impactful ingredient complements the sweetness of the bananas while adding a warm, aromatic quality.
Butter also plays a significant role in enhancing the pudding’s taste. Adding a couple of tablespoons of unsalted butter at the end of the cooking process creates a rich, creamy mouthfeel that rounds out the flavors beautifully. The butter not only adds richness but also contributes to the glossy finish of the pudding, making it even more visually appealing.
Layering the Banana Pudding
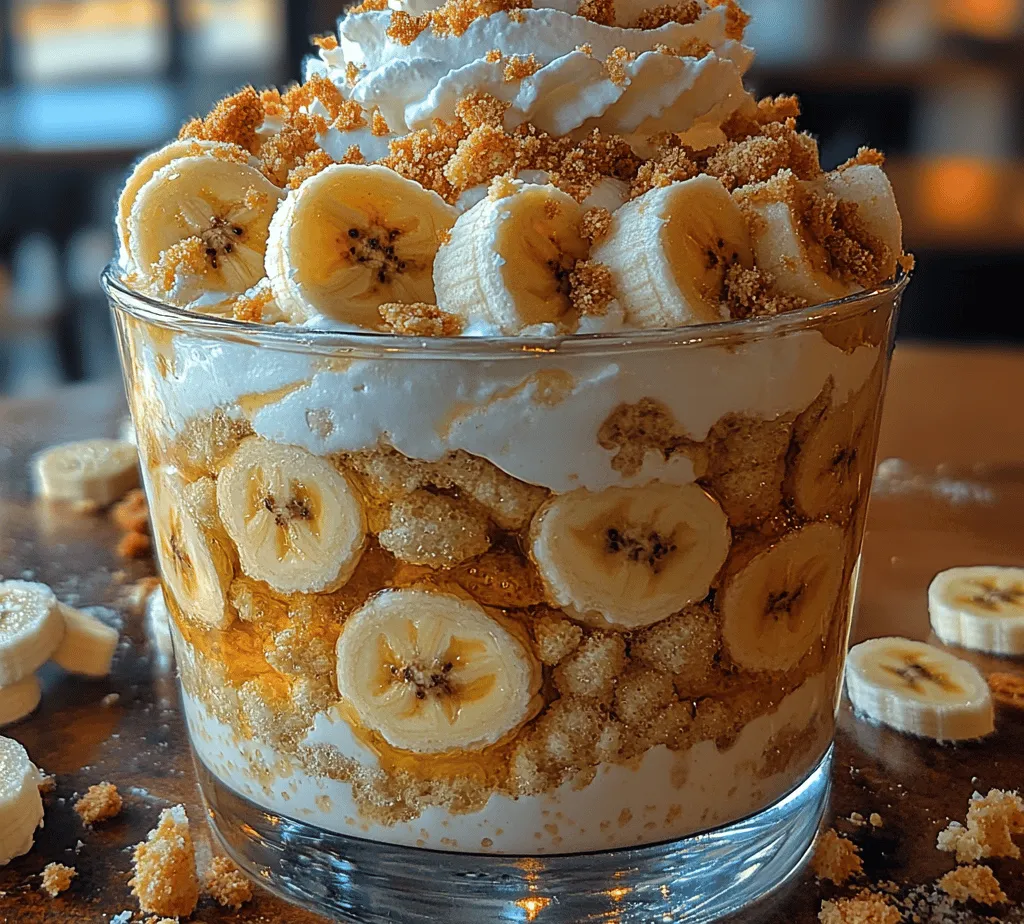
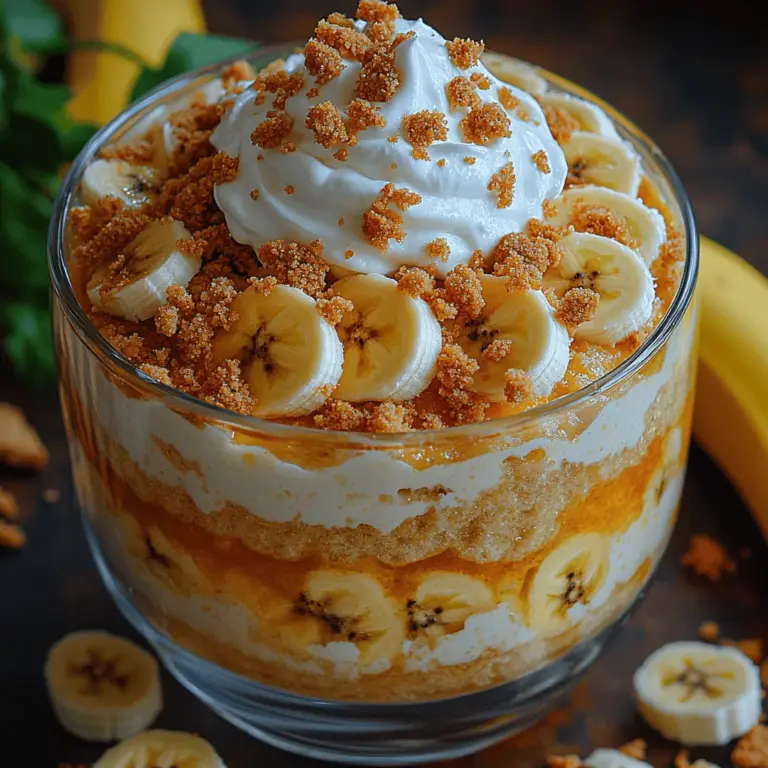
Proper layering is essential for both flavor and presentation in Grandma’s Classic Banana Pudding. Start with a layer of the creamy pudding at the bottom of your serving dish to anchor the other ingredients. Then, follow with a layer of sliced bananas and a generous sprinkling of vanilla wafers. Alternate these layers until you reach the top of your dish, finishing with a final layer of pudding.
For optimal visual appeal, arrange the banana slices in an overlapping pattern. This not only enhances the look but also ensures that every spoonful contains a balance of all flavors. The wafers should be placed strategically so that they are visible from the sides of the dish, showcasing the layers and enticing anyone who lays eyes on it.
Tips for Achieving the Perfect Pudding-to-Wafer Ratio
Getting the pudding-to-wafer ratio just right is crucial. Aim for a 2:1 ratio of pudding to wafers. This means that for every two layers of pudding, you should add one layer of wafers. This balance allows the creaminess of the pudding to shine through without overwhelming the dessert with too many wafers.
Additionally, consider the type of wafers you use. Traditional vanilla wafers add a delightful crunch and sweetness that complements the bananas and pudding. If you’re feeling adventurous, you can try using chocolate wafers for a unique twist. Just be sure to adjust the layering to maintain that perfect balance.
The Chilling Process
Once you have assembled your banana pudding, the chilling process is vital for achieving the perfect set. Chilling allows the pudding to firm up, making it easier to scoop and serve. Ideally, let the pudding chill in the refrigerator for at least 4 hours, although overnight is even better. This extended chilling time helps the flavors meld further, enhancing the overall taste.
If you skip or shorten the chilling time, you may end up with a pudding that is too soft and runny, losing its intended texture. The pudding needs this time to stabilize, allowing the layers to meld together beautifully. A well-chilled pudding will present itself in clean, defined layers, making it as beautiful as it is delicious.
Serving Suggestions for Grandma’s Classic Banana Pudding
When it comes to serving Grandma’s Classic Banana Pudding, you have several delightful options. The most popular choice is to top the pudding with a layer of whipped cream. This light and airy topping contrasts beautifully with the creamy pudding and adds an extra touch of sweetness. For a more traditional approach, consider making a meringue topping. This will provide a fluffy and slightly toasted finish that complements the flavors of the pudding perfectly.
For enhanced presentation, consider garnishing your pudding with additional banana slices, a sprinkle of crushed vanilla wafers, or even a dusting of cocoa powder if you opted for chocolate wafers. These small touches can elevate the visual appeal of your dessert and make it even more enticing to your guests.
In terms of serving style, you can choose between individual cups for a more elegant presentation or a family-style dish for a casual gathering. Individual cups allow for easy serving and portion control, while a larger dish encourages sharing and brings a sense of warmth to the table.
The Nutritional Perspective
Understanding the nutritional content of Grandma’s Classic Banana Pudding can help you enjoy this indulgent dessert with a balanced perspective. Each serving typically contains calories from whole milk, sugar, and bananas, making it a treat that should be enjoyed in moderation. A standard serving may contain around 250-300 calories, depending on the size and specific ingredients used.
While this dessert is undeniably rich and indulgent, there are ways to make it a bit more health-conscious without compromising flavor. Consider using low-fat milk or almond milk as a substitute for whole milk, and replace some of the sugar with natural sweeteners like honey or maple syrup. You can also reduce the amount of vanilla wafers used and replace them with healthier options like crushed graham crackers or oat cookies.
Conclusion
Grandma’s Classic Banana Pudding is more than just a dessert; it’s a cherished recipe that brings warmth, comfort, and a sense of nostalgia. With its creamy layers, sweet bananas, and crunchy wafers, every bite is a reminder of the special moments spent around the family table. By following the tips outlined in this article, you can create a pudding that not only tastes incredible but also looks stunning.
We invite you to enjoy this timeless recipe and perhaps find inspiration to share your own memories related to banana pudding. Whether you’re making it for a family gathering, a potluck, or simply to indulge yourself, this classic dessert is sure to bring joy to anyone who takes a bite. Homemade desserts like Grandma’s Classic Banana Pudding have a unique way of connecting us to our past while creating new memories for the future. So gather your ingredients, roll up your sleeves, and enjoy the delightful process of making this beloved treat.

