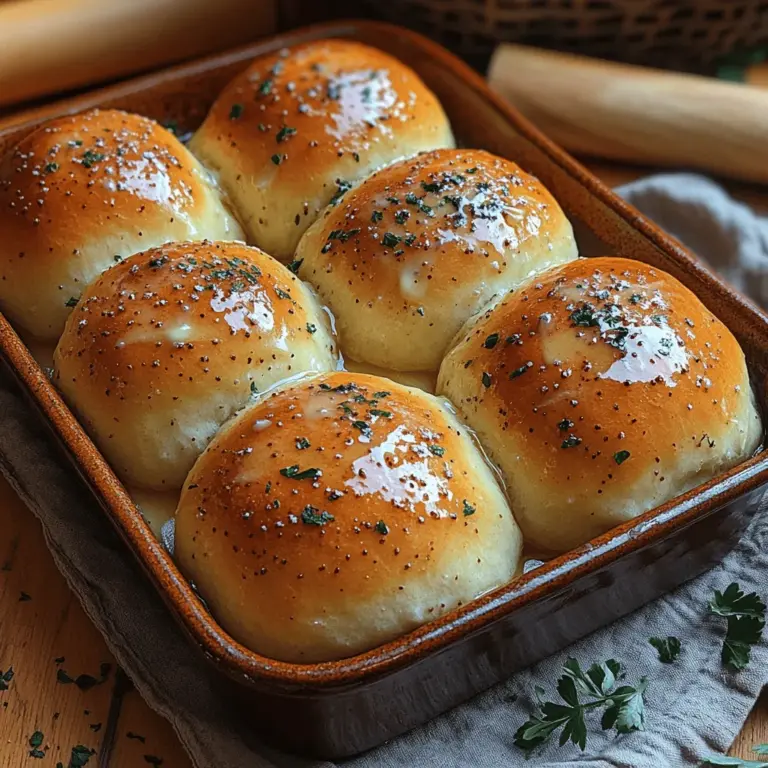
Fluffy Cloud Dinner Rolls Recipe

WANT TO SAVE THIS RECIPE?

Introduction

There’s something undeniably comforting about fresh, homemade dinner rolls. The aroma that wafts through your kitchen as they bake, the way they puff up to perfection, and the soft, pillowy texture are all part of what makes dinner rolls an irresistible addition to any meal. Whether served alongside a holiday feast, a simple weeknight dinner, or as part of a gathering with friends, homemade rolls elevate the dining experience. Among the many variations of dinner rolls, Fluffy Cloud Dinner Rolls stand out for their lightness and exceptional texture.

These rolls are not just a side dish; they are the kind of comforting indulgence that can bring people together around the table. Their soft, airy nature makes them perfect for sopping up gravy, slathering in butter, or even using as a base for sliders. The beauty of these rolls lies not only in their taste but also in their simplicity. With a few quality ingredients and a little bit of patience, you can create something truly special.

To achieve the best results, it is essential to use high-quality ingredients. Each component plays a pivotal role in developing the flavor and texture of your rolls. From the flour that provides structure to the yeast that helps them rise, every ingredient is critical. Let’s take a closer look at what makes these Fluffy Cloud Dinner Rolls a delightful addition to your culinary repertoire.

Understanding the Ingredients

All-Purpose Flour

Flour is the backbone of any bread recipe, and all-purpose flour is a versatile choice that provides the necessary structure and elasticity for our dinner rolls. When combined with water, flour forms gluten, which gives the dough strength and helps it hold its shape during rising and baking. For the best results, it’s advisable to measure your flour correctly and consider sifting it before use, as this can help aerate the flour and make it lighter.

Active Dry Yeast

Yeast is the magic ingredient that transforms a simple dough into fluffy rolls. Active dry yeast is a type of leavening agent that needs to be activated before use. When combined with warm water and sugar, it begins to ferment and produce carbon dioxide, which causes the dough to rise. Ensuring your yeast is fresh and properly activated is crucial for achieving the desired lightness in your rolls.

Granulated Sugar

Sugar serves two main purposes in this recipe: it helps activate the yeast and adds a subtle sweetness to the rolls. The yeast consumes the sugar, producing carbon dioxide and alcohol in the process, which contributes to the dough’s rise. A small amount of sugar enhances the overall flavor, giving the rolls a lightly sweet profile that complements savory dishes beautifully.

Salt

While it may seem counterintuitive, salt is essential in bread making. It enhances the flavor of the rolls and helps regulate yeast activity, ensuring a balanced fermentation process. Too little salt can lead to overly rapid rising, while too much can inhibit yeast growth. A careful balance is key to achieving perfectly risen and flavorful rolls.

Whole Milk

Whole milk adds moisture and richness to the dough, contributing to a tender crumb and a delightful flavor. The fat in the milk also helps to soften the gluten structure, making the rolls even fluffier. For best results, use milk at room temperature, as this aids in the fermentation process and ensures a smooth dough consistency.

Unsalted Butter

Butter is another crucial ingredient that imparts flavor and tenderness to the rolls. Unsalted butter allows you to control the amount of salt in the recipe, ensuring optimal flavor balance. When melted and mixed into the dough, it creates a rich, soft texture that’s simply irresistible.

Eggs

Eggs are a powerhouse ingredient in baking, providing richness, moisture, and structure to the dough. They help bind the ingredients together and contribute to the overall rise of the rolls. Using room temperature eggs in your dough will promote a smoother mixture and better incorporation of all ingredients.

Importance of Room Temperature Ingredients

Using room temperature ingredients is vital for the success of your Fluffy Cloud Dinner Rolls. Cold ingredients can slow down the activation of the yeast and lead to a dense texture. Allowing your milk, eggs, and butter to come to room temperature ensures that they mix evenly and contribute to the dough’s overall consistency.

Step-by-Step Instructions for Fluffy Cloud Dinner Rolls

Activating the Yeast

The first step in making Fluffy Cloud Dinner Rolls is to activate the yeast. This process is crucial, as it determines the success of your dough’s rise. Start by measuring out warm water (about 110°F or 43°C) into a small bowl. The water should feel warm to the touch but not hot, as excessive heat can kill the yeast.

Add a teaspoon of granulated sugar to the water and sprinkle the active dry yeast on top. Allow the mixture to sit undisturbed for about 5 to 10 minutes. During this time, the yeast will begin to feed on the sugar, and you should see a frothy layer forming on the surface. This bubbling action indicates that the yeast is alive and ready to work its magic in your dough.

Mixing the Wet Ingredients

Once your yeast is activated, it’s time to mix the wet ingredients. In a large mixing bowl, combine the warm milk and melted unsalted butter. Stir to combine, and then add in the frothy yeast mixture along with two room temperature eggs. Whisk together until the mixture is smooth and well incorporated. This step is essential for ensuring that the yeast is evenly distributed throughout the dough, allowing for an even rise.

Combining Dry Ingredients

Next, you will want to prepare the dry ingredients. In a separate bowl, whisk together the all-purpose flour and salt. This step helps to evenly distribute the salt throughout the flour and prevents clumping during mixing. Begin by adding the dry flour mixture to the wet ingredients in three parts, stirring gently after each addition. The goal is to combine the ingredients until a shaggy dough begins to form.

Tip: If you find that your dough is too sticky after adding the flour, you can gradually adjust by adding a little more flour, one tablespoon at a time. However, be cautious not to add too much flour, as this can lead to dense rolls.

Kneading the Dough

Kneading is a critical step in developing the gluten structure in your dough. Prepare a clean, lightly floured surface for kneading. Turn the dough out onto the surface and begin to knead by folding the dough over itself and pushing it down with the heel of your hand. Rotate the dough a quarter turn and repeat the process. Knead for about 8 to 10 minutes, or until the dough is smooth and elastic.

You can test the dough’s readiness by performing the “windowpane test.” Take a small piece of dough and stretch it gently between your fingers. If it stretches thin enough to let light through without tearing, your dough is ready. If it tears easily, continue kneading for a few more minutes.

This stage is important, as the right amount of kneading will ensure that your Fluffy Cloud Dinner Rolls rise beautifully and have that signature soft texture.

Stay tuned for the next part of this recipe, where we will cover the essential steps of letting the dough rise, shaping the rolls, and baking them to golden perfection.
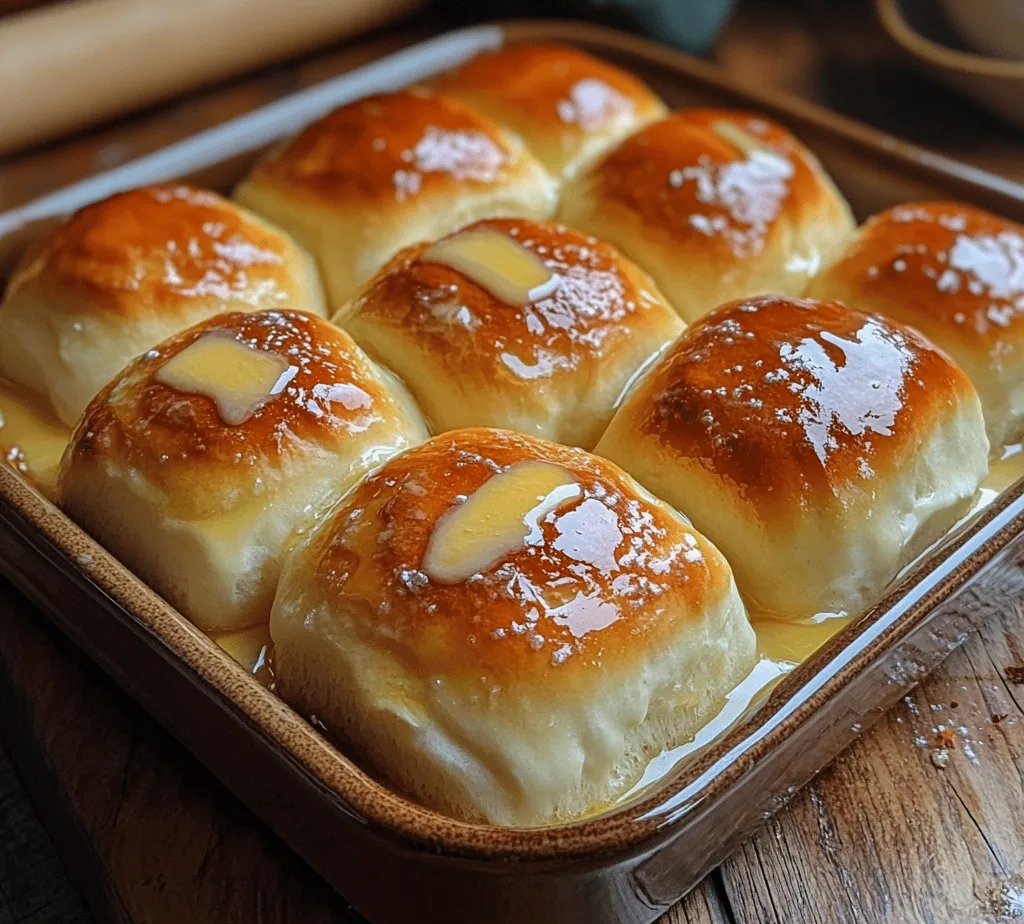

There’s something undeniably comforting about fresh, homemade dinner rolls. The aroma that wafts through your kitchen as they bake, the way they puff up to perfection, and the soft, pillowy texture are all part of what makes dinner rolls an irresistible addition to any meal. Whether served alongside a holiday feast, a simple weeknight dinner, or as part of a gathering with friends, homemade rolls elevate the dining experience. Among the many variations of dinner rolls, <strong>Fluffy Cloud Dinner Rolls</strong> stand out for their lightness and exceptional texture.” /></p>
</p>
<h3>Using a Stand Mixer versus Hand Kneading</h3>
</p>
<p>When it comes to making Fluffy Cloud Dinner Rolls, you have the option of using a stand mixer or kneading by hand. Each method has its advantages. A stand mixer, equipped with a dough hook, can save you time and effort, allowing you to focus on other aspects of your meal preparation. It also provides consistent kneading, which is essential for developing gluten in the dough. If you opt for this method, mix the ingredients on low speed until combined, then increase to medium speed for about 5-7 minutes, or until the dough is smooth and elastic.</p>
</p>
<p>On the other hand, hand kneading can be a rewarding experience, connecting you to the process of baking. It allows you to feel the texture of the dough and adjust as needed. To knead by hand, turn the dough out onto a floured surface and push it away from you with the heel of your hand, then fold it back over itself. Rotate the dough a quarter turn and repeat this process for about 10 minutes, or until the dough is soft and stretchy. Regardless of the method you choose, the key is to ensure the dough is well-kneaded to develop that fluffy texture you crave in your rolls.</p>
</p>
<h3>First Rise</h3>
</p>
<p>After your dough is kneaded, it’s time for the first rise. This step is crucial for developing flavor and texture in your rolls. The yeast in the dough needs time to ferment and produce carbon dioxide, which causes the dough to expand. For optimal results, place the kneaded dough in a warm, draft-free environment. An ideal temperature for yeast activation is around 75°F to 85°F. If your kitchen is cool, you can create a warm environment by turning on your oven for a minute or two, then turning it off and placing the dough inside. Cover the bowl with a damp cloth or plastic wrap to retain moisture while it rises.</p>
</p>
<p>During this first rise, allow the dough to double in size, which usually takes about 1 to 1.5 hours. This fermentation process not only helps the dough rise but also enhances the flavor profile of the rolls, making them taste homemade and delicious.</p>
</p>
<h3>Shaping the Rolls</h3>
</p>
<p>Once your dough has risen, it’s time to shape the rolls. Start by gently punching down the dough to release the built-up gases. Turn the dough out onto a lightly floured surface and divide it into equal portions using a dough cutter or your hands. Aim for pieces that weigh about 2 ounces each for uniform rolls.</p>
</p>
<p>To shape each piece, flatten it slightly and then fold the edges toward the center, creating a little pouch. Flip it over so the seam is on the bottom and use your hands to roll it into a smooth ball. This technique helps create surface tension, which is essential for the rolls to rise properly during the second rise.</p>
</p>
<p>For even more uniformity, you can use a kitchen scale to measure each piece of dough. This might seem like an extra step, but it ensures that all your rolls bake evenly and have a consistent texture.</p>
</p>
<h3>Second Rise</h3>
</p>
<p>The second rise is equally important as the first, as it contributes to the final texture of your rolls. After shaping, place the rolls in a greased baking dish, leaving some space between each roll to allow for expansion. Cover the dish with a clean kitchen towel and let the rolls rise again until they have doubled in size, which typically takes about 30 to 45 minutes.</p>
</p>
<p>To tell when the rolls are ready to bake, gently poke one with your finger. If the indentation springs back slowly, they are ready. If it springs back quickly, they need a bit more time. The dough should look puffy and well-aerated, indicating that the yeast has done its job.</p>
</p>
<h3>Preheating the Oven</h3>
</p>
<p>While the rolls are rising, preheat your oven to 375°F (190°C). Preheating is a crucial step in the baking process. It ensures that your rolls start baking evenly from the moment they enter the oven, resulting in a consistent texture and a perfect rise. An adequately preheated oven also helps to create a nice crust, giving your rolls that desirable golden-brown finish.</p>
</p>
<h3>Baking the Rolls</h3>
</p>
<p>Once your rolls have risen and your oven is preheated, it’s time to bake! Place the baking dish in the center of the oven and set a timer for 20–25 minutes. The rolls should look golden brown, but color isn’t the only indicator of doneness. Gently tap the top of a roll; a hollow sound indicates that they are baked through. Additionally, if you have a kitchen thermometer, the internal temperature should reach about 190°F (88°C) for fully baked rolls.</p>
</p>
<p>To achieve that golden-brown finish, you can rotate the baking pan halfway through the baking time to ensure even browning. If you find that the tops are browning too quickly, you can cover them loosely with aluminum foil for the remaining baking time.</p>
</p>
<h3>Brushing with Butter</h3>
</p>
<p>Once your rolls are out of the oven, don’t forget to brush them with melted butter! This step adds not only flavor but also a beautiful sheen to the rolls. The buttery coating enhances the overall taste, making each bite irresistibly delicious. For added flavor, consider mixing in herbs or spices to the melted butter, such as garlic powder, rosemary, or thyme, for a savory twist.</p>
</p>
<h3>Serving Suggestions</h3>
</p>
<p>Fluffy Cloud Dinner Rolls are best enjoyed warm. Serve them with a generous pat of butter for a simple yet delightful experience. They pair beautifully with various dishes, from hearty stews and soups to roasted meats and salads. For a sweet twist, consider serving them with homemade jams or honey, allowing guests to customize their rolls to their preference. You can also slice them and make mini sandwiches filled with deli meats, cheeses, or even fresh veggies for a delightful lunch option.</p>
</p>
<h3>The Benefits of Homemade Rolls</h3>
</p>
<p>Homemade rolls come with numerous advantages over store-bought options. Firstly, you control the ingredients, which means you can avoid preservatives and artificial flavors often found in commercial bread. You can also customize the recipe to suit your dietary needs, such as using whole grain flour or reducing sugar.</p>
</p>
<p>Additionally, baking your own rolls can be a therapeutic experience. The process of kneading dough, watching it rise, and finally enjoying the fruits of your labor can be incredibly satisfying. It creates a sense of accomplishment and can even be a bonding experience if you involve family members or friends in the process.</p>
</p>
<p>Finally, homemade bread often carries sentimental value. Sharing fresh rolls around the dinner table can foster family traditions and create lasting memories. Whether it’s a holiday gathering or a casual family dinner, the warmth of homemade rolls adds a special touch to any meal.</p>
</p>
<h3>Conclusion</h3>
</p>
<p>In summary, making Fluffy Cloud Dinner Rolls is a delightful process that brings together the joys of baking and the satisfaction of creating something special for loved ones. With each step, from kneading to shaping and baking, you’re not just preparing a dish; you’re crafting an experience. The fluffy, light texture and rich flavor of these rolls will undoubtedly impress your family and friends, making them a cherished addition to any meal.</p>
</p>
<p>Don’t hesitate to try this recipe and discover the joy of homemade baking. The warmth and comfort that fresh dinner rolls can bring to your dining table is unmatched. So roll up your sleeves, gather your ingredients, and embark on this delicious adventure. Your kitchen will soon be filled with the irresistible aroma of freshly baked bread, and your family will thank you for it!</p>
</div>

There’s something undeniably comforting about fresh, homemade dinner rolls. The aroma that wafts through your kitchen as they bake, the way they puff up to perfection, and the soft, pillowy texture are all part of what makes dinner rolls an irresistible addition to any meal. Whether served alongside a holiday feast, a simple weeknight dinner, or as part of a gathering with friends, homemade rolls elevate the dining experience. Among the many variations of dinner rolls, Fluffy Cloud Dinner Rolls stand out for their lightness and exceptional texture.

Super Soft Dinner Rolls

Discover the joy of baking with this Fluffy Cloud Dinner Rolls recipe! These soft, pillowy rolls are the perfect addition to any meal, bringing comfort and warmth to your dining experience. With a few quality ingredients like all-purpose flour, active dry yeast, and unsalted butter, you can create rolls that are not only delicious but also easy to make. Perfect for soaking up gravy or savoring with butter, these homemade rolls are sure to impress family and friends at your next gathering. Elevate your meals with these irresistible treats!

Ingredients
  

4 cups all-purpose flour

1 packet (2 1/4 teaspoons) active dry yeast

1/4 cup granulated sugar

1 teaspoon salt

1 cup whole milk (warm)

1/4 cup unsalted butter (melted)

2 large eggs (room temperature)

1/4 cup warm water

Extra melted butter (for brushing on top)

Instructions
 

Activate the Yeast: In a small bowl, combine the warm water and sugar. Sprinkle the active dry yeast on top. Let it sit for about 5-10 minutes, or until it becomes frothy. This indicates the yeast is activated.

    Mix Wet Ingredients: In a large mixing bowl, whisk together the warm milk, melted butter, and eggs. Once the yeast mixture is frothy, add it to the bowl and mix until combined.

      Combine Dry Ingredients: In a separate bowl, mix the flour and salt. Gradually add the dry ingredients to the wet ingredients, mixing until a soft dough forms. You may need to add a bit more flour if the dough is sticky.

        Knead the Dough: On a lightly floured surface, knead the dough for about 8-10 minutes until it is smooth and elastic. Alternatively, you can use a stand mixer with a dough hook for this step.

          First Rise: Place the dough in a greased bowl and cover it with a damp cloth or plastic wrap. Let it rise in a warm place for about 1 to 1.5 hours, or until it has doubled in size.

            Shape the Rolls: Once the dough has risen, punch it down to release the air. Divide the dough into 12 equal pieces. Shape each piece into a ball by tucking the edges underneath.

              Second Rise: Place the shaped rolls into a greased 9x13-inch baking dish, keeping them close but not touching. Cover again and let rise for another 30-45 minutes, until they’re puffy.

                Preheat Oven: While the rolls are rising, preheat your oven to 350°F (175°C).

                  Bake the Rolls: Once risen, bake the rolls in the preheated oven for 20-25 minutes, or until they are golden brown on top.

                    Brush with Butter: Immediately after baking, brush the tops with more melted butter for a delicious, soft finish. Let them cool for a few minutes before serving.

                      Serve and Enjoy: These rolls are best served warm and can be accompanied by butter or your favorite jam.

                        Prep Time, Total Time, Servings: 20 minutes | 2 hours 10 minutes | 12 rolls

                          WANT TO SAVE THIS RECIPE?

                          Leave a Comment

                          Recipe Rating