
Indulging in breakfast delicacies has never been easier than with our Dreamy Buttermilk Pancake Casserole. This delightful dish combines the beloved flavors of traditional pancakes into a convenient casserole form, making it perfect for feeding a crowd or enjoying throughout the week. Imagine waking up to the enticing aroma of fluffy pancakes baked to golden perfection, infused with rich butter flavor and studded with delicious berries. This recipe is destined to become a family favorite, and in this article, we will guide you through every step of creating this scrumptious pancake casserole, exploring its versatility, offering tips for perfecting your bake, and suggesting ideal serving options.
Understanding the Appeal of Pancake Casseroles
Exploring the Concept of Pancake Casseroles
Pancake casseroles have surged in popularity over recent years, transforming the traditional pancake experience into a more convenient and communal dish. The evolution from flipping individual pancakes to serving a casserole allows for effortless preparation, particularly when hosting family gatherings or brunches. No more standing at the stove flipping pancakes; instead, you can prepare a single dish that bakes evenly and serves multiple people at once.
The benefits of a pancake casserole are numerous. Not only does it save time, but it also allows for a variety of flavors and textures. Whether you prefer the classic buttermilk flavor or want to experiment with different fruits and spices, pancake casseroles can accommodate all tastes. This dish is ideal for special occasions like holidays, birthdays, or simply a cozy Sunday brunch, making it a versatile addition to your cooking repertoire.
The Comfort of Buttermilk in Pancakes
To understand why buttermilk is the star of our pancake casserole, it’s essential to delve into its role in baking. Buttermilk, a fermented dairy product, adds a tangy flavor and a light texture to baked goods. Its acidity reacts with baking soda or baking powder, creating carbon dioxide and resulting in a fluffy rise. This reaction is what gives buttermilk pancakes their signature lightness and tenderness.
In addition to enhancing flavor and texture, buttermilk also brings health benefits to the table. It is lower in fat compared to regular milk and contains probiotics that promote gut health. Moreover, buttermilk is rich in vitamins and minerals, making it a nutritious choice for your breakfast creations. When incorporated into our pancake casserole, buttermilk elevates the dish from a simple breakfast to a wholesome and flavorful experience.
Ingredients Breakdown for Buttermilk Pancake Casserole
Essential Ingredients
To create the Dreamy Buttermilk Pancake Casserole, you will need a selection of high-quality ingredients. Each component plays a crucial role in achieving that perfect pancake texture and flavor. Here’s a breakdown of the essential ingredients:
– Buttermilk: The foundation of our casserole, buttermilk adds moisture and a slight tang, resulting in fluffy pancakes.
– All-Purpose Flour: This forms the base of the batter. Using high-quality flour ensures a consistent texture.
– Baking Powder and Baking Soda: These leavening agents work together to create that light and airy texture characteristic of pancakes.
– Eggs: Providing structure and richness, eggs help bind the ingredients and contribute to the casserole’s overall flavor.
– Sugar: A touch of sweetness enhances the flavor profile of the casserole.
– Vanilla Extract: This adds depth and warmth to the dish, complementing the buttermilk beautifully.
– Salt: A pinch of salt balances the sweetness and enhances the overall flavor.
Using high-quality ingredients is key to achieving the best results. Whenever possible, opt for fresh, organic items that can significantly impact the taste and texture of your dish.
Substitutions for Dietary Restrictions
For those with dietary restrictions, there are several substitutions to ensure everyone can enjoy this delicious casserole:
– Gluten-Free: Substitute all-purpose flour with a gluten-free flour blend. Be sure to choose a blend that includes xanthan gum for proper texture.
– Dairy-Free: Use a dairy-free buttermilk alternative, such as almond or soy milk mixed with a tablespoon of vinegar or lemon juice to mimic buttermilk’s acidity.
Optional Ingredients and Variations
One of the best aspects of a pancake casserole is its versatility. You can easily customize it to suit your taste preferences or the occasion. Here are some optional ingredients and variations to consider:
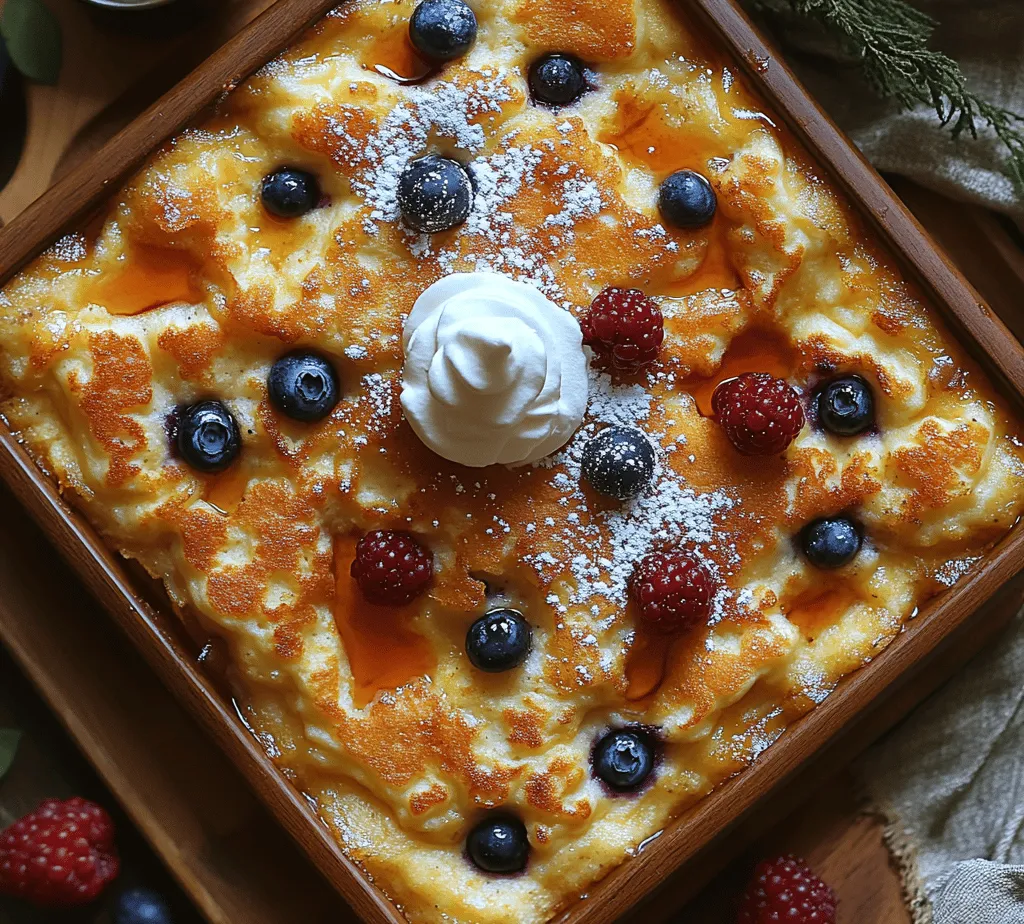
– Toppings: Consider adding nuts for crunch, powdered sugar for sweetness, or a dollop of whipped cream for a decadent finish.
– Berry Alternatives: While blueberries are a classic choice, feel free to experiment with strawberries, raspberries, or a mix of your favorite berries. Each fruit brings its unique flavor and color to the dish.
– Flavor Enhancements: For an extra layer of flavor, consider adding spices like cinnamon or nutmeg. A dash of vanilla bean paste can also elevate the dish to new heights.
Step-by-Step Instructions for Preparing Pancake Casserole
Now that we’ve covered the ingredients, let’s dive into the preparation of the Dreamy Buttermilk Pancake Casserole. Following these steps will ensure a perfectly baked casserole that is both delicious and visually appealing.
Preheat and Prepare Your Baking Dish
The first step in creating your pancake casserole is to preheat your oven. Preheating is vital for even baking, as it allows the casserole to cook through uniformly. Set your oven to 350°F (175°C) and let it heat while you prepare the batter.
Next, prepare your baking dish. Whether you choose a 9×13 inch pan or a similar-sized dish, greasing the bottom and sides with butter or cooking spray is essential. This step prevents the casserole from sticking and makes for easy serving. For added flavor, consider using melted butter to grease the pan, infusing the dish with a rich, buttery taste.
Mixing the Batter
In a large mixing bowl, combine the dry ingredients. Whisk together the all-purpose flour, baking powder, baking soda, sugar, and salt until well mixed. This helps ensure even distribution of the leavening agents for optimal rise.
In a separate bowl, whisk together the wet ingredients: buttermilk, eggs, and vanilla extract. Once combined, pour the wet mixture into the dry ingredients. Gently stir until just combined. Be careful not to overmix; a few lumps are perfectly fine. Overmixing can lead to a dense casserole, and we want to maintain that delightful fluffiness.
Adding the Berries
Once your batter is mixed, it’s time to fold in your choice of berries. Gently add them to the batter, being careful not to crush the fruit. If you’re using frozen berries, there’s no need to thaw them; adding them directly will help maintain their shape and prevent excess moisture in the batter.
Pouring and Baking
Pour the batter into your prepared baking dish, spreading it evenly with a spatula. The batter should fill the dish about halfway, allowing room for rising during baking. Once the oven is preheated, carefully place your pancake casserole in the oven and bake for approximately 25-30 minutes, or until golden brown on top and a toothpick inserted in the center comes out clean.
As your casserole bakes, the kitchen will fill with the warm, inviting aroma of pancakes, making it nearly impossible to resist. Enjoy the anticipation as you wait for your delicious Dreamy Buttermilk Pancake Casserole to come out of the oven, perfectly puffed and ready to indulge.
In the following sections, we will delve deeper into tips for achieving the best results, serving suggestions, and even more variations to try. Get ready to impress your family and friends with this delightful breakfast casserole that takes the classic pancake experience to a whole new level!
Combining Dry Ingredients
To create a smooth and fluffy batter for your Dreamy Buttermilk Pancake Casserole, it’s essential to combine your dry ingredients effectively. Start by measuring out your flour accurately. For the best results, spoon flour into your measuring cup and level it off with a knife rather than scooping directly from the bag, which can compact the flour and lead to excess amounts.
Sifting and Blending for Smoothness: Sifting your flour, baking powder, and baking soda together not only eliminates lumps but also aerates these dry ingredients, ensuring a light texture in your final dish. Use a fine-mesh sieve to sift over a large bowl. Once sifted, whisk the ingredients together gently. This thorough blending helps distribute the leavening agents evenly, which is crucial for achieving a uniform rise in your casserole.
Understanding Leavening Agents: Baking powder and baking soda play pivotal roles in the texture of your casserole. Baking powder is a double-acting leavening agent that reacts both when wet and when heated, contributing to the fluffiness of your pancakes. Baking soda, on the other hand, requires an acid, like buttermilk, to activate its leavening properties. Together, these ingredients ensure that your pancake casserole rises beautifully and maintains a soft, airy structure.
Mixing Wet Ingredients
When it comes to the wet ingredients, proper mixing is key to achieving a consistent batter. Begin by cracking your eggs into a separate bowl. Whisk them until they are well blended, which helps to incorporate air for a fluffier texture.
Combining Eggs, Buttermilk, and Butter: In a large mixing bowl, combine your whisked eggs with the buttermilk. Make sure the buttermilk is at room temperature; cold ingredients can lead to uneven mixing and a denser batter. Melt the butter and allow it to cool slightly before adding it to the mixture to prevent cooking the eggs. Pour the melted butter into the eggs and buttermilk, whisking to combine thoroughly.
Temperature Matters: Maintaining consistent temperatures between your wet and dry ingredients is crucial. If your wet ingredients are too cold, they can cause the melted butter to solidify, leading to a lumpy batter. Conversely, if they are too warm, they can affect the leavening process negatively. Aim for a lukewarm consistency for the best results.
Combining Mixtures and Folding in Berries
Now that your dry and wet ingredients are prepared, it’s time to combine them. Pour the wet mixture into the bowl containing the dry ingredients.
Mixing Without Overworking: Use a spatula to gently fold the two mixtures together. It’s important to mix just until the dry ingredients are moistened. Overmixing can develop the gluten in the flour, resulting in a tough texture. A few lumps are perfectly acceptable; they will disappear during baking.
Folding in Berries: If you’re adding berries to your casserole, do so at this stage. Fresh blueberries, raspberries, or chopped strawberries work beautifully. To fold them in, gently lift and turn the batter over the berries with your spatula. This technique helps maintain the integrity of the berries, preventing them from breaking down and bleeding into the batter, which can alter the color and flavor of your casserole.
Pouring and Baking the Casserole
With your batter ready, the next step is to pour it into your prepared baking dish.
Spreading the Batter Evenly: Use a spatula to spread the batter into an even layer in the dish. This ensures uniform cooking and browning. If you’re using a 9×13-inch pan, the batter should fill it to about three-quarters full to allow for rising without overflowing.
Baking to Perfection: Preheat your oven to 350°F (175°C), and bake the casserole for approximately 25-30 minutes. Keep an eye on it; it’s done when the top is golden and a toothpick inserted into the center comes out clean. If the top is browning too quickly, you can cover it loosely with aluminum foil to prevent burning while the inside continues to cook.
Cooling and Serving the Pancake Casserole
Once baked, allow your casserole to cool for about 10-15 minutes before serving. This cooling time is crucial as it allows the layers to set, making it easier to slice and serve without falling apart.
Serving Styles and Presentation: You can serve the pancake casserole directly from the baking dish for a casual, family-style meal, or cut it into squares and transfer them to individual plates for a more formal presentation. Dust with powdered sugar for an elegant touch, or drizzle with maple syrup right before serving for added sweetness.
Enhancing Your Pancake Casserole Experience
Creative Toppings and Serving Suggestions
To elevate your pancake casserole, consider a variety of toppings. Fresh fruits like slices of banana or strawberries add a refreshing touch. For a crunch, try sprinkling some chopped nuts such as pecans or walnuts on top just before serving. A dollop of whipped cream or Greek yogurt can also complement the flavors beautifully, providing a creamy contrast to the fluffy pancake base.
Beverage Pairings: This casserole pairs excellently with a range of beverages. A freshly brewed cup of coffee or a warm mug of chai complements the sweetness of the pancakes perfectly. For a brunch gathering, consider serving mimosas or a fruity smoothie for a refreshing twist.
Customizing for Guests: If you’re serving a crowd, consider offering a selection of toppings to cater to different tastes. Set up a toppings bar with options like honey, fruit compote, chocolate chips, and flavored syrups, allowing guests to customize their servings.
Storage and Reheating Tips
If you have leftovers (though that’s often unlikely), proper storage will ensure your pancake casserole remains delicious. Allow it to cool completely before covering it with plastic wrap or aluminum foil. Store in the refrigerator for up to 3 days.
Reheating Without Losing Quality: To reheat, preheat your oven to 350°F (175°C) and place the casserole in for about 10-15 minutes until warmed through. You can also microwave individual portions, but be sure to cover them to retain moisture and prevent the pancakes from drying out.
Conclusion: Savoring the Dreamy Buttermilk Pancake Casserole
In conclusion, the Dreamy Buttermilk Pancake Casserole is not just a meal; it’s an experience that brings together family and friends. With its ease of preparation, delightful taste, and versatility, this dish is perfect for any occasion, whether it’s a cozy family breakfast or a festive brunch gathering. By following the steps and tips outlined in this article, you can confidently create a delicious pancake casserole that everyone will love. Embrace the joy of cooking and savor each bite of this scrumptious dish!
