Introduction: Discover the Magic of Whipped Shortbread Cookies
Whipped shortbread cookies are a delightful treat that every baker should have in their repertoire. These cookies are known for their light, airy texture that practically melts in your mouth, making them irresistible to anyone who tries them. The charm of whipped shortbread cookies lies not only in their taste but also in their simplicity. With just a handful of ingredients, they transform into a sweet indulgence that can be enjoyed at any time of the year. Whether it’s during the holiday season or as a simple afternoon snack, these cookies are perfect for any occasion.
Baked goods often serve as a backdrop for cherished memories. The aroma of freshly baked cookies wafting through the kitchen can evoke feelings of nostalgia and warmth, reminding us of family gatherings, holiday celebrations, or quiet evenings at home. Whipped shortbread cookies, in particular, hold a special place in many hearts due to their melt-in-your-mouth texture and buttery flavor. They are not just cookies; they are a way to express love and joy, making them a favorite for sharing with friends and family.
Understanding Whipped Shortbread Cookies
Whipped shortbread cookies are a unique variation of traditional shortbread. They are characterized by their light and airy consistency, achieved through a creaming process that incorporates air into the dough. Unlike standard shortbread, which is dense and crumbly, whipped shortbread cookies have a more delicate structure that makes them exceptionally tender. The key to their delightful texture lies in the way the ingredients are combined, resulting in a cookie that is both soft and slightly crisp on the edges.
The origins of shortbread cookies can be traced back to Scotland in the 16th century. Initially, shortbread was a luxury item made from leftover bread dough, sweetened with sugar and flavored with spices or herbs. Over time, the recipe evolved, and the use of butter became prominent, leading to the rich, buttery version we know today. Whipped shortbread cookies emerged as a favorite among bakers for their delightful texture and ease of preparation. They became a staple in many households, especially during holiday seasons and celebrations.
Bakers love whipped shortbread cookies for several reasons. First, they are incredibly versatile, allowing for various flavor enhancements and toppings. Second, the recipe is straightforward, making it accessible for both novice and experienced bakers alike. Lastly, the cookies are quick to prepare and bake, making them an excellent choice for last-minute gatherings or as an everyday treat.
Essential Ingredients for Whipped Shortbread Cookies
To create the perfect whipped shortbread cookies, you need a handful of essential ingredients. Each component plays a vital role in achieving the desired flavor and texture. Here’s a closer look at each ingredient:
– Unsalted Butter: The star of the show, unsalted butter is crucial for flavor and texture. It provides the rich, creamy taste that shortbread cookies are known for. Using unsalted butter allows you to control the amount of salt in the recipe, ensuring a balanced flavor profile. It’s important to let the butter come to room temperature before starting, as this will help it cream more easily with the sugar.
– Icing Sugar: Also known as powdered sugar, icing sugar is preferred for shortbread cookies due to its fine texture. It dissolves quickly, allowing for a smoother batter and contributing to the melt-in-your-mouth quality of the finished cookies. The small amount of cornstarch often included in icing sugar helps prevent clumping and contributes to the tender texture of the cookies.
– All-Purpose Flour: This ingredient forms the foundation of the cookie dough. All-purpose flour provides structure to the cookies, allowing them to hold their shape while still maintaining a soft texture. Be careful not to overmix once the flour is added, as this can lead to denser cookies.
– Cornstarch: Cornstarch is a key ingredient that sets whipped shortbread cookies apart from other cookie types. It interferes with gluten formation, which helps create a more tender, crumbly texture. This is essential for achieving that melt-in-your-mouth quality that makes these cookies so special.
– Vanilla Extract: Vanilla extract enhances the overall flavor of the cookies, adding a warm, sweet note that complements the buttery richness. Using high-quality vanilla extract is essential, as it can significantly impact the final taste of your cookies.
– Salt: While it may seem counterintuitive to add salt to a sweet cookie, a small amount of salt is crucial for balancing the sweetness and enhancing the overall flavor. It brings out the buttery notes and prevents the cookies from tasting one-dimensional.
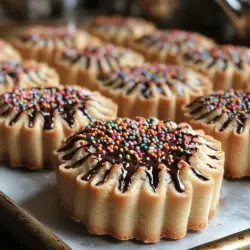
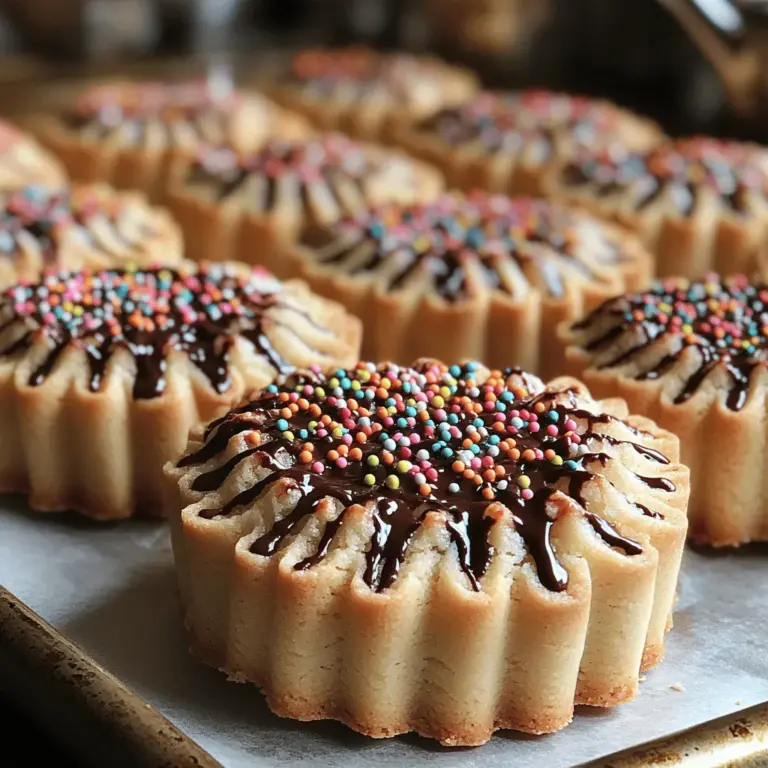
– Optional Toppings: Whipped shortbread cookies are incredibly versatile, making them a perfect canvas for creativity. Consider adding toppings such as chocolate drizzle, crushed nuts, or sprinkles to personalize your cookies. These additions can elevate the visual appeal and introduce new flavors and textures.
Step-by-Step Guide to Making Whipped Shortbread Cookies
Creating delightful whipped shortbread cookies is a straightforward process that anyone can master. Follow these essential steps to ensure your cookies come out perfectly every time.
Preparation and Pre-Baking Tips
Before you start mixing your ingredients, it’s crucial to prepare your workspace and gather all the necessary tools. Preheat your oven to 350°F (175°C) to ensure it’s ready for baking. Line a baking sheet with parchment paper to prevent sticking and allow for easy cleanup. Having everything ready will streamline the process and help you focus on creating your delicious cookies.
Creaming the Butter and Sugar
The first step in making whipped shortbread cookies is to cream the room-temperature unsalted butter and icing sugar together. This step is crucial as it incorporates air into the mixture, creating a light and fluffy texture. Use an electric mixer on medium speed for about 3-4 minutes until the mixture becomes pale and fluffy. Scrape down the sides of the bowl as needed to ensure even mixing. The goal is to achieve a creamy consistency that will provide the perfect base for your cookies.
Tips for Achieving the Perfect Fluffy Texture
To achieve the ideal fluffy texture, ensure that your butter is at the right temperature. If it’s too cold, it won’t cream properly, and if it’s too warm, it may become greasy. The butter should be soft enough to leave an indentation when pressed but not so soft that it melts. Additionally, taking the time to cream the butter and sugar thoroughly is essential. This step provides the lift that will make your cookies light and airy.
Incorporating the Vanilla Extract
Once your butter and sugar are creamed to perfection, it’s time to add the vanilla extract. Pour in the vanilla and mix for an additional 30 seconds to incorporate it evenly into the batter. The quality of the vanilla extract plays a significant role in the flavor profile of your cookies, so choose a high-quality product for the best results.
Combining Dry Ingredients
In a separate bowl, sift together the all-purpose flour, cornstarch, and salt. Sifting helps to aerate the dry ingredients and break up any lumps, ensuring a smooth cookie dough. Gradually add the dry ingredients to the creamed butter and sugar mixture, mixing on low speed until just combined. Be careful not to overmix, as this can lead to tougher cookies. The dough should come together without being sticky.
The Significance of Proper Mixing Techniques
Proper mixing techniques are vital in baking, as they can significantly affect the texture and consistency of your cookies. When combining the dry ingredients with the wet ingredients, mix just until you see no more flour streaks. Overmixing can develop the gluten in the flour, resulting in denser cookies—something we want to avoid with whipped shortbread.
Now that you have a solid understanding of the ingredients and the initial steps for making whipped shortbread cookies, you are well on your way to creating a delightful treat that is sure to impress. The next part of our guide will delve into the remaining steps, including shaping the cookies, baking, and enjoying them fresh from the oven. Stay tuned for the continuation of this scrumptious journey in cookie-making!

Mixing the Dough
After gathering all your ingredients, it’s time to mix the dough for your delightful whipped shortbread cookies. Begin by creaming together the softened butter and sugar until the mixture is light and fluffy. This process generally takes about 3-5 minutes, depending on your mixer speed. The goal is to incorporate air into the butter, which creates a lighter texture for your cookies.
Once you achieve the desired consistency, gradually add in the all-purpose flour and cornstarch. Use a spatula or wooden spoon to gently fold the dry ingredients into the mixture, being careful not to over-mix. Over-mixing can lead to tough cookies, which is the opposite of what we want for our light and delicate whipped shortbreads.
Signs to Look For to Avoid Over-Mixing
As you mix, keep an eye out for a few telltale signs of over-mixing. The dough should come together without any dry flour remaining, but it should not be too sticky or elastic. If you notice that the dough is becoming shiny or stretchy, it’s a clear indication that you’ve mixed it too much. Aim for a cohesive ball that holds together when pressed, but still has a slightly crumbly texture.
Shaping the Cookies
Shaping your whipped shortbread cookies is where the fun begins! You have two primary techniques to choose from: piping and scooping.
Techniques for Piping Versus Scooping
If you decide to pipe your cookies, fit a piping bag with a large star tip and fill it with your cookie dough. This method allows you to create beautiful shapes and patterns, enhancing the visual appeal of your cookies. Make sure to practice on a piece of parchment paper first to get the hang of it.
On the other hand, if you prefer the easier method of scooping, use a cookie scoop or a tablespoon to portion the dough. Ensure each scoop is uniform in size to promote even baking. A cookie scoop often results in perfectly rounded cookies, while a tablespoon can give you a more rustic look.
Visual Cues for Uniform Sizes
Regardless of the method you choose, uniform sizes are essential for even baking. If you’re piping, aim for each cookie to be about 1 inch in diameter. For scooped cookies, ensure they are roughly the same size, about 1 tablespoon each. This consistency not only helps with baking time but also enhances the aesthetic appeal of your cookie platter.
Decorating Your Whipped Shortbread Cookies
Once your cookies are shaped and ready to go, the next step is decorating them. Decorating adds a personal touch and can elevate your cookies from simple to stunning.
Ideas for Toppings and Their Impact on Presentation and Taste
Consider various toppings that not only enhance the appearance but also complement the flavor of your cookies. Here are some popular ideas:
– Chocolate Drizzle: A classic choice that adds richness. Melt chocolate and drizzle it over cooled cookies for a sophisticated look.
– Crushed Nuts: Sprinkling crushed nuts like pecans or almonds introduces a delightful crunch and nutty flavor, creating a wonderful contrast to the tender cookie texture.
– Colored Sprinkles: For a fun and festive look, especially during holidays, add colorful sprinkles. They brighten up your cookies and appeal to both children and adults alike.
Baking the Perfect Whipped Shortbread Cookies
Now that your cookies are prepped and decorated, it’s time to bake them to perfection.
Ideal Baking Conditions and Times
Preheat your oven to 350°F (175°C). Line your baking sheets with parchment paper to prevent sticking. Place your cookies about 1-2 inches apart on the sheets to allow for slight spreading. Bake for 10-12 minutes, or until the edges are lightly golden. The centers may appear slightly underbaked, but they will firm up as they cool.
Why Monitoring Color and Texture is Crucial
Monitoring the color and texture of your cookies is key to achieving that perfect melt-in-your-mouth experience. Look for a very light golden color around the edges. If they begin to brown too much, they will become crisp rather than tender.
Understanding the Cooling Process
Once your cookies are baked, it’s essential to let them cool properly. Allow them to sit on the baking sheet for about 5 minutes before transferring them to a wire rack. This cooling process helps the cookies set and lets excess moisture escape, preventing sogginess.
Importance of Cooling on a Wire Rack for Texture
Cooling on a wire rack is vital for the desired texture of your whipped shortbread cookies. The airflow around the cookies prevents them from steaming and helps maintain their soft and crumbly nature. After about 15-20 minutes on the rack, your cookies will be ready to enjoy.
Storing and Serving Whipped Shortbread Cookies
Once your cookies are baked and cooled, proper storage is crucial to maintain their freshness.
Best Practices for Storing Cookies to Maintain Freshness
Place your cookies in an airtight container at room temperature. They can typically last for up to a week, maintaining their delightful texture. If you want to extend their shelf life, consider freezing them. Layer the cookies between parchment paper in an airtight freezer bag, where they can last for up to three months.
Serving Suggestions for Different Occasions
Whipped shortbread cookies are versatile for various occasions. Serve them as part of a festive cookie platter during holiday gatherings, or enjoy them as a simple afternoon treat with tea or coffee. They also make great gifts when arranged in a decorative tin.
Pairing with Beverages: Tea, Coffee, or Milk
These cookies pair exceptionally well with beverages. A warm cup of tea or coffee complements their richness beautifully, while a glass of milk is a nostalgic choice that delights both kids and adults alike.
Ideal Settings for Sharing Cookies with Friends and Family
Consider hosting a cookie exchange or a tea party where these cookies can shine. Their light texture and delightful flavor make them a perfect addition to any gathering, ensuring they will be a hit among guests.
Nutritional Insights of Whipped Shortbread Cookies
Understanding the nutritional aspect of your baking can help you enjoy them responsibly.
Breakdown of Nutritional Information Per Serving
Each whipped shortbread cookie typically contains around 100 calories, with varying amounts of sugar and fat depending on your specific recipe and portion size. They are a treat to savor in moderation, especially given their rich flavor and delicate nature.
Discussion on Moderation and Indulgence in Baked Goods
While indulging in these delightful cookies, it’s important to practice moderation. Enjoying a few cookies as a treat can be part of a balanced diet, allowing you to savor the joy of homemade baking without overdoing it.
Conclusion: Enjoying the Simple Pleasure of Whipped Shortbread Cookies
In conclusion, making whipped shortbread cookies is not just about the end product; it’s about the joy and satisfaction that comes from baking. The simple pleasure of creating these light, tender cookies from scratch can be incredibly rewarding. Their versatility allows you to customize them with various toppings and celebrate different occasions.
Baking can serve as a wonderful creative outlet, inviting you to experiment with flavors and techniques. So gather your ingredients, preheat your oven, and indulge in the delightful experience of whipping up your own batch of shortbread cookies. Whether for yourself or to share with loved ones, these cookies will surely bring smiles and satisfaction to your kitchen.

