Introduction
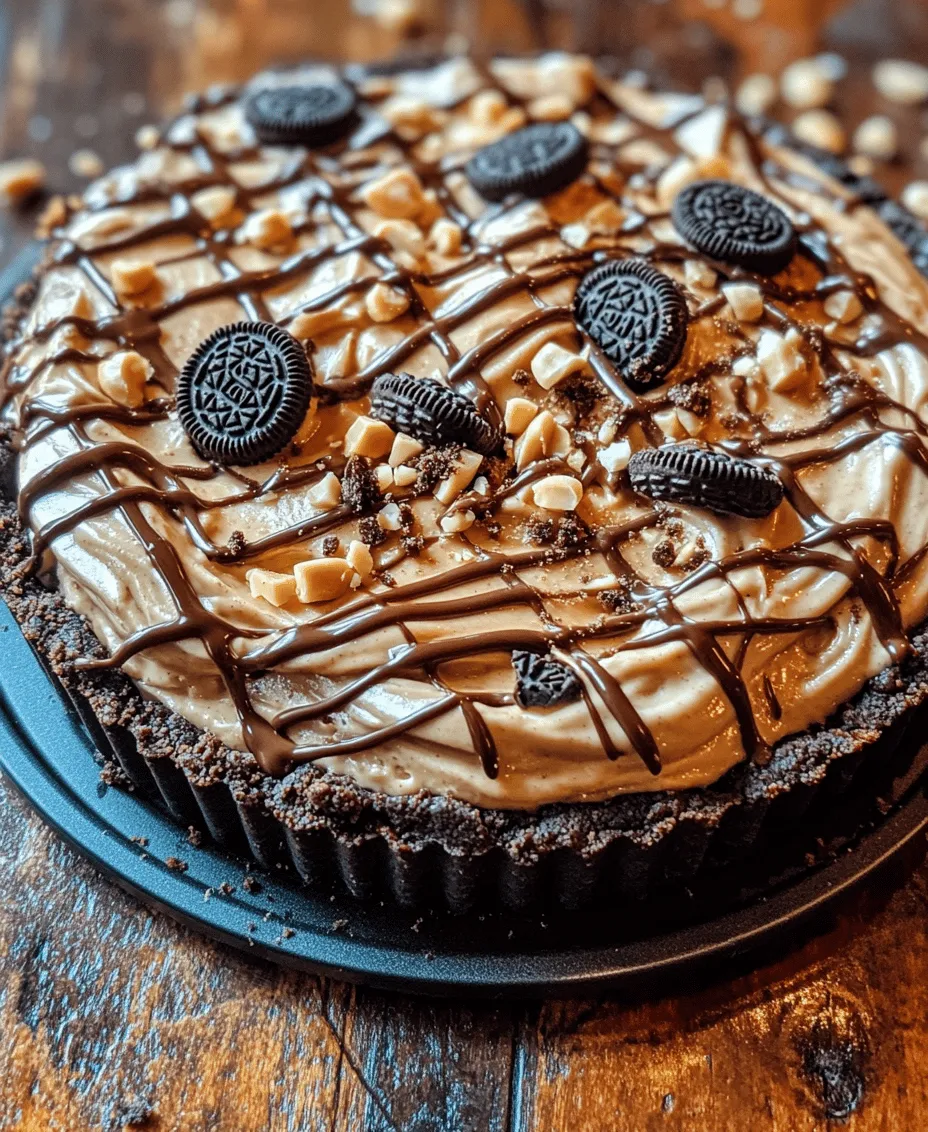
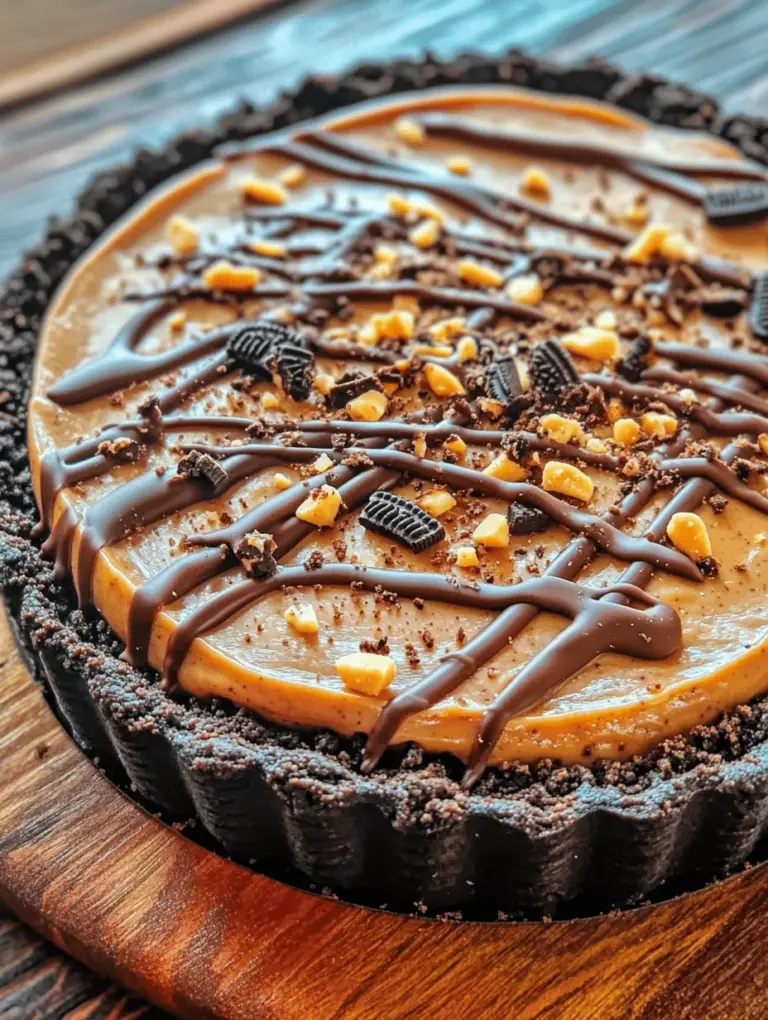
If you’re searching for a dessert that perfectly marries the rich flavors of chocolate and peanut butter, look no further than the Decadent Oreo Peanut Butter Pie. This pie is an irresistible treat that showcases the beloved Oreo cookie in a new and exciting way. The combination of a crunchy Oreo crust, a creamy peanut butter filling, and a luscious chocolate topping makes this dessert a crowd-pleaser at any gathering. Whether it’s a casual family dinner or a special celebration like a birthday or holiday party, this pie is sure to impress guests of all ages.
One of the best aspects of this recipe is its simplicity. With no baking required, you can whip up this dessert in no time, making it an ideal option for those who want to create something special without spending hours in the kitchen. This no-bake approach not only saves time but also ensures that the pie maintains a light and airy texture that melts in your mouth. As you delve into this guide, you’ll discover how easy it is to create this decadent dessert that promises to be the highlight of your meal.
The Allure of Oreo Peanut Butter Pie
Oreo cookies have been a staple in dessert recipes for decades, and their versatility is unmatched. From classic milkshake recipes to sophisticated cheesecakes, Oreos bring a delightful crunch and a rich, chocolatey flavor that elevates any dish. Their popularity is well-deserved, and when combined with the creamy goodness of peanut butter, they create a dessert experience unlike any other.
In recent years, no-bake desserts have gained immense popularity, especially among home bakers looking for convenience without compromising on flavor. The appeal of these recipes lies in their ease of preparation; often requiring just a few simple steps and minimal equipment, no-bake desserts allow even novice cooks to create something that looks and tastes impressive. The Decadent Oreo Peanut Butter Pie perfectly embodies this trend, offering a hassle-free way to indulge in a luxurious treat.
The unique flavor profile of peanut butter and chocolate is another reason why this pie is so beloved. The nutty richness of peanut butter complements the sweetness of chocolate, creating a harmonious balance that tantalizes the taste buds. This combination is not only satisfying but also nostalgic for many, evoking memories of childhood favorites. By incorporating these flavors into a pie, you get a dessert that is not only visually appealing but also brings a sense of comfort and joy.
Ingredients Overview
Creating the Decadent Oreo Peanut Butter Pie requires a few key ingredients that come together to create a stunning dessert. Here’s what you will need:
– Oreo Cookies: The star of the crust, Oreos provide a perfect chocolatey base for the pie.
– Butter: Melted butter is essential for binding the crushed cookies together, ensuring a sturdy and flavorful crust.
– Cream Cheese: Softened cream cheese is crucial for the filling, offering a smooth texture that blends beautifully with the peanut butter.
– Peanut Butter: The hero of this recipe, creamy peanut butter adds richness and depth.
– Powdered Sugar: This sweetener balances the flavors in the filling, providing the right amount of sweetness without being overpowering.
– Cool Whip or Heavy Whipping Cream: These ingredients create a light and fluffy texture for the filling, making the pie feel indulgent without being too dense.
While these ingredients are essential for the classic version of the pie, there are also optional ingredients that can elevate your dessert further. For instance, adding chocolate chips or chopped peanuts as a garnish not only enhances the visual appeal but also adds extra texture and flavor. Quality ingredients are paramount for achieving the best results, so opt for high-quality peanut butter and fresh cream cheese to ensure your pie tastes divine.
Step-by-Step Guide to Creating the Perfect Oreo Peanut Butter Pie
Preparation of the Crust
Before diving into the filling, it’s important to prepare the crust properly. Begin by preheating your oven to 350°F (175°C). Preheating is crucial as it ensures an even baking process, providing a crisp texture for your crust.
Next, take your Oreo cookies and crush them into fine crumbs. This step is foundational for a well-structured crust. You can use a food processor for convenience or place the cookies in a resealable plastic bag and crush them with a rolling pin. Aim for crumbs that are fine and uniform; larger pieces may lead to a crumbly crust that doesn’t hold together well.
Once you’ve achieved the desired crumb consistency, transfer the crushed Oreos to a mixing bowl, and add melted butter. The melted butter acts as a glue, binding the crumbs together. It’s important to mix thoroughly until all the crumbs are well-coated with butter; this will help create a cohesive crust.
Now comes the fun part—pressing the mixture into your pie plate. Using your fingers or the bottom of a measuring cup, firmly press the Oreo mixture into the bottom and up the sides of the pie plate. Be sure to pack it down tightly to ensure it holds its shape when serving.
After you’ve finished pressing the crust, place it in the preheated oven and bake for about 10 minutes. Baking the crust enhances its flavor and adds a lovely texture, creating a crunchy base for the creamy filling. Once it’s done baking, allow the crust to cool completely before adding the filling.
Crafting the Creamy Filling
While the crust is cooling, it’s time to prepare the creamy peanut butter filling. Start by ensuring your cream cheese is softened to room temperature; this is crucial for achieving a smooth and lump-free filling. If your cream cheese is too cold, it may lead to a chunky texture, which we want to avoid.
In a large mixing bowl, combine the softened cream cheese and peanut butter. Using an electric mixer, blend the two ingredients together until they are completely smooth and well incorporated. This should take about 2-3 minutes on medium speed. The goal is to create a uniform mixture where the cream cheese and peanut butter are fully combined, resulting in a creamy base for your pie.
Next, gradually add the powdered sugar to the bowl, mixing continuously until the sugar is fully incorporated. The powdered sugar not only sweetens the filling but also contributes to its overall texture. Once the mixture is smooth and combined, gently fold in the Cool Whip or heavy whipping cream. This step is essential for adding lightness and fluffiness to your filling, creating a delightful contrast to the dense crust.
Be careful not to overmix at this stage; you want to maintain the airy texture that the whipped cream provides. Once everything is combined, pour the filling into the cooled Oreo crust, spreading it evenly with a spatula.
With these initial steps complete, your Oreo Peanut Butter Pie is well on its way to becoming a show-stopping dessert that will have everyone asking for seconds. Follow along as we continue to explore the final touches and presentation tips in the next part of this article.

Mixing the Filling: Peanut Butter, Powdered Sugar, and Vanilla Extract
To create the luscious filling for your Decadent Oreo Peanut Butter Pie, start by gathering your ingredients: creamy peanut butter, powdered sugar, and pure vanilla extract. In a large mixing bowl, combine 1 cup of creamy peanut butter with 1 cup of powdered sugar. The powdered sugar is essential not only for sweetness but also for achieving the right texture. Next, add 1 teaspoon of vanilla extract for flavor depth.
Using a hand mixer or stand mixer, beat the ingredients together on medium speed until they are well combined. The goal is to create a smooth, lump-free mixture. Be cautious not to overmix, as this can lead to a dense filling. A well-combined mixture should be thick but still airy. If you notice that the mixture is too stiff, you can add a splash of milk to loosen it slightly without compromising its integrity.
The Role of Whipped Topping
Whipped topping is a game changer in this recipe, ensuring that your pie filling remains light and airy. After mixing the peanut butter, powdered sugar, and vanilla, it’s time to fold in 1 cup of whipped topping. The key to achieving the perfect texture is to gently fold the whipped topping into the peanut butter mixture. Use a spatula to incorporate the whipped topping, ensuring you maintain as much air as possible. This will give your filling a fluffy quality that beautifully contrasts with the dense Oreo crust.
Assembling the Pie
Pouring and Spreading the Filling
Once your filling is prepared, it’s time to assemble the pie. Carefully pour the peanut butter filling into the chilled Oreo crust. Use a spatula to spread the filling evenly across the crust, making sure to reach the edges for a polished look. The filling should be smooth and even, creating a lovely contrast against the dark crust.
Chilling Time and Its Importance
After you’ve spread the filling, it’s crucial to chill the pie for at least 4 hours, or preferably overnight. Chilling helps the filling set properly, allowing it to firm up and hold its shape when sliced. This step is vital for ensuring that each slice maintains its integrity and does not crumble when served. If you’re pressed for time, consider placing the pie in the freezer for about 1-2 hours, but keep an eye on it to avoid freezing solid.
Creative Garnishing Ideas
Once your pie has set, it’s time to make it visually stunning with some creative garnishing. Start with melting chocolate chips for a drizzle. To do this, place ½ cup of chocolate chips in a microwave-safe bowl and heat in 30-second intervals, stirring in between until smooth. Once melted, transfer the chocolate to a piping bag or a ziplock bag with a corner snipped off for easy drizzling.
Additional Toppings
For added crunch and flavor, consider topping your pie with crushed Oreos and chopped peanuts. Sprinkle a generous amount of crushed Oreos on top of the pie for a delightful texture and appearance. Chopped peanuts can also add a nice crunch and enhance the peanut butter flavor.
Presentation Tips
Presentation is key when serving desserts. Consider serving the pie on a decorative cake stand and adding some fresh mint leaves around the base for a pop of color. You can also serve slices on individual dessert plates, garnished with a dollop of whipped cream or a scoop of vanilla ice cream for an extra indulgent touch.
Serving the Pie
When it comes time to slice and serve your Oreo Peanut Butter Pie, aim for clean cuts to maintain the visual appeal of each slice. A hot knife can help achieve cleaner cuts; simply run the knife under hot water, wipe it dry, and then slice through the pie.
To complement the rich flavors of the pie, consider serving it with a dollop of whipped cream or a scoop of vanilla ice cream. The creaminess of the ice cream balances the richness of the pie, creating a delightful experience.
Nutritional Information
As delicious as this pie is, it’s important to enjoy it in moderation. Each slice of the Decadent Oreo Peanut Butter Pie contains approximately 350 calories, with a breakdown of about 20 grams of fat, 40 grams of carbohydrates, and 6 grams of protein. Portion sizes can vary based on how thickly you slice the pie, so be mindful of serving sizes when indulging in this rich dessert.
Conclusion
The Decadent Oreo Peanut Butter Pie is not just a dessert; it’s an experience. With its creamy peanut butter filling, crunchy Oreo crust, and creative garnishes, this pie is sure to impress friends and family alike. The ease of preparation and the joy of creating something so delicious from scratch make this recipe a must-try for any dessert lover.
Encouragement is key: gather your ingredients, follow the steps, and don’t hesitate to share your creation with loved ones. The warmth of homemade desserts brings people together, and there’s nothing quite like enjoying a slice of pie with those you care about. Dive into this delectable treat and relish every bite!

