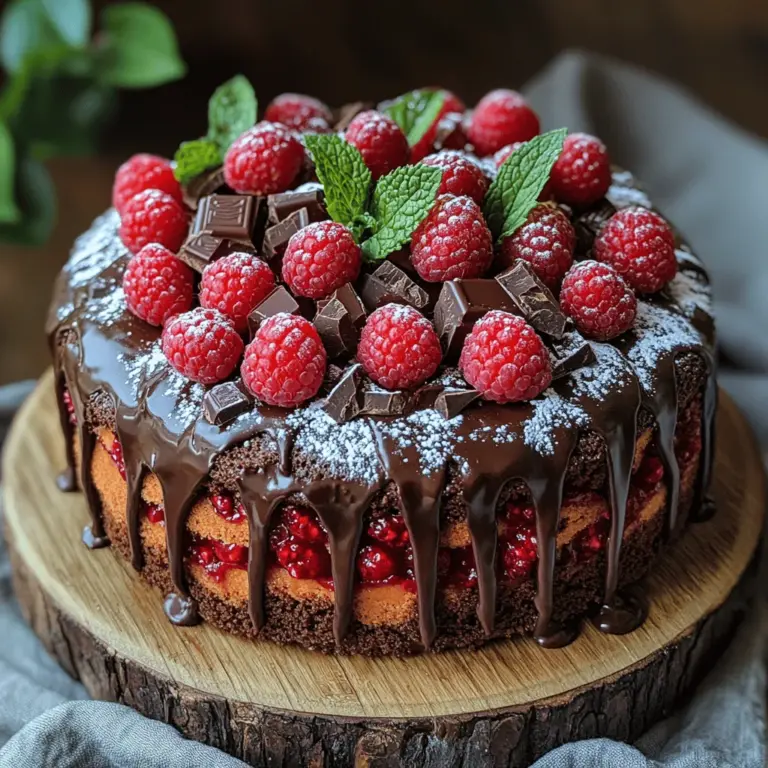
Decadent Chocolate Cake with Fresh Raspberry Bliss

WANT TO SAVE THIS RECIPE?

Introduction

Few desserts can rival the allure of a classic chocolate cake. Rich, moist, and undeniably indulgent, chocolate cake has a way of captivating hearts and tantalizing taste buds. It’s a dessert that appeals to both the young and the young-at-heart, making it the perfect centerpiece for birthdays, anniversaries, or simply a celebratory gathering. Yet, what if this beloved treat could be elevated to new heights? Enter the Decadent Chocolate Cake with Fresh Raspberry Bliss – a delightful twist that combines the deep, rich flavors of chocolate with the bright, tangy notes of fresh raspberries.

This recipe goes beyond the traditional chocolate cake by introducing a luscious raspberry filling that beautifully complements the cake’s dense texture. The pairing of chocolate and raspberries is a timeless classic, reminiscent of gourmet desserts found in the finest bakeries. The sweet and tart flavors create an exquisite balance that makes every bite an unforgettable experience. Whether you’re a seasoned baker or a novice in the kitchen, this cake promises to impress your family and friends, leaving everyone asking for seconds.

Understanding the Ingredients

To create the Decadent Chocolate Cake with Fresh Raspberry Bliss, it’s essential to understand the key ingredients that contribute to its exceptional taste and texture. Each component plays a vital role in achieving the perfect balance of flavors and the ideal cake structure.

Key Ingredients in the Chocolate Cake

1. All-Purpose Flour: This is the foundation of the cake, providing structure and stability. The right flour-to-liquid ratio is crucial for achieving a tender crumb.

2. Cocoa Powder: Unsweetened cocoa powder is essential for imparting a rich chocolate flavor. It’s important to choose high-quality cocoa for the best results.

3. Granulated Sugar: Sugar not only sweetens the cake but also helps create a moist texture. It works in harmony with flour and fat to create that melt-in-your-mouth experience.

4. Baking Powder and Baking Soda: These leavening agents are critical for the cake’s rise. They react with moisture and heat, creating air bubbles that lighten the batter.

5. Salt: A pinch of salt enhances all the flavors, balancing the sweetness and deepening the chocolate taste.

6. Eggs: Eggs provide moisture and richness while acting as a binding agent. They contribute to the overall stability of the cake.

7. Buttermilk: This is a secret ingredient that adds moisture and richness, creating a tender crumb. The acidity in buttermilk also reacts with baking soda, enhancing the cake’s rise.

8. Vegetable Oil: Using oil instead of butter contributes to a moist cake texture that stays fresh longer.

9. Vanilla Extract: This adds a subtle depth of flavor, rounding out the chocolate and raspberry profiles beautifully.

The Role of Fresh Raspberries

Fresh raspberries are the star of the filling, bringing a vibrant color and a burst of flavor that contrasts beautifully with the rich chocolate cake. Their natural sweetness paired with a slight tartness elevates the entire dessert. When selecting raspberries, look for plump, firm berries that are bright in color, as they will provide the best flavor and texture.

The raspberry filling is easy to make and can be prepared ahead of time, allowing the flavors to meld beautifully. Incorporating fresh raspberries not only enhances the cake’s taste but also adds a touch of sophistication, making this dessert a true showstopper.

The Craft of Baking a Decadent Chocolate Cake

Prepping for Success: Preheating the Oven and Preparing Cake Pans

Before diving into mixing the ingredients, it’s crucial to prepare your workspace. The first step in any baking endeavor is to preheat your oven. Set it to 350°F (175°C) to ensure it reaches the correct temperature by the time your batter is ready for baking. Preheating is vital because it allows for even baking and helps the cake rise properly from the moment it goes into the oven.

Next, focus on preparing the cake pans. This is a vital step that should never be overlooked, as it prevents the cake from sticking. Here’s how to do it:

1. Greasing the Pans: Use a generous amount of butter or non-stick spray to coat the bottom and sides of the cake pans. If you prefer, you can also use parchment paper for an extra layer of protection.

2. Flouring the Pans: After greasing, dust the pans with flour. Tap the sides gently to remove any excess flour. This method creates a barrier that facilitates easy removal of the cake after baking.

By taking these steps, you set yourself up for success, making it easier to achieve a beautiful, intact cake.

Creating the Perfect Chocolate Cake Batter

Once your pans are prepped and the oven is preheated, it’s time to create the cake batter. The process of mixing is just as important as the ingredients themselves. Here’s a step-by-step guide to achieving a smooth, decadent batter:

1. Combine Dry Ingredients: In a large mixing bowl, whisk together the all-purpose flour, cocoa powder, baking powder, baking soda, and salt. This helps to evenly distribute the leavening agents throughout the flour.

2. Mix Wet Ingredients: In another bowl, combine the granulated sugar, eggs, buttermilk, vegetable oil, and vanilla extract. Whisk until well blended; this ensures a uniform texture in the batter.

3. Integrate the Mixtures: Gradually add the wet ingredients to the dry ingredients, mixing gently. It’s important not to overmix at this stage. Overmixing can lead to a dense cake instead of a light, airy one. Mix just until the dry ingredients are incorporated.

4. Check Ingredient Temperatures: For the best results, make sure that your eggs and buttermilk are at room temperature. This helps to create a smoother batter and ensures that all ingredients blend well together.

5. Achieving a Smooth Batter: Use a spatula to scrape down the sides of the bowl, ensuring all ingredients are mixed evenly. The batter should be thick yet pourable, with no lumps remaining.

Baking to Perfection

With your batter ready, it’s time to pour it into the prepared pans and bake. Baking is a delicate process that requires attention to both time and temperature. Here’s how to ensure your cake bakes perfectly:

1. Divide the Batter: Pour an equal amount of batter into each prepared cake pan. Use a spatula to smooth the tops for even baking.

2. Bake: Place the pans in the preheated oven and bake for 25 to 30 minutes. It’s important to check for doneness as baking times can vary based on your oven and the size of your pans.

3. Signs of Doneness: To test if the cakes are done, insert a toothpick into the center of each cake. If it comes out clean or with a few moist crumbs, the cakes are ready. If the toothpick comes out wet, give it a few more minutes and test again.

4. Cooling Tips: Once baked, remove the cakes from the oven and let them cool in the pans for about 10 minutes. Then, carefully transfer them to a wire rack to cool completely. Allowing the cakes to cool completely is crucial for maintaining moisture and achieving the optimal texture when frosting.

Crafting the Raspberry Bliss Filling

The final step in creating the Decadent Chocolate Cake with Fresh Raspberry Bliss is to prepare the raspberry filling. This vibrant layer adds a refreshing contrast to the rich chocolate cake, making every bite a delightful experience.

The Role of Fresh Raspberries

Fresh raspberries are not just a topping; they are an integral part of the cake’s flavor profile. Their natural sweetness and tartness balance the richness of the chocolate, creating a dynamic dessert that excites the palate.

Cooking Instructions for the Raspberry Filling

1. Ingredients Needed: Gather fresh raspberries, granulated sugar, and a splash of lemon juice. The sugar will help to sweeten the filling, while lemon juice adds acidity that brightens the flavors.

2. Cooking the Raspberries: In a medium saucepan over medium heat, combine the raspberries, sugar, and lemon juice. Stir gently to combine, allowing the raspberries to break down and release their juices.

3. Simmer: Continue to cook the mixture, stirring occasionally, until it thickens slightly. This should take about 5 to 10 minutes. You want the filling to be spreadable but not too runny, as it needs to hold its shape between the cake layers.

4. Cool the Filling: Once the filling has reached the desired consistency, remove it from the heat and let it cool completely before using. This cooling step is essential; a warm filling can melt the frosting and make a mess of the cake layers.

5. Balancing Sweetness and Acidity: Taste the filling as it cools and adjust the sweetness by adding more sugar if necessary. The goal is to achieve a harmonious blend of flavors that complements the chocolate cake.

With the raspberry filling prepared and the cake layers baked and cooled, you’re well on your way to assembling a stunning dessert that will impress anyone lucky enough to indulge in it. The next steps involve frosting and layering, where the real magic happens, turning your decadent chocolate cake into a masterpiece of flavor and presentation. Stay tuned for the next part of the recipe where we will explore these exciting final steps!
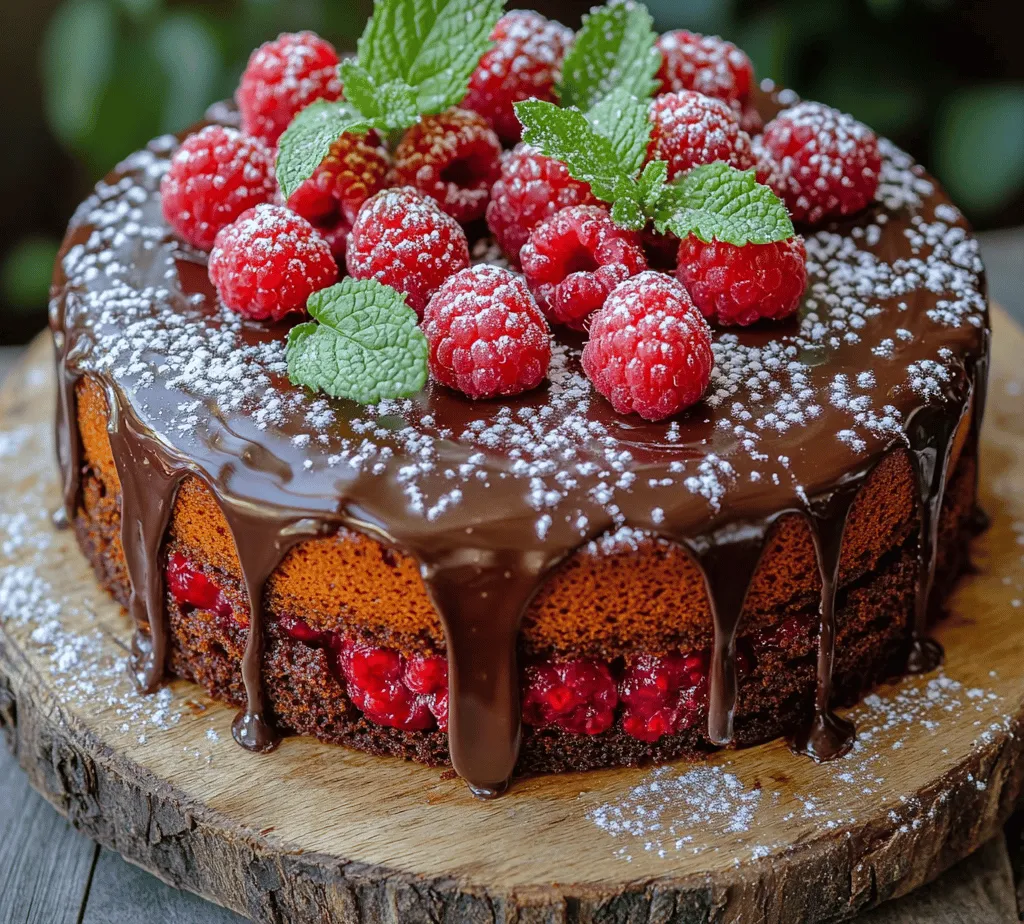
Few desserts can rival the allure of a classic chocolate cake. Rich, moist, and undeniably indulgent, chocolate cake has a way of captivating hearts and tantalizing taste buds. It’s a dessert that appeals to both the young and the young-at-heart, making it the perfect centerpiece for birthdays, anniversaries, or simply a celebratory gathering. Yet, what if this beloved treat could be elevated to new heights? Enter the <strong>Decadent Chocolate Cake with Fresh Raspberry Bliss</strong> – a delightful twist that combines the deep, rich flavors of chocolate with the bright, tangy notes of fresh raspberries.” /></p>
</p>
<h3>How Cornstarch Contributes to the Filling’s Texture</h3>
</p>
<p>Cornstarch plays a pivotal role in achieving the perfect texture for your raspberry filling. When combined with fresh raspberries, cornstarch acts as a thickening agent, ensuring a luscious, creamy consistency that beautifully complements the rich chocolate ganache. By cooking the raspberries with cornstarch, you create a filling that holds its shape between the layers of chocolate cake, preventing it from becoming runny or overly juicy. This not only enhances the cake’s overall mouthfeel but also allows for a delightful burst of raspberry flavor with every bite.</p>
</p>
<h3>Making the Luxurious Chocolate Ganache</h3>
</p>
<h4>The Allure of Chocolate Ganache as a Finishing Touch</h4>
</p>
<p>Chocolate ganache is the crowning glory of our decadent chocolate cake. Its smooth, velvety texture and rich flavor elevate any dessert, transforming simple ingredients into a luxurious treat. The ganache serves not only as a glaze to coat the cake but also adds a layer of indulgence that perfectly complements the tartness of the raspberry filling. With its glossy finish, chocolate ganache provides an inviting sheen that enhances the cake’s visual appeal, making it a showstopper at any gathering.</p>
</p>
<h4>Step-by-Step Guide to Creating the Ganache</h4>
</p>
<p>1. <strong>Ingredients Needed</strong>:</p>
<p>– 8 ounces of high-quality dark chocolate (at least 70% cocoa)</p>
<p>– 1 cup of heavy cream</p>
<p>– 2 tablespoons of unsalted butter (optional, for added richness)</p>
</p>
<p>2. <strong>Preparation</strong>:</p>
<p>– Start by chopping the dark chocolate into small, uniform pieces to ensure even melting. Place the chopped chocolate in a heatproof bowl.</p>
</p>
<p>3. <strong>Heating the Cream</strong>:</p>
<p>– In a small saucepan, heat the heavy cream over medium heat until it just begins to simmer. Remove it from the heat immediately to avoid boiling.</p>
</p>
<p>4. <strong>Combining Chocolate and Cream</strong>:</p>
<p>– Pour the hot cream over the chopped chocolate. Let the mixture sit for about 2-3 minutes to allow the chocolate to soften.</p>
</p>
<p>5. <strong>Mixing</strong>:</p>
<p>– Gently stir the mixture with a spatula or whisk until the chocolate is completely melted and the ganache is smooth. If using, add the unsalted butter at this stage for an extra touch of richness.</p>
</p>
<p>6. <strong>Cooling</strong>:</p>
<p>– Allow the ganache to cool at room temperature until it thickens to your desired consistency. For a pourable ganache, let it cool for about 10-15 minutes. For a spreadable consistency, refrigerate it for a short while.</p>
</p>
<h4>Importance of Chocolate Quality in Achieving a Rich Flavor</h4>
</p>
<p>When it comes to chocolate ganache, quality matters. The type of chocolate you choose directly influences the flavor and texture of the ganache. Opt for high-quality chocolate that contains at least 70% cocoa. The bitter notes from the dark chocolate will balance beautifully with the sweetness of the cake and the tartness of the raspberry filling, creating a harmonious flavor profile. Avoid using chocolate chips, as they often contain stabilizers that can alter the smoothness of your ganache.</p>
</p>
<h4>Tips for Ensuring a Smooth and Glossy Finish</h4>
</p>
<p>To achieve a flawless finish on your ganache, consider these essential tips:</p>
<p>– <strong>Be Gentle</strong>: Stir the ganache slowly and avoid whisking too vigorously, as this can introduce air bubbles, leading to a less glossy appearance.</p>
<p>– <strong>Temperature Control</strong>: Always work with warm ganache. If it cools too much, it will become too thick to spread. If it’s too hot, it may separate.</p>
<p>– <strong>Straining</strong>: If you notice any lumps after mixing, strain the ganache through a fine-mesh sieve to ensure a silky texture.</p>
</p>
<h3>Assembling Your Decadent Cake</h3>
</p>
<h4>Step-by-Step Instructions for Layering the Cake</h4>
</p>
<p>1. <strong>Prepare the Layers</strong>: Once your chocolate cake layers have cooled completely, level the tops with a serrated knife if necessary. This ensures even stacking, which is crucial for the cake’s overall presentation.</p>
</p>
<p>2. <strong>First Layer</strong>: Place the first layer of chocolate cake on a serving plate or cake board. Use a cake turntable if you have one for easier decorating.</p>
</p>
<p>3. <strong>Spread Raspberry Filling</strong>: Generously spread a layer of the raspberry filling on top of the first cake layer, leaving a small border around the edges to prevent overflow when adding the next cake layer.</p>
</p>
<p>4. <strong>Second Layer</strong>: Gently place the second cake layer on top of the raspberry filling. Repeat the process with the raspberry filling, adding it to the second layer.</p>
</p>
<p>5. <strong>Final Layer and Ganache</strong>: Place the final cake layer on top. At this stage, it’s best to chill the cake for about 30 minutes to set the raspberry filling before pouring the ganache.</p>
</p>
<h4>Importance of Even Layers for Presentation and Taste</h4>
</p>
<p>Even layers are essential not just for aesthetics but also for taste. Uniformity ensures that each slice boasts a balanced ratio of cake, filling, and ganache. When the layers are even, the cake is not only visually appealing but also offers a consistent taste experience. This attention to detail transforms your cake from delicious to extraordinary.</p>
</p>
<h4>Techniques for Spreading Raspberry Filling and Pouring Ganache</h4>
</p>
<p>– <strong>Spreading</strong>: Use an offset spatula to spread the raspberry filling evenly across each layer. This tool allows you to control the thickness and achieve a smooth surface.</p>
<p>– <strong>Pouring Ganache</strong>: To pour the ganache, start at the center of the cake and let it naturally drip down the sides. This technique creates a beautiful, cascading effect. If you prefer a neater finish, use a spatula to help spread the ganache around the sides.</p>
</p>
<h3>The Art of Garnishing</h3>
</p>
<h4>Creative Ideas for Decorating the Cake</h4>
</p>
<p>Garnishing your cake is where your creativity can truly shine. Here are some ideas to elevate your presentation:</p>
<p>– <strong>Fresh Raspberries</strong>: Scatter whole fresh raspberries on top of the ganache. Their vibrant color adds a pop of freshness.</p>
<p>– <strong>Chocolate Shavings</strong>: Use a vegetable peeler to create chocolate curls or shavings from a chocolate bar. Sprinkle them over the ganache for an elegant touch.</p>
<p>– <strong>Mint Leaves</strong>: Add a few fresh mint leaves for a contrasting color and a hint of freshness that complements the raspberries.</p>
</p>
<h4>Importance of Fresh Ingredients for Visual Appeal</h4>
</p>
<p>Using fresh ingredients not only enhances the flavor but also significantly improves the aesthetic of your dessert. Fresh fruits provide vibrant colors and textures that can brighten your cake, making it more appetizing. When garnishing, ensure that all ingredients are clean and free from blemishes to maintain the cake’s professional appearance.</p>
</p>
<h4>Suggestions for Alternative Garnishes to Suit Different Tastes</h4>
</p>
<p>Feel free to customize your cake according to your preferences or dietary needs:</p>
<p>– <strong>Nuts</strong>: Chopped pistachios or hazelnuts can add a delightful crunch and a unique flavor contrast.</p>
<p>– <strong>Edible Flowers</strong>: For a more sophisticated look, consider using edible flowers, such as violets or pansies.</p>
<p>– <strong>Caramel Drizzle</strong>: A light drizzle of caramel sauce can provide an additional layer of sweetness and a beautiful presentation.</p>
</p>
<h3>Serving Suggestions</h3>
</p>
<h4>Presentation Ideas for Showcasing the Cake</h4>
</p>
<p>Presenting your cake beautifully is just as important as how it tastes. Here are some presentation ideas:</p>
<p>– <strong>Cake Stand</strong>: Elevate your cake on a decorative cake stand to make it the centerpiece of your dessert table.</p>
<p>– <strong>Plates and Napkins</strong>: Use themed plates and napkins that match the occasion to enhance the overall experience.</p>
<p>– <strong>Slice Display</strong>: Consider cutting a slice and placing it on a separate plate to showcase the layers and filling when serving.</p>
</p>
<h4>Ideal Occasions for Serving the Decadent Chocolate Cake</h4>
</p>
<p>This decadent chocolate cake is perfect for a variety of occasions, including:</p>
<p>– <strong>Birthdays</strong>: A showstopper for anyone celebrating their special day.</p>
<p>– <strong>Weddings</strong>: Customize the garnishes to fit the theme of the wedding for an elegant reception dessert.</p>
<p>– <strong>Holiday Gatherings</strong>: Serve it at holiday parties or family gatherings for a festive treat that everyone will love.</p>
</p>
<h4>Pairing Recommendations with Beverages</h4>
</p>
<p>To enhance your dessert experience, consider these beverage pairings:</p>
<p>– <strong>Coffee</strong>: A rich espresso or a creamy latte complements the chocolate flavor beautifully.</p>
<p>– <strong>Tea</strong>: A floral tea, such as Earl Grey, can provide a pleasant contrast to the richness of the cake.</p>
<p>– <strong>Dessert Wines</strong>: Sweet dessert wines, like a late-harvest Riesling, can elevate the enjoyment of the chocolate and raspberry flavors.</p>
</p>
<h3>Nutritional Considerations</h3>
</p>
<h4>Overview of the Nutritional Profile of the Cake</h4>
</p>
<p>While this decadent chocolate cake is certainly a treat, being aware of its nutritional profile is essential for mindful indulgence:</p>
<p>– <strong>Calories</strong>: A slice of chocolate cake can range from 350 to 500 calories, depending on the size and ingredients used.</p>
<p>– <strong>Fat and Sugar Content</strong>: The cake contains higher levels of fats and sugars, mainly due to the ganache and filling.</p>
</p>
<h4>Discussion of Portion Control and Indulgence in Moderation</h4>
</p>
<p>Although this cake is a delightful indulgence, portion control is key to enjoying it without guilt. Consider slicing the cake into smaller pieces, allowing guests to savor a taste without overindulging. Encourage sharing, as enjoying desserts in good company can enhance the experience and lessen the temptation to overeat.</p>
</p>
<h3>Conclusion</h3>
</p>
<p>Creating a decadent chocolate cake with fresh raspberry filling is not only a rewarding baking project but also an opportunity to bring joy to those around you. The combination of rich chocolate and vibrant raspberry is a timeless classic that never fails to impress. As you embark on this delicious journey, remember that the joy of baking lies not just in the finished product but in the process itself. Embrace the creativity, savor the aromas, and share your creation with loved ones. Your decadent chocolate cake will surely become a cherished favorite, making every occasion a little sweeter.</p>
</div>

Few desserts can rival the allure of a classic chocolate cake. Rich, moist, and undeniably indulgent, chocolate cake has a way of captivating hearts and tantalizing taste buds. It’s a dessert that appeals to both the young and the young-at-heart, making it the perfect centerpiece for birthdays, anniversaries, or simply a celebratory gathering. Yet, what if this beloved treat could be elevated to new heights? Enter the Decadent Chocolate Cake with Fresh Raspberry Bliss – a delightful twist that combines the deep, rich flavors of chocolate with the bright, tangy notes of fresh raspberries.

Decadent Chocolate Cake with Fresh Raspberry Bliss

Indulge in the ultimate dessert experience with this Decadent Chocolate Cake featuring a luscious raspberry filling. Perfect for any celebration, this cake combines rich chocolate flavors with the bright, tartness of fresh raspberries. The moist layers are complemented by a smooth chocolate ganache, making it a showstopper at any gathering. Ideal for bakers of all skill levels, this delightful treat promises to impress and leave everyone asking for more. Make your next occasion memorable with this exquisite cake!

Ingredients
  

For the Chocolate Cake:

1 ¾ cups all-purpose flour

1 ¾ cups granulated sugar

¾ cup unsweetened cocoa powder

1 ½ tsp baking powder

1 ½ tsp baking soda

1 tsp salt

2 large eggs

1 cup whole milk

½ cup vegetable oil

2 tsp vanilla extract

1 cup boiling water

For the Raspberry Bliss Filling:

1 cup fresh raspberries (plus extra for garnish)

½ cup granulated sugar

2 tbsp lemon juice

1 tbsp cornstarch

2 tbsp water

For the Chocolate Ganache:

1 cup heavy cream

8 oz semi-sweet chocolate, chopped

1 tsp vanilla extract

For Decoration:

Fresh mint leaves

Optional: powdered sugar for dusting

Instructions
 

Preheat the Oven: Preheat your oven to 350°F (175°C). Grease and flour two 9-inch round cake pans.

    Prepare the Chocolate Cake Batter:

      - In a large mixing bowl, combine the flour, sugar, cocoa powder, baking powder, baking soda, and salt. Whisk until well combined.

        - Add the eggs, milk, oil, and vanilla extract. Beat on medium speed for 2 minutes until the batter is smooth.

          - Carefully stir in the boiling water (the batter will be thin).

            Bake the Cakes:

              - Pour the batter evenly into the prepared cake pans.

                - Bake in the preheated oven for 30-35 minutes, or until a toothpick inserted in the center comes out clean.

                  - Let the cakes cool in the pans for 10 minutes before transferring to wire racks to cool completely.

                    Make the Raspberry Bliss Filling:

                      - In a small saucepan, combine the fresh raspberries, granulated sugar, lemon juice, cornstarch, and water.

                        - Cook over medium heat, stirring gently, until the mixture comes to a boil and thickens (about 5 minutes).

                          - Remove from heat and let it cool completely.

                            Prepare the Chocolate Ganache:

                              - In a small saucepan, heat the heavy cream over medium heat until it begins to simmer. Remove from heat.

                                - Add the chopped chocolate and vanilla extract, stirring until the chocolate is melted and the mixture is smooth. Let it cool slightly.

                                  Assemble the Cake:

                                    - Place one layer of the chocolate cake on a serving platter. Spread a layer of the raspberry filling over the cake layer.

                                      - Place the second cake layer on top. Pour the chocolate ganache over the top, allowing it to drip down the sides.

                                        Garnish:

                                          - Decorate the top with fresh raspberries and mint leaves. Optionally, dust with powdered sugar for a touch of elegance.

                                            Serve:

                                              - Slice, serve, and bask in the bliss of this decadent chocolate experience!

                                                Prep Time: 30 minutes | Total Time: 1 hour 15 minutes | Servings: 12 slices

                                                  WANT TO SAVE THIS RECIPE?

                                                  Leave a Comment

                                                  Recipe Rating