Introduction
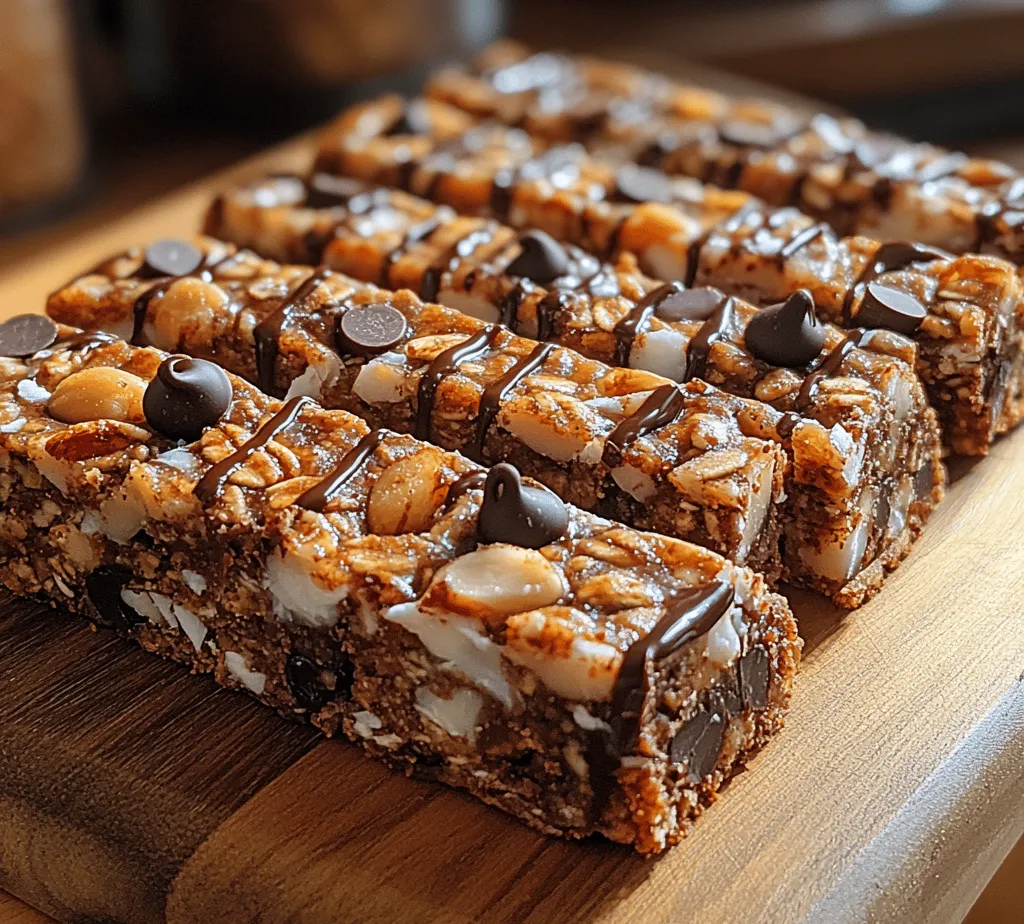
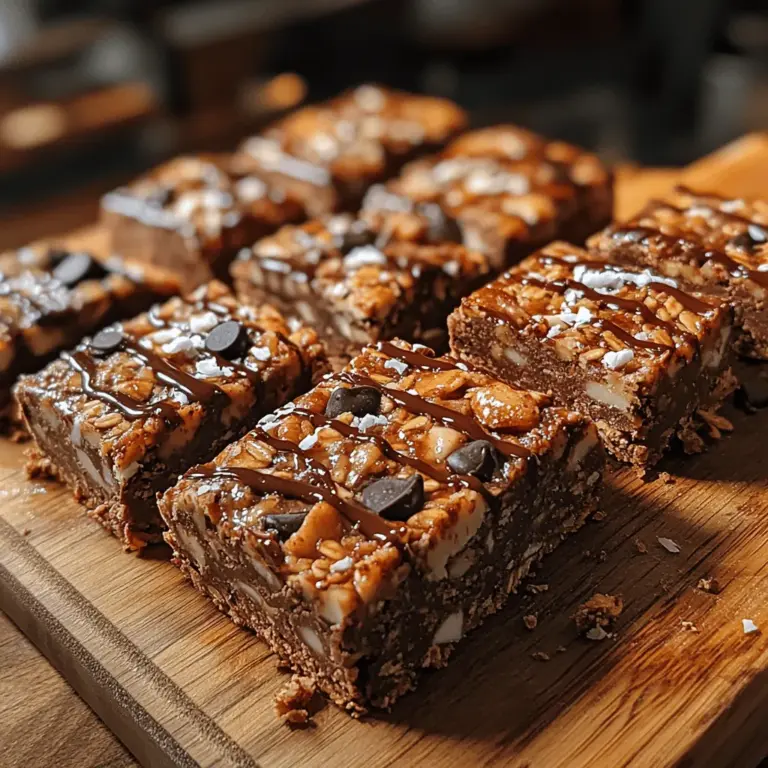
Granola bars have long been a staple in the realm of healthy snacking, cherished for their convenience and versatility. Whether you’re on the go, looking for a quick breakfast option, or in need of an afternoon pick-me-up, a granola bar can satisfy hunger while delivering essential nutrients. Among the myriad of granola bar recipes available, the Crunchy Cocoa Nut Granola Bars stand out for their delightful combination of flavors and textures, making them a favorite for both health enthusiasts and snack lovers alike.
This recipe not only highlights the rich taste of cocoa but also incorporates a blend of nuts and seeds, providing a deliciously satisfying crunch. With a perfect balance of sweetness from natural ingredients, these homemade granola bars offer an indulgent treat without the guilt often associated with store-bought snacks. The beauty of making your own granola bars lies in the ability to control the ingredients, ensuring they align with your dietary preferences and health goals.
In an era where health consciousness and budget considerations are paramount, opting for homemade snacks has never been more appealing. Store-bought granola bars can be packed with artificial sweeteners, preservatives, and hidden sugars that can detract from their nutritional value. By preparing your own Crunchy Cocoa Nut Granola Bars, you not only save money but also create a wholesome snack that you can feel good about sharing with family and friends.
Understanding the Ingredients
To truly appreciate the deliciousness and health benefits of Crunchy Cocoa Nut Granola Bars, it’s essential to understand the role each ingredient plays. Here’s a breakdown of the key ingredients and their nutritional benefits:
Rolled Oats: Source of Fiber and Energy
At the base of our granola bars are rolled oats, which provide a hearty foundation. Oats are an excellent source of dietary fiber, particularly beta-glucan, which is known for lowering cholesterol levels and promoting heart health. Additionally, oats are rich in complex carbohydrates, supplying sustained energy that keeps you feeling full longer. This makes them an ideal choice for breakfast or an energy-boosting snack.
Mixed Nuts: Healthy Fats and Protein
A delightful mix of nuts, such as almonds, walnuts, and cashews, adds both crunch and nutritional value to our granola bars. Nuts are packed with healthy fats, protein, and essential nutrients like vitamin E and magnesium. They also contribute to cardiovascular health and can help keep hunger at bay due to their satiating properties. The variety of nuts you choose can also introduce different flavor profiles and textures, making each batch of granola bars unique.
Unsweetened Cocoa Powder: Antioxidants and Rich Flavor
Cocoa powder is what gives our granola bars that delicious chocolatey flavor while also providing a wealth of health benefits. Unsweetened cocoa powder is rich in antioxidants, particularly flavonoids, which have been linked to improved heart health and cognitive function. By using unsweetened cocoa, we can enjoy the rich taste of chocolate without the added sugars that often accompany sweet treats.
Honey or Maple Syrup: Natural Sweeteners and Their Health Benefits
For sweetness, we turn to natural sweeteners like honey or maple syrup. Both options are less processed than traditional granulated sugar and come with their own set of health benefits. Honey has antibacterial properties and can soothe sore throats, while maple syrup contains antioxidants and essential minerals like manganese and zinc. The natural sweetness from these ingredients complements the rich cocoa flavor, resulting in a perfectly balanced bar.
Almond Butter or Peanut Butter: Nutritional Value and Flavor Profile
Nut butters are another essential ingredient in our granola bars, providing creaminess and binding the mixture together. Almond butter is a nutrient-dense option, rich in healthy fats, protein, and vitamin E. Peanut butter, on the other hand, is not only delicious but also provides a good source of protein and additional fiber. Both options enhance the flavor of the bars while contributing to their overall nutritional profile.
Shredded Coconut: Healthy Fats and Texture
Shredded coconut adds a delightful texture and natural sweetness to the granola bars. It is a source of healthy fats, particularly medium-chain triglycerides (MCTs), which are known for providing quick energy and promoting weight loss. Furthermore, coconut contributes to the overall flavor and chewiness of the bars, making each bite a satisfying experience.
Dark Chocolate Chips: Indulgence with Health Benefits
To add an extra touch of indulgence, we include dark chocolate chips in our recipe. Dark chocolate is known for its antioxidant properties and can enhance mood due to its ability to release endorphins. Opting for a high-quality dark chocolate with a cocoa content of at least 70% will not only satisfy your sweet tooth but also provide health benefits, making it a guilt-free addition to our granola bars.
Sea Salt: Enhancing Flavor and Its Role in Recipes
A pinch of sea salt may seem like a minor detail, but it plays a crucial role in enhancing the overall flavor of the granola bars. Salt helps to balance sweetness and brings out the rich flavors of the cocoa and nuts. Additionally, it provides essential minerals that the body needs for various functions, making it a vital component in our recipe.
Dried Fruit: Optional Sweetness and Added Nutrients
While not mandatory, dried fruit can be a fantastic addition to our Crunchy Cocoa Nut Granola Bars. Options like raisins, cranberries, or apricots can provide additional sweetness and a chewy texture that contrasts beautifully with the crunchy nuts and oats. Dried fruits are also a source of vitamins, minerals, and antioxidants, adding to the overall nutritional value of the bars.
Step-by-Step Guide to Making Crunchy Cocoa Nut Granola Bars
Now that we’ve explored the fantastic ingredients that make up our Crunchy Cocoa Nut Granola Bars, it’s time to delve into the step-by-step process of making them. Each step is designed to ensure that your granola bars turn out perfectly every time.
Preheating the Oven: Importance of Temperature Control in Baking
The first step in our granola bar-making journey is preheating the oven to 350°F (175°C). This is a crucial step in ensuring that your bars bake evenly and achieve the right level of crunchiness. A properly preheated oven helps to activate the ingredients, allowing the oats and nuts to toast perfectly, resulting in a rich flavor and desirable texture.
Toasting Oats and Nuts: How It Enhances Flavor and Texture
Once your oven is preheated, it’s time to toast the rolled oats and mixed nuts. Spread them out on a baking sheet in a single layer and place them in the oven for about 10-15 minutes, stirring occasionally to ensure even toasting. This step is vital, as toasting enhances the nutty flavor of the oats and nuts while also providing a satisfying crunch. Keep a close eye on them to prevent burning, as they can quickly go from perfectly toasted to overly crispy.
Mixing Wet Ingredients: Tips for Achieving the Right Consistency
While the oats and nuts are toasting, you can prepare the wet ingredients. In a large mixing bowl, combine your chosen sweetener (honey or maple syrup) and nut butter (almond or peanut butter). For ease of mixing, you may want to slightly warm the nut butter in the microwave for about 15-20 seconds to make it more fluid. Whisk these ingredients together until they are well combined and smooth. This mixture should be thick but pourable, ensuring that it will coat the dry ingredients evenly.
Combining Dry Ingredients: Techniques for Ensuring Even Distribution
Once the oats and nuts are toasted and have cooled slightly, it’s time to combine them with the dry ingredients. In a separate bowl, mix the toasted oats, nuts, unsweetened cocoa powder, shredded coconut, and a pinch of sea salt. If you’re adding any dried fruits or dark chocolate chips, you can fold them in at this stage as well.
When combining the wet and dry ingredients, pour the nut butter and sweetener mixture into the bowl of dry ingredients. Using a spatula or wooden spoon, mix everything together until the dry ingredients are thoroughly coated with the wet mixture. This step is crucial, as it ensures that each bite of your granola bars is flavorful and satisfying.
—
This initial section of the Crunchy Cocoa Nut Granola Bars recipe sets the stage for a delicious and nutritious snack. The focus on ingredient benefits and detailed instructions highlights the health-conscious nature of the recipe while maintaining an engaging tone. As we proceed to the next steps, we will continue to build on this foundation, guiding you through the final stages of creating your homemade granola bars. Stay tuned for the continuation, where we will guide you through the baking process and provide tips for achieving the perfect texture and flavor.

Bringing it All Together: Importance of Mixing and Folding Techniques
Once you have gathered all your ingredients for the Crunchy Cocoa Nut Granola Bars, the next critical step is to combine everything effectively. Proper mixing and folding techniques are vital to ensuring that the ingredients are evenly distributed, which impacts both flavor and texture.
Start by adding the dry ingredients—your oats, nuts, cocoa powder, and any other dry mix-ins—into a large mixing bowl. In a separate bowl, combine your wet ingredients, including nut butter and sweeteners. It’s essential to mix these ingredients thoroughly to create a uniform mixture before combining them. This method prevents clumping and ensures that every bite of your granola bar has a consistent flavor profile.
When you combine the wet and dry ingredients, use a spatula to fold the mixture gently. This technique ensures that you don’t crush the nuts or oats while still thoroughly incorporating everything. Be patient with this step; the goal is to make sure every piece of oat and nut is coated in the sticky sweet mixture.
Pressing Into the Pan: Best Practices for Compacting the Mixture
After mixing your ingredients, the next step is to transfer the mixture into a lined baking pan. The importance of compacting this mixture cannot be overstated. If the granola bars are not pressed firmly into the pan, they might crumble once cooled.
Using a spatula or your hands, press the mixture evenly into the pan. Aim for a thickness of about 1 inch to ensure they hold their shape without being too thick. You can use a piece of parchment paper to cover the mixture as you press down, which helps maintain cleanliness and prevents sticking. Make sure to apply even pressure across the entire surface. The more compacted the mixture, the better your bars will hold together once baked.
Baking: What to Look for to Know When They’re Done
Baking your granola bars is a straightforward process, but knowing when they are done is essential for achieving the desired texture. Preheat your oven to the recommended temperature (usually around 350°F or 175°C). Bake the bars for 20-25 minutes, or until they are golden brown on the edges.
As they bake, watch for the edges to start pulling away from the sides of the pan. The center may still look soft, but it will firm up as it cools. A good indicator that your bars are ready is a slight crispness on the surface, accompanied by a delicious aroma wafting through your kitchen, hinting at the cocoa and toasted nuts.
Cooling and Serving: Proper Techniques for Optimal Texture and Flavor
Once your granola bars are baked to perfection, it’s crucial to allow them to cool completely in the pan. This cooling period is essential for the bars to set properly. If you attempt to cut them too soon, they may fall apart. Allow them to sit at room temperature for at least 30 minutes before transferring them to a wire rack to cool completely.
After cooling, use a sharp knife to cut the bars into your desired shape—whether that’s rectangles or squares. For a clean cut, consider running the knife under warm water and wiping it dry between cuts. This will help prevent sticking and ensure you get nice, clean edges.
Storage and Shelf Life
Best Practices for Storing Granola Bars
Storing your Crunchy Cocoa Nut Granola Bars properly is key to maintaining their freshness and flavor. After they have cooled completely, place the bars in an airtight container. You can layer parchment paper between the bars if you plan to stack them, which helps prevent sticking.
How to Maintain Freshness and Prevent Sogginess
To keep your granola bars crunchy, it’s best to store them in a cool, dry place. Avoid exposing them to moisture, as this can lead to sogginess. If you live in a humid environment, consider storing them in the refrigerator, but be aware that this may alter their texture slightly.
Shelf Life of the Bars and Tips for Freezing
Homemade granola bars can last for about one week at room temperature or two weeks in the refrigerator. If you’d like to keep them for longer, consider freezing them. Wrap each bar individually in plastic wrap or place them in a freezer-safe bag. When stored this way, they can last for up to three months. Thaw them in the fridge overnight when you’re ready to enjoy them again.
Nutritional Information
Estimation of Calories per Serving
Each serving of Crunchy Cocoa Nut Granola Bars is estimated to contain approximately 200-250 calories, depending on the specific ingredients and measurements used. This makes them an excellent option for a nutritious snack.
Breakdown of Macronutrients (Protein, Carbs, Fats)
The bars provide a balanced mix of macronutrients. On average, you can expect around 6-8 grams of protein, 30-35 grams of carbohydrates, and 8-10 grams of healthy fats per serving. The combination of oats, nuts, and nut butter contributes to this nutritional profile.
Health Benefits of the Ingredients Used
The ingredients in these granola bars offer numerous health benefits. Oats are a great source of fiber, which aids digestion and helps maintain stable blood sugar levels. Nuts provide healthy fats and protein that can help you feel fuller for longer, while cocoa powder is rich in antioxidants. Together, these ingredients create a snack that not only satisfies your sweet tooth but also supports overall health.
Versatility of the Recipe
Variations of the Crunchy Cocoa Nut Granola Bars
One of the significant advantages of this recipe is its versatility. You can customize your granola bars to suit your tastes or dietary needs. If you’re looking for a different flavor profile, consider adding dried fruits like cranberries, raisins, or chopped apricots to the mix.
Substitutions for Nuts and Nut Butters
If you have nut allergies or prefer a different flavor, you can easily substitute other seeds like pumpkin or sunflower seeds for the nuts. Similarly, swap out nut butter for seed butter, such as sunflower seed butter, for a nut-free option.
Altering Sweeteners Based on Dietary Needs
The recipe allows for flexibility in sweeteners as well. If you’re looking to reduce sugar intake, consider using mashed bananas or unsweetened applesauce as natural sweeteners. You can also use agave syrup or maple syrup based on your dietary preferences.
Ideas for Adding Spices or Flavors for Different Twists
To add an extra layer of flavor, consider incorporating spices like cinnamon, vanilla extract, or even a dash of sea salt for a sweet and salty combination. Experimenting with these additions can help you create a unique granola bar that suits your palate perfectly.
Suggestions for Using the Bars: Breakfast, Snacks, or Post-Workout Fuel
These Crunchy Cocoa Nut Granola Bars are not just a snack; they can also serve various purposes. Enjoy them as a quick breakfast on the go, a midday snack, or a nutritious post-workout fuel. Their convenient size makes them easy to grab when you need a boost of energy throughout the day.
Conclusion
Making your own Crunchy Cocoa Nut Granola Bars offers numerous benefits, from controlling the ingredients to ensuring freshness. By creating these bars at home, you eliminate preservatives and excess sugars often found in store-bought options. This recipe not only encourages healthier snacking habits but also allows for customization to suit your taste preferences and dietary needs.
We encourage you to try this recipe as a healthier alternative to traditional snacks. Incorporating homemade snacks like these granola bars into your diet can contribute to a balanced lifestyle, providing you with energy and satisfaction without compromising your health. Enjoy the process of making them, and relish the delicious results that come from your kitchen!

