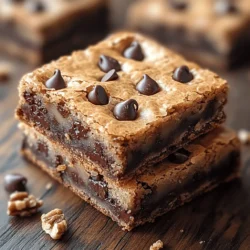
Blondies, often considered a delightful alternative to traditional brownies, have carved out a special place in the hearts of dessert lovers around the world. These sweet treats boast a rich, buttery flavor profile and a soft, chewy texture that makes each bite utterly irresistible. Among the various iterations of blondies, chocolate chip blondies stand out for their combination of brown sugar sweetness and gooey chocolate chips, creating a dessert experience that is both comforting and indulgent.
The appeal of homemade desserts cannot be overstated. There’s something profoundly satisfying about measuring out ingredients, mixing them together, and watching as they transform into a warm, delectable treat. Baking allows for creativity and experimentation, and with every batch, you have the opportunity to customize flavors and textures to your liking. In this article, we’ll delve into the world of chewy chocolate chip blondies, exploring their background, understanding what makes them unique, and guiding you through the preparation steps to create your very own batch at home.
Understanding Blondies
The history of blondies dates back to the early 20th century, with some sources suggesting that they emerged as a variation of brownies. The term “blondie” was popularized in the 1950s and 1960s, particularly in American kitchens, where home bakers sought to create a version of brownies that didn’t rely on cocoa. Instead of the deep, dark chocolate flavor of brownies, blondies are characterized by their rich, caramel-like taste, which comes primarily from the use of brown sugar.
While both brownies and blondies share a similar base of fat, sugar, and flour, the key difference lies in the absence of cocoa powder in blondies, giving them their distinctive light golden-brown hue. This subtle shift in ingredients allows for a broader range of flavor profiles, particularly when it comes to enhancing the taste with ingredients like vanilla, nuts, or, in this case, chocolate chips.
In contemporary baking, chocolate chip blondies have gained immense popularity. They are frequently featured in cafes and bakeries, celebrated for their simplicity and the joy they bring to any gathering or dessert table. The combination of chewy texture and rich chocolate makes them a favorite among both kids and adults alike, proving that sometimes, the classics truly stand the test of time.
Ingredients Breakdown
To achieve the perfect chewy texture and rich flavor in your chocolate chip blondies, understanding the role of each ingredient is crucial. Here’s a breakdown of the key components you’ll need:
– Unsalted Butter: The backbone of any good blondie, unsalted butter is essential for adding moisture and richness. The fat content in the butter contributes to the chewy texture that blondies are known for. Always use unsalted butter so you can control the amount of salt in your recipe.
– Sugars: A combination of brown sugar and granulated sugar is typically used in blondies. Brown sugar adds moisture and a deeper flavor, thanks to its molasses content, while granulated sugar contributes to the overall sweetness and helps create a slight crispness on the edges.
– Eggs: Eggs serve as a binding agent, providing structure and moisture to the blondies. They also play a crucial role in the texture, ensuring that the finished product is chewy rather than cakey.
– Vanilla Extract: Pure vanilla extract enhances the flavor depth of blondies, complementing the sweetness of the sugars and the richness of the butter. A high-quality vanilla extract can make a noticeable difference in the final taste.
– Flour and Leavening Agents: All-purpose flour is the primary dry ingredient that gives structure to the blondies. The leavening agent, usually baking powder, helps the blondies rise slightly, creating that perfect chewy texture without making them too cake-like.
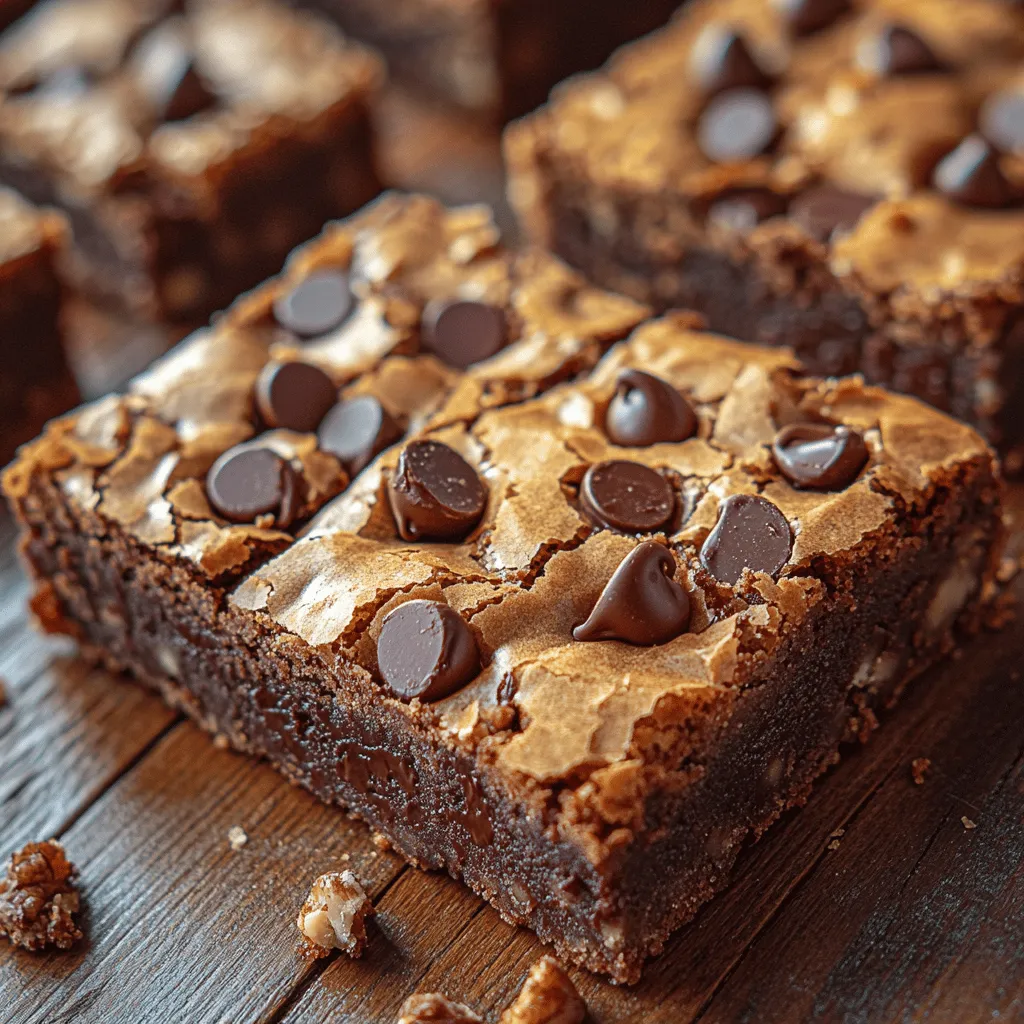
– Chocolate Chips: The star ingredient, chocolate chips, come in various forms—semisweet, milk chocolate, dark chocolate, or even white chocolate. Choosing the right type can significantly impact the flavor of your blondies. For a classic taste, semisweet chocolate chips are recommended, but feel free to experiment with different varieties to suit your palate.
– Optional Nuts: While not a necessity, adding nuts such as walnuts or pecans can enhance the flavor and texture of your blondies. The crunch of the nuts provides a nice contrast to the chewy base, making each bite even more enjoyable.
Preparation Steps
Now that you have a solid understanding of the ingredients, let’s move on to the preparation of your chewy chocolate chip blondies. Here’s a step-by-step guide to help you create these delicious treats in your own kitchen.
Step 1: Preheat the Oven
Begin by preheating your oven to 350°F (175°C). This ensures that your blondies will bake evenly and achieve a golden-brown color.
Step 2: Prepare the Baking Pan
Grease a 9×13-inch baking pan with butter or line it with parchment paper for easy removal. If using parchment paper, leave some overhang on the sides to help lift the blondies out once they are baked.
Step 3: Melt the Butter
In a medium saucepan over low heat, melt the unsalted butter. Once melted, remove it from the heat and allow it to cool slightly. This will prevent the eggs from scrambling when mixed in.
Step 4: Mix in the Sugars
In a large mixing bowl, combine the melted butter with the brown sugar and granulated sugar. Use a whisk to mix them together until the mixture is well combined and smooth. This step is crucial for ensuring that the sugars dissolve properly, contributing to a uniform texture in the finished blondies.
Step 5: Incorporate the Eggs and Vanilla
Add the eggs, one at a time, to the sugar-butter mixture, whisking well after each addition. Then, stir in the vanilla extract. This will create a rich, creamy batter that is full of flavor.
Step 6: Combine the Dry Ingredients
In a separate bowl, whisk together the all-purpose flour and baking powder. Gradually add the dry mixture to the wet ingredients, stirring just until combined. Be careful not to overmix; this will help keep your blondies chewy rather than tough.
Step 7: Fold in the Chocolate Chips
Gently fold in your choice of chocolate chips, ensuring they are evenly distributed throughout the batter. This is where the magic happens, as the chocolate chips will melt slightly during baking, creating pockets of gooey goodness.
Step 8: Pour and Spread the Batter
Pour the blondie batter into the prepared baking pan. Use a spatula to spread the batter evenly across the pan, smoothing the top to ensure an even bake.
Step 9: Bake
Place the baking pan in the preheated oven and bake for approximately 25-30 minutes. The blondies are done when the edges are golden brown, and a toothpick inserted into the center comes out with a few moist crumbs. Be careful not to overbake, as this can lead to a dry texture.
As you follow these initial steps, the aroma of melting butter and sweet chocolate will fill your kitchen, setting the stage for a delightful baking experience. Stay tuned for the next part of this article, where we’ll explore the finishing touches and tips for serving and storing your chewy chocolate chip blondies!
Creating the perfect Chewy Chocolate Chip Blondies requires a blend of careful preparation, precise measuring, and a sprinkle of creativity. This section will guide you through the essential steps to ensure that your blondies come out perfectly chewy and delicious. From preheating your oven to serving the finished product, let’s dive into the details that will make your baking experience a success.
Preheating the Oven and Preparing the Baking Pan
Before you begin mixing your ingredients, it’s crucial to preheat your oven to 350°F (175°C). Preheating is essential for even baking. If the oven isn’t hot enough when you place your batter inside, it can lead to unevenly baked blondies that may end up too gooey in the center or dry at the edges.
While the oven is preheating, prepare your baking pan. A 9×13 inch pan is ideal for this recipe. To prevent the blondies from sticking to the pan, line it with parchment paper, leaving a little overhang on the sides. This will allow you to easily lift the blondies out once they are baked. Lightly greasing the parchment paper with non-stick spray can also help ensure a smooth release.
Mixing Wet Ingredients
To achieve the right consistency for your blondies, start by mixing your wet ingredients. In a large mixing bowl, combine 1 cup of unsalted butter (melted), 2 cups of brown sugar, and 2 teaspoons of vanilla extract. Whisk these ingredients together until the mixture is smooth and glossy. The brown sugar contributes to the chewy texture and introduces a rich flavor, while the melted butter ensures that the blondies remain moist.
After mixing, add 2 large eggs one at a time, whisking well after each addition. The eggs not only bind the ingredients together but also provide structure. You should aim for a smooth and slightly thick batter after the wet ingredients are fully combined.
Combining Dry Ingredients
Next, it’s time to incorporate the dry ingredients. In a separate bowl, whisk together 2 cups of all-purpose flour, 1 teaspoon of baking powder, 1/2 teaspoon of baking soda, and 1/2 teaspoon of salt. This step is important as it ensures that the leavening agents are evenly distributed throughout the flour.
To avoid lumps, make sure to sift the flour before measuring it. If you don’t have a sifter, you can use a whisk or fork to aerate the flour. Gradually fold the dry ingredients into the wet mixture using a spatula, stirring gently until just combined. Be careful not to overmix; this will help retain the blondies’ chewy texture.
Incorporating Chocolate Chips and Nuts
Now for the best part—adding the mix-ins! Gently fold in 2 cups of semi-sweet chocolate chips and 1 cup of chopped nuts (such as walnuts or pecans) if desired. This step is crucial for even distribution of the chocolate and nuts throughout the batter. Using a spatula, make sure to scrape the bottom of the bowl to incorporate any remaining flour that may stick there.
For an extra touch, consider using a mix of chocolate chips, such as dark or milk chocolate, to create a more complex flavor profile. Ensure that the chips and nuts are evenly scattered throughout so that every bite is filled with deliciousness.
Pouring and Leveling the Batter
Once your batter is ready, pour it into the prepared baking pan. Use a spatula to spread the batter evenly across the pan, making sure to level the top. This will ensure uniform baking and that the blondies cook evenly. Smooth out the surface as much as possible to avoid any dome shape during baking, which can lead to uneven texture.
Baking Techniques
Oven Temperature and Its Effect on Baking Time
Bake your blondies in the preheated oven for 20 to 25 minutes. Keep in mind that every oven is different, and factors like altitude and pan material can affect baking time. It’s best to check your blondies a few minutes before the minimum baking time to avoid overbaking.
Tips for Checking Doneness
To check if your blondies are done, insert a toothpick into the center. It should come out with a few moist crumbs—not wet batter. Remember, blondies will continue to cook slightly after being removed from the oven due to residual heat, so it’s better to err on the side of underbaking slightly.
Cooling Process
Once baked, remove the blondies from the oven and place the pan on a wire rack to cool. Allow them to cool in the pan for about 10 to 15 minutes before lifting them out using the parchment overhang. This cooling period is crucial; it allows the blondies to set up, making them easier to cut into squares later. If you try to cut them too soon, they may fall apart.
Serving Suggestions
When it comes to enjoying your Chewy Chocolate Chip Blondies, you have a variety of options. You can serve them warm, straight from the oven, or allow them to cool completely for a firmer texture. Here are some creative ideas to enhance your serving experience:
– Plain or with Toppings: Enjoy blondies on their own or add a scoop of vanilla ice cream on top for a delightful dessert. Drizzling caramel or chocolate sauce can elevate the flavor even further.
– Creative Ways to Serve: For gatherings or parties, consider cutting the blondies into fun shapes or serving them as a dessert bar. Pair them with toppings such as whipped cream, fresh berries, or even a sprinkle of sea salt for a gourmet touch.
– Storing Leftovers: If you have any blondies left (which is unlikely!), store them in an airtight container at room temperature for up to four days. For longer freshness, you can refrigerate them for up to a week or freeze them for up to three months. Just make sure they are fully cooled before wrapping them in plastic wrap and placing them in a freezer-safe container.
Nutritional Information
Understanding the nutritional content of your blondies can help you enjoy them more mindfully. Each serving (assuming you cut the pan into 24 squares) contains approximately:
– Calories: 200
– Fat: 10g
– Carbohydrates: 30g
– Protein: 2g
Dietary Considerations
For those with specific dietary restrictions, consider these adaptations:
– Gluten-Free: Substitute all-purpose flour with a gluten-free flour blend. Ensure that the baking powder used is also gluten-free.
– Healthier Substitutions: You can replace some of the all-purpose flour with whole wheat flour for added fiber. Additionally, using coconut oil instead of butter can be a healthier fat option.
Conclusion
Baking Chewy Chocolate Chip Blondies is a rewarding experience that fills your kitchen with a warm, inviting aroma and brings joy to all who taste them. The combination of buttery, chewy goodness and rich chocolate creates a dessert that is hard to resist. Whether enjoyed plain or dressed up with your favorite toppings, these blondies are sure to impress family and friends alike.
Don’t hesitate to try this recipe and share the delicious results with loved ones. The satisfaction of creating such a delightful treat is unmatched. Furthermore, if you’re looking for more dessert inspiration, explore other recipes on the blog to keep your baking adventures exciting and varied. So grab your apron, gather your ingredients, and get ready to indulge in the bliss of homemade blondies!