Introduction
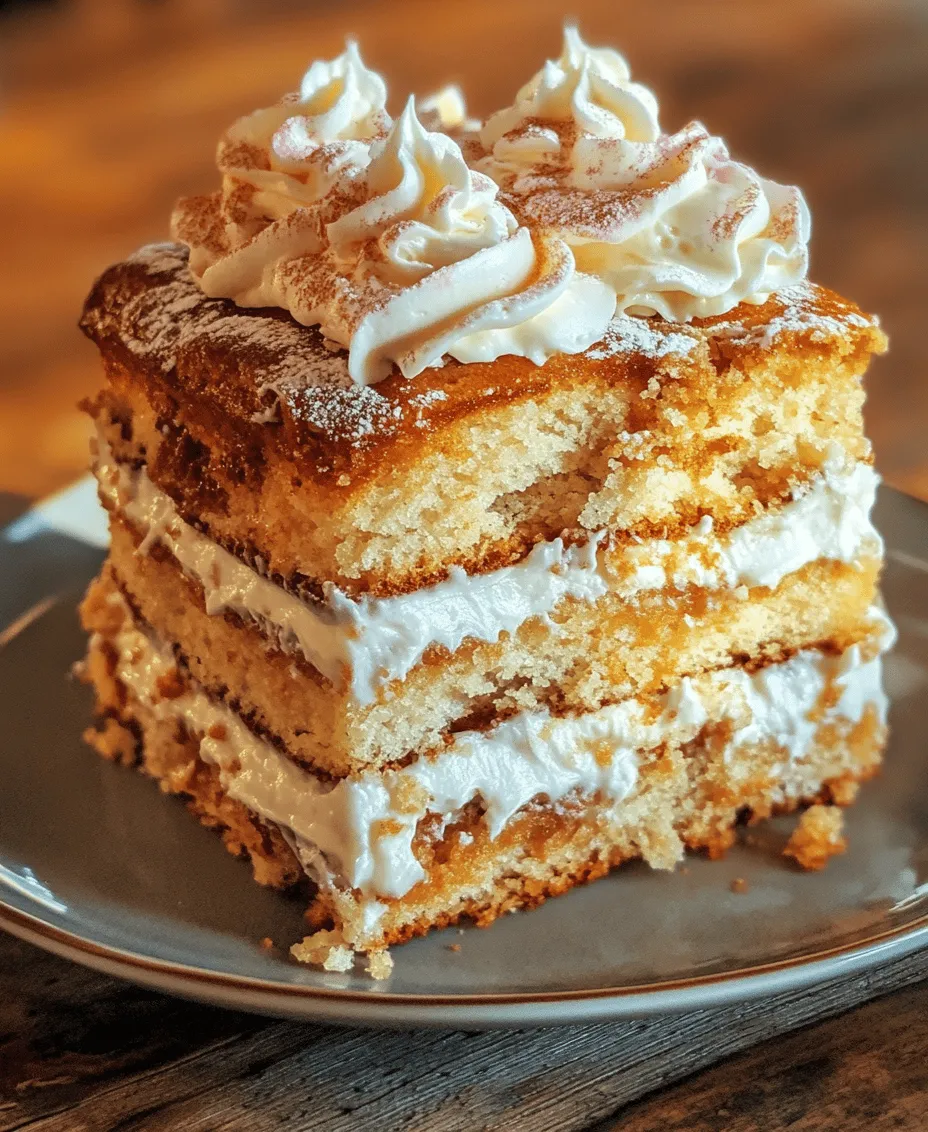
If you are on the lookout for a dessert that promises to be the star of any gathering, look no further than the Buttermilk Bliss Cake. This delightful cake is not just a feast for the palate but also a visual treat, boasting a beautifully golden exterior that beckons you to take a slice. The secret behind its rich flavor and moist texture lies in the use of buttermilk, which infuses the cake with a subtle tang and a level of tenderness that is hard to achieve with regular milk.
Buttermilk Bliss Cake has gained a reputation as a go-to dessert for special occasions, family gatherings, and festive celebrations. Whether it’s a birthday party, a holiday gathering, or simply a Sunday afternoon treat, this cake is sure to impress your guests and family alike. Its versatility allows it to be served plain, dusted with powdered sugar, or dressed up with a luscious frosting, making it appropriate for both casual and formal events.
Let’s dive deeper into the cake’s unique ingredient, buttermilk, and discover why it’s a game-changer in baking.
Understanding Buttermilk in Baking
Buttermilk is a fermented dairy product that traditionally comes from the liquid left after churning butter. Today, it is typically made by adding lactic acid bacteria to milk, which gives it that characteristic tangy flavor and thicker consistency. In baking, buttermilk plays several crucial roles that elevate recipes like our Buttermilk Bliss Cake from ordinary to extraordinary.
Benefits of Using Buttermilk
1. Tenderness: The acidity in buttermilk breaks down gluten in the flour, resulting in a softer, more tender cake. This quality is particularly important in cake baking, where a light and airy texture is desired.
2. Flavor Enhancement: The tangy flavor of buttermilk adds depth and complexity to the cake, balancing the sweetness of the sugar. This unique flavor profile makes each bite of the cake a delightful experience.
3. Moisture Retention: Buttermilk contributes to the overall moisture of the cake, helping to keep it fresh and delectable for days after baking.
4. Leavening Agent: The acidity in buttermilk reacts with baking soda and baking powder, creating carbon dioxide bubbles that help the cake rise. This reaction results in a fluffy texture that makes the cake light and airy.
Buttermilk vs. Regular Milk
While regular milk can be used in baking, it does not offer the same benefits as buttermilk. Cakes made with regular milk may lack the same level of tenderness and flavor complexity. Moreover, buttermilk’s acidity aids in the activation of baking soda, leading to a better rise compared to its non-acidic counterpart, which might require additional adjustments in the recipe. For those seeking a cake that stands out, buttermilk is the clear choice.
Ingredients Breakdown
Before we jump into the baking process, it’s crucial to understand the role of each ingredient in our Buttermilk Bliss Cake. Each element contributes to the cake’s final taste and texture, so let’s break them down.
All-Purpose Flour
All-purpose flour is the foundation of our cake, providing the necessary structure. It contains a moderate amount of protein, which is essential for gluten development. When combined with moisture, it gives the cake its form and texture.
Granulated Sugar
Sugar is not just for sweetness; it also contributes to the cake’s moisture. As it melts during baking, it helps to create a tender crumb. The caramelization of sugar at high temperatures also adds a subtle richness to the overall flavor.
Unsalted Butter
Butter is a key player in achieving the rich, creamy flavor and moist texture of the cake. Using unsalted butter allows you to control the salt content of your recipe, ensuring that your cake is perfectly balanced.
Buttermilk
As mentioned earlier, buttermilk is the star ingredient in this recipe. Its tanginess not only enhances flavor but also helps to keep the cake moist and tender.
Eggs
Eggs serve multiple purposes in our cake. They act as a binding agent, holding all the ingredients together, and they also add richness and moisture. The proteins in eggs help the cake to rise as they coagulate during baking.
Vanilla Extract
Vanilla extract is a classic flavor enhancer that brings warmth and sweetness to the cake. It complements the other flavors, making every bite more enjoyable.
Baking Powder and Baking Soda
These are the leavening agents that help our cake rise. Baking powder contains both an acid and a base, while baking soda requires an acidic ingredient (like buttermilk) to activate. Together, they create the bubbles that give our cake its light and fluffy texture.
Salt
Salt is a vital flavor enhancer. While it may seem counterintuitive to add salt to a sweet cake, it actually helps to balance the sweetness and elevate all the flavors present in the cake.
Frosting Ingredients
While the cake itself is a delight, the frosting plays an integral role in the overall experience. Common choices for frosting include buttercream, cream cheese frosting, or a simple glaze. Each type adds a different flavor and texture, complementing the moist cake beautifully.
Step-by-Step Instructions for the Cake
Now that we’ve explored the essential ingredients, it’s time to get our hands dirty and start baking! Below are the detailed instructions to ensure your Buttermilk Bliss Cake turns out perfectly.
Prepping the Kitchen
Before you dive into mixing, it’s crucial to prepare your kitchen and tools properly. Start by preheating your oven to 350°F (175°C). This ensures that the cake bakes evenly from the moment it goes in.
Next, prepare your baking pans. For a two-layer cake, grease and flour two 9-inch round cake pans. This step is crucial; a well-prepared pan will prevent the cake from sticking and ensure a smooth release when you’re ready to serve.
Mixing the Dry Ingredients
Begin by gathering all your dry ingredients—this includes the all-purpose flour, baking powder, baking soda, and salt. In a medium bowl, whisk these ingredients together until they are well combined.
Whisking the dry ingredients helps to evenly distribute the leavening agents and salt throughout the flour. This step is essential to ensure that the cake rises uniformly and has a consistent texture.
Mixing the Wet Ingredients
In a separate large mixing bowl, cream together the unsalted butter and granulated sugar until the mixture is light and fluffy. This process usually takes about 3-4 minutes using an electric mixer. The creaming process incorporates air into the butter and sugar, which aids in the leavening of the cake.
Once the butter and sugar are well combined, add in the eggs one at a time, ensuring each is fully incorporated before adding the next. Follow this by mixing in the vanilla extract. Finally, gradually add in the buttermilk, mixing until everything is just combined.
Combining Wet and Dry Ingredients
Now comes the exciting part: combining the wet and dry mixtures to create the cake batter. Gradually add the dry mixture to the wet mixture, stirring gently until just combined. Be careful not to overmix, as this can lead to a dense cake.
Once you see no more flour streaks, stop mixing. The batter should be fairly thick, yet smooth. This is the perfect consistency for a light and fluffy cake.
Pouring the Batter into Pans
Now that your batter is ready, divide it evenly between the prepared cake pans. Use a spatula to smooth the tops, ensuring even distribution. This will help the cakes rise evenly in the oven.
Baking the Cake
Place the pans in the preheated oven and bake for about 25-30 minutes, or until a toothpick inserted into the center comes out clean. Keep a close eye on the cakes during the last few minutes of baking, as oven temperatures can vary.
Once baked, remove the cakes from the oven and allow them to cool in the pans for about 10 minutes. Afterward, carefully transfer the cakes to a cooling rack to cool completely before frosting.
By following these detailed steps, you’ll be well on your way to creating a Buttermilk Bliss Cake that is not only delicious but also visually stunning. Stay tuned for the next part, where we’ll explore the frosting options and tips for decorating your cake to perfection.

Creaming Butter and Sugar: Importance of Texture and Aeration
The first critical step in achieving the perfect Buttermilk Bliss Cake is creaming the butter and sugar together. This process is fundamental as it not only combines the ingredients but also incorporates air into the mixture, which contributes to the cake’s light and fluffy texture. Begin by using room-temperature butter, as this will allow for better incorporation of air.
To cream butter and sugar effectively, place the softened butter in a mixing bowl and add the granulated sugar. Using an electric mixer on medium speed, beat the mixture until it becomes pale and fluffy, usually about 3-5 minutes. The mixture should double in volume and have a light, airy consistency. This step is crucial because it sets the foundation for the cake’s structure and helps it rise beautifully in the oven.
Incorporating Eggs and Vanilla: Ensuring Even Distribution
Once you have achieved the right texture with the butter and sugar, the next step is to incorporate the eggs and vanilla extract. This is where you add richness to the batter and enhance the flavor profile of your cake. Crack the eggs into a separate bowl to avoid any shell fragments, then add them one at a time to the creamed mixture.
Mix on low speed until each egg is fully incorporated before adding the next. This gradual addition ensures that the eggs blend evenly into the batter, preventing any separation. After the eggs, add the vanilla extract, which adds a delightful aroma and taste. Continue mixing until the batter is smooth and homogenous.
Wet and Dry Ingredients Combination: Techniques to Avoid Overmixing
The combination of wet and dry ingredients is a delicate dance that requires attention to detail. For the Buttermilk Bliss Cake, you will alternate adding the dry ingredients (flour, baking powder, baking soda, and salt) and the buttermilk into the creamed mixture. Start by sifting the dry ingredients together in a separate bowl to ensure even distribution of the leavening agents.
Begin by adding one-third of the dry mixture to the batter, mixing on low speed just until incorporated. Then, add half of the buttermilk, again mixing gently. This technique helps to prevent overmixing, which can lead to a dense cake. Continue this alternating pattern—dry ingredients, buttermilk, dry ingredients—ending with the dry mix. The goal is to mix just until the ingredients are combined; a few lumps are perfectly acceptable.
Baking Process: Understanding Baking Times and Testing for Doneness
After preparing your cake batter, it’s time to pour it into prepared cake pans. Preheat your oven to 350°F (175°C) and ensure your pans are greased and lined with parchment paper for easy removal. Divide the batter evenly between the pans, smoothing the tops with a spatula.
Bake the cakes in the preheated oven for approximately 25-30 minutes or until a toothpick inserted in the center comes out clean. Keep an eye on your cakes in the last few minutes of baking, as oven temperatures can vary. Avoid opening the oven door too frequently, as this can cause the cakes to sink. Once done, remove the cakes from the oven and allow them to cool in the pans for 10 minutes before transferring them to a wire rack.
Cooling the Cakes: Importance of Cooling for Structure
Cooling the cakes is a vital step that ensures the structure remains intact. Let the cakes cool in the pans for about 10 minutes, then carefully remove them and place them on a wire rack to cool completely. This allows air to circulate around the cakes, preventing them from becoming soggy. Cooling is essential because frosting a warm cake can cause the frosting to melt and slide off, ruining your beautiful creation.
Crafting the Perfect Buttercream Frosting
Importance of Butter Temperature for Smooth Frosting
The success of your frosting hinges on the temperature of the butter. Using room-temperature butter is key to achieving a smooth and creamy texture. Cold butter will not incorporate well, leading to a lumpy frosting, while melted butter will create an overly runny consistency. Aim for butter that is soft to the touch but not greasy. This will ensure your frosting is light and fluffy.
Step-by-Step on Making the Frosting: From Beating to Consistency Adjustments
To make the buttercream frosting, start by beating the softened butter in a mixing bowl until it is light and fluffy, about 3-5 minutes. Gradually add powdered sugar, mixing on low speed to avoid a sugar cloud. Once incorporated, add a splash of milk or cream and vanilla extract. Beat on medium-high speed until the frosting is light and fluffy.
If your frosting is too thick, add more milk, one tablespoon at a time, until you reach the desired consistency. Conversely, if it’s too thin, add more powdered sugar until it thickens. You want a frosting that holds its shape but is still spreadable.
Tips for Achieving the Desired Fluffiness and Stability
To achieve the perfect fluffiness and stability, consider the following tips:
– Beat the frosting for a longer duration; this incorporates more air, making it lighter.
– Use high-quality butter and powdered sugar for the best flavor and texture.
– If you’re in a warm environment, consider adding a bit of shortening to your frosting for added stability.
Incorporating Food Coloring for Decorative Purposes
If you want to add a splash of color to your frosting, gel food coloring is your best bet. It allows for vibrant hues without altering the consistency of the frosting. Start with a small amount, mixing thoroughly, and continue adding until you achieve your desired shade. Remember to mix well to ensure the color is evenly distributed.
Assembling the Buttermilk Bliss Cake
Layering Techniques: Ensuring Even and Stable Layers
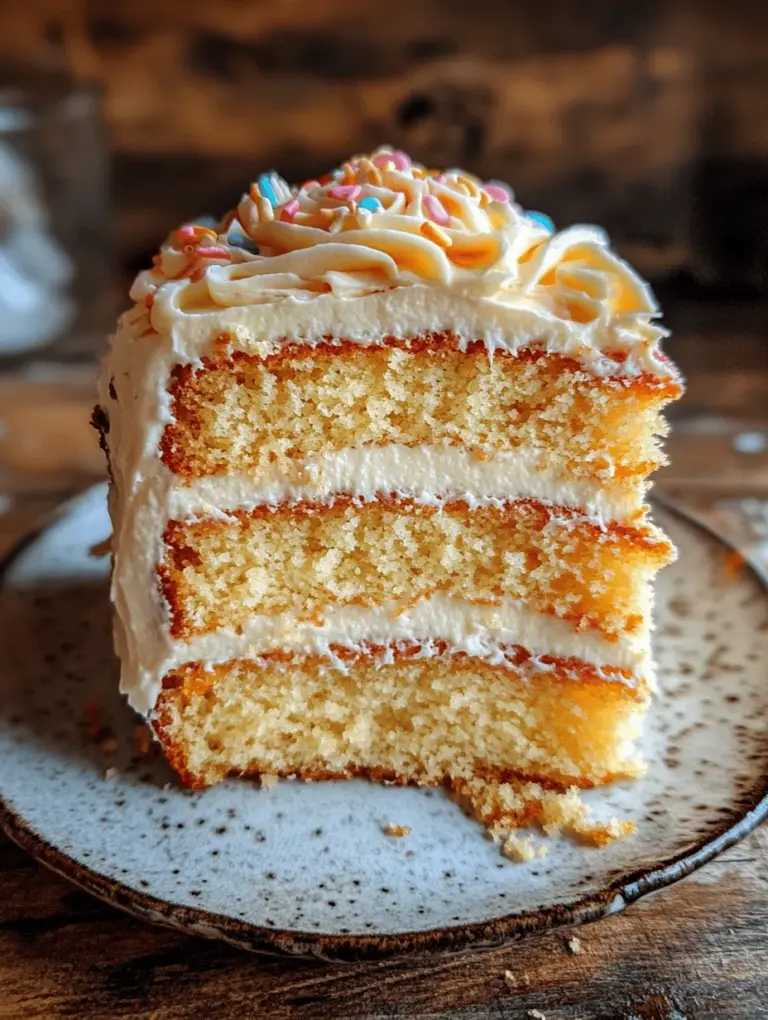
Once your cakes have completely cooled, it’s time to assemble your Buttermilk Bliss Cake. Start by leveling off the tops of your cakes with a serrated knife to create even layers. Place the first layer on a serving plate or cake stand.
Spread an even layer of frosting on top of the first layer, ensuring it reaches the edges for a nice, clean finish. Add the second layer on top, pressing down gently to secure. Repeat this process if you have more layers, making sure to frost the tops and sides evenly.
Frosting Application: Tips for a Smooth and Professional Finish
For a professional-looking finish, apply a crumb coat first—a thin layer of frosting that traps any loose crumbs before the final coat. Chill the cake for about 30 minutes after applying the crumb coat. Once set, apply the final layer of frosting using a spatula to create smooth surfaces. If you desire a textured look, you can use a cake comb or the back of a spoon to create patterns.
Creative Decoration Ideas: Using Piping Techniques and Sprinkles
Decorating your Buttermilk Bliss Cake can be as simple or as elaborate as you desire. Use a piping bag fitted with your favorite tip to create decorative swirls or rosettes on top of the cake. For a festive touch, consider adding colorful sprinkles, edible glitter, or fresh fruit.
Presentation Tips for Serving
Presentation is key when serving your cake. Consider placing your cake on a decorative cake stand or platter. If you’ve decorated with sprinkles or fruit, ensure they’re evenly distributed for an appealing look. Serving the cake with a sharp knife will help maintain the integrity of the layers as you cut slices for your guests.
Serving Suggestions
Ideal Occasions for Serving the Buttermilk Bliss Cake
The Buttermilk Bliss Cake is a versatile dessert that fits perfectly into any occasion, from birthdays and weddings to casual gatherings and holiday celebrations. Its rich flavor and moist texture make it a crowd-pleaser, ensuring it will be the star of your dessert table.
Pairing Ideas: Beverages and Additional Desserts
To elevate your serving experience, consider pairing the Buttermilk Bliss Cake with complementary beverages like a rich cup of coffee, a glass of cold milk, or even a sweet dessert wine. For a special twist, serve it alongside a scoop of vanilla ice cream or a dollop of whipped cream for added indulgence.
How to Store Leftovers Properly for Freshness
If you have any leftovers (though they may be hard to resist), storing your Buttermilk Bliss Cake properly will keep it fresh. Place any uneaten cake in an airtight container at room temperature for up to three days. If you want to store it longer, wrap it tightly in plastic wrap and refrigerate for up to a week. For longer storage, consider freezing individual slices wrapped in plastic wrap and aluminum foil.
Conclusion
Baking and sharing the Buttermilk Bliss Cake is not just about creating a delicious dessert; it’s about the joy it brings to your gatherings and celebrations. This cake, with its moist texture and delightful flavor, is perfect for any occasion, from festive birthdays to cozy family dinners.
Its versatility allows it to shine in various settings, making it a go-to recipe in your baking repertoire. So, roll up your sleeves, gather your ingredients, and embark on the delightful journey of creating this scrumptious cake. Whether you’re indulging in it yourself or sharing it with loved ones, the Buttermilk Bliss Cake is sure to leave a lasting impression. Happy baking!

