Introduction to Crunchy Mini Chicken Caesar Wraps
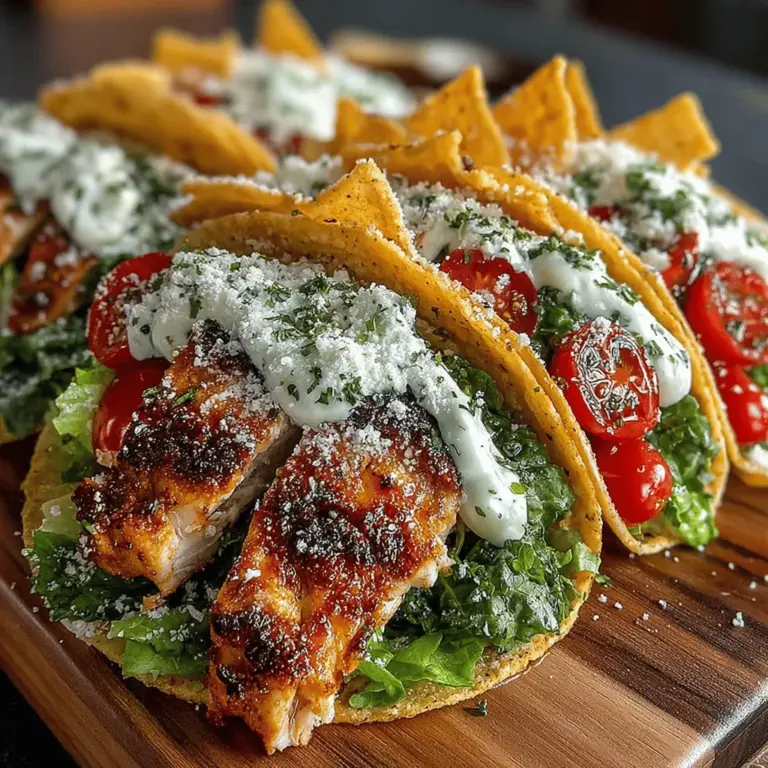
Crunchy Mini Chicken Caesar Wraps offer a refreshing and portable take on the beloved classic Caesar salad. This recipe is perfect for anyone seeking a satisfying meal that doesn’t compromise on flavor or nutrition. The combination of tender, grilled chicken, crisp romaine lettuce, and juicy cherry tomatoes, all enveloped in a soft flour tortilla, makes these wraps not only delicious but also visually appealing. The addition of crispy tortilla chips provides an unexpected crunch, enhancing the overall texture and making them a favorite for both children and adults alike.
The inspiration for these wraps stems from the traditional Caesar salad, which has been a staple in American cuisine since its creation in the 1920s. The original Caesar salad, attributed to restaurateur Caesar Cardini, featured romaine lettuce, croutons, Parmesan cheese, and a creamy dressing made from garlic, anchovies, and egg. Over the years, variations have emerged, and this recipe transforms the classic dish into a convenient wrap format that is ideal for busy weeknights, picnics, or even casual gatherings.
In this article, we will delve into the detailed process of creating these Crunchy Mini Chicken Caesar Wraps, exploring each step from marinating the chicken to assembling the wraps. We will also highlight the health benefits of the ingredients used and provide variations to cater to different dietary preferences, ensuring that everyone can enjoy this delicious meal.
Understanding the Ingredients
To create the perfect Crunchy Mini Chicken Caesar Wraps, it’s essential to understand the role each ingredient plays in achieving the right balance of flavor and texture. Let’s take a closer look at the main components that make up this delightful recipe.
– Boneless, Skinless Chicken Breasts: The foundation of our wraps lies in the chicken, which serves as a lean source of protein. Chicken breasts are not only healthy but also versatile, absorbing flavors beautifully during the marinating process.
– Olive Oil: This heart-healthy fat is crucial for cooking the chicken and enhancing its flavor. Olive oil not only helps to keep the chicken moist but also adds a rich taste that complements the other ingredients.
– Seasonings: Garlic powder and Italian seasoning play key roles in elevating the flavor profile of the chicken. Salt and pepper are essential for enhancing the overall taste, making sure every bite is well-seasoned.
– Flour Tortillas: The wrap’s shell, flour tortillas provide a soft and flexible base that holds all the ingredients together. They are easy to work with and perfect for wrapping up the filling.
– Fresh Produce: Romaine lettuce and cherry tomatoes bring freshness and nutrients to the dish. Romaine lettuce adds a satisfying crunch, while cherry tomatoes contribute a burst of juiciness.
– Caesar Dressing: This creamy element is what ties all the flavors together. It adds richness and ensures that every bite is coated in the signature Caesar flavor.
– Parmesan Cheese: Adding a savory, nutty flavor, Parmesan cheese complements the Caesar dressing beautifully. It also provides an extra layer of flavor that enhances the overall dish.
– Crispy Bacon Bits: While optional, crispy bacon bits introduce a savory crunch that elevates the wraps to a new level of deliciousness. They’re especially appealing to those who enjoy a bit of added richness.
– Tortilla Chips: These are the secret ingredient that adds an unexpected crunch to the wraps. By incorporating crushed tortilla chips, you get a satisfying textural contrast that makes each bite more enjoyable.
Preparation Steps for Crunchy Mini Chicken Caesar Wraps
Marinating and Cooking the Chicken
The first step in creating the Crunchy Mini Chicken Caesar Wraps is marinating the chicken. This process is crucial for flavor enhancement and ensuring that the chicken remains juicy throughout cooking.
1. Marinating: To prepare the chicken, start by combining olive oil, garlic powder, Italian seasoning, salt, and pepper in a bowl. Place the boneless, skinless chicken breasts in the marinade, ensuring they are evenly coated. Allow the chicken to marinate for at least 30 minutes, or up to several hours for maximum flavor infusion.
2. Cooking Methods: You can choose between grilling or skillet cooking to prepare the chicken. Grilling adds a smoky flavor and beautiful char marks, while skillet cooking allows for more control over the cooking process. If grilling, preheat the grill to medium-high and cook the chicken for about 6-7 minutes on each side, or until the internal temperature reaches 165°F. For skillet cooking, heat a tablespoon of olive oil in a non-stick pan over medium heat and cook the chicken for 6-8 minutes on each side.
3. Ensuring Perfectly Cooked Chicken: Regardless of the cooking method chosen, it’s important to avoid overcooking the chicken to maintain its juiciness. Use a meat thermometer to check the internal temperature and remove the chicken from heat as soon as it reaches 165°F. Once cooked, let the chicken rest for a few minutes before slicing it into bite-sized pieces.
Creating the Filling
With the chicken cooked and ready, it’s time to prepare the filling for the wraps.
1. Freshness Matters: Start by washing and chopping the romaine lettuce and halving the cherry tomatoes. Fresh produce not only enhances the flavor but also adds essential vitamins and minerals, making the wraps a nutritious option.
2. Balancing Flavors: In a large mixing bowl, combine the sliced chicken, romaine lettuce, cherry tomatoes, and a generous drizzle of Caesar dressing. If using, sprinkle in the crispy bacon bits and grated Parmesan cheese. The key is to balance the creamy dressing with the fresh vegetables and savory chicken, ensuring that each bite is flavorful.
3. Mixing Technique: Use tongs or a spatula to gently toss the ingredients together, making sure the dressing evenly coats the chicken and vegetables. This step is crucial for achieving a harmonious blend of flavors, ensuring that every wrap is delicious.
In the next section of this article, we will discuss the final assembly of the wraps and provide tips for serving and storing them, ensuring you have all the information you need to create these tasty Crunchy Mini Chicken Caesar Wraps.
Assembling the Wraps
Creating the perfect Crunchy Mini Chicken Caesar Wraps is all about proper assembly. Follow these step-by-step guidelines to ensure that your wraps hold together well and are bursting with flavor.
1. Prepare the Tortillas: Start with the tortillas laid flat on a clean surface. If you’ve opted for flour tortillas, ensure they are at room temperature to make them more pliable. If using gluten-free tortillas, choose those that are sturdy enough to hold the ingredients.
2. Layer the Ingredients: Begin by spreading a thin layer of Caesar dressing on each tortilla, leaving a small border around the edges. This not only adds flavor but also acts as a barrier to prevent sogginess.
3. Add the Romaine Lettuce: Next, place a handful of romaine lettuce in the center. This crunchy layer will provide a refreshing contrast to the other ingredients. Aim for a balanced amount, ensuring that it doesn’t spill over when you roll the wrap.
4. Distribute the Chicken: After the lettuce, add your cooked and seasoned chicken breast. Aim for even distribution to ensure every bite contains protein. If you have cut your chicken into smaller pieces or strips, this step will be easier.
5. Sprinkle Cherry Tomatoes: Add halved cherry tomatoes on top of the chicken. Their juicy burst will enhance the flavor profile of the wrap.
6. Finish with Cheese: If you’re using grated Parmesan or any cheese of your choice, sprinkle it generously over the top. Cheese adds creaminess and ties all the flavors together.
7. Roll the Wrap: To roll the wrap, start from the side closest to you and fold it over the filling. Tuck in the sides as you roll to minimize spillage, creating a tight wrap that holds everything inside.
8. Secure the Wrap: If necessary, use a toothpick to secure the wrap or wrap it tightly in parchment paper for a neat presentation.
This careful assembly will ensure that every bite of your Crunchy Mini Chicken Caesar Wrap is packed with flavor while maintaining its structure.
Toasting the Wraps for Extra Crunch (Optional)
Toasting your wraps can elevate the overall experience, adding warmth and an extra layer of crunch. Here’s how to do it effectively:
Benefits of Toasting
Toasting your wraps not only enhances the texture but also intensifies the flavors. The heat helps meld the ingredients together and brings out the richness of the cheese while making the tortilla crispier.
Recommended Cooking Time and Heat Level
1. Preheat Your Pan: Start by heating a skillet over medium heat. If you prefer, you can use a panini press for an even toast.
2. Add the Wraps: Place the assembled wraps in the skillet. Avoid overcrowding to ensure even cooking.
3. Cooking Time: Toast each wrap for about 2-3 minutes on one side until golden brown and crisp. Flip and repeat on the other side. If using a panini press, close it and toast for 3-4 minutes.
4. Check for Crispiness: The wraps should be golden brown on the outside and the cheese melted inside. If they need more time, check every minute to avoid burning.
Toasted Crunchy Mini Chicken Caesar Wraps offer an irresistible crunch and warmth that may become your new favorite way to serve this dish.
Serving Suggestions and Pairings
Presentation and pairing can elevate your meal experience. Here are some creative ideas to serve your Crunchy Mini Chicken Caesar Wraps.
Creative Ways to Serve the Wraps
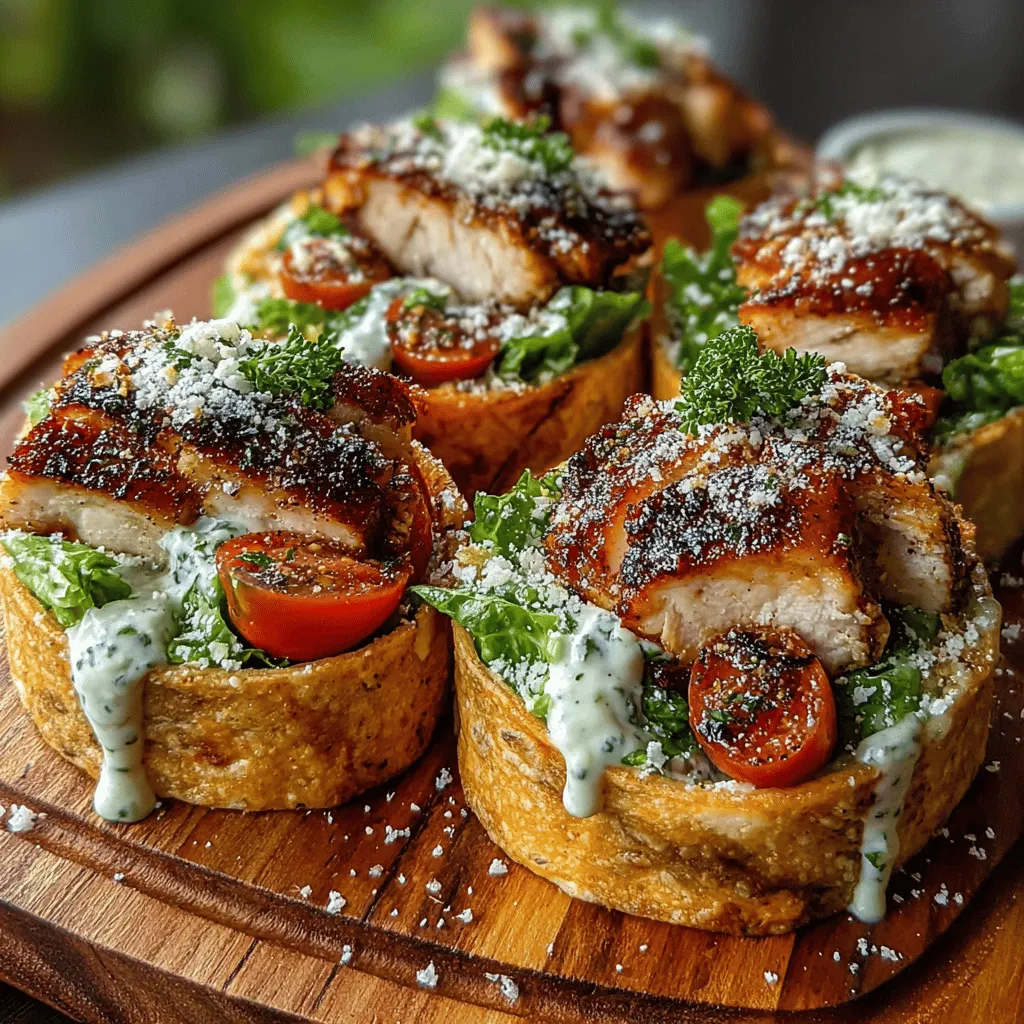
– Platter Arrangement: Serve the wraps on a large platter, arranged in a circular fashion for an inviting look. You can garnish the platter with extra cherry tomatoes and sprigs of fresh parsley to add color.
– Dipping Sauces: Offer a selection of dipping sauces alongside your wraps, such as extra Caesar dressing, ranch, or a zesty balsamic vinaigrette. This adds an interactive element to your meal and allows guests to customize their flavors.
Suggested Side Dishes
To round out the meal, consider pairing your wraps with light and refreshing sides:
– Side Salads: A simple side salad with mixed greens, cucumbers, and a light vinaigrette complements the wraps perfectly. Alternatively, a caprese salad can add charm and flavor.
– Chips and Salsa: For a casual twist, serve your wraps with tortilla chips and fresh salsa or guacamole for a delightful crunch.
Beverages that Pair Well
To complement your meal, consider serving:
– Iced Tea or Lemonade: These drinks add a refreshing touch without overpowering the flavors of the wraps.
– Light Beer or White Wine: If you prefer an adult beverage, a light beer or a crisp white wine like Sauvignon Blanc can enhance the dining experience.
Nutritional Benefits of Crunchy Mini Chicken Caesar Wraps
Understanding the nutritional aspects of your ingredients can help you appreciate your meal even more. Here’s a closer look at the health benefits of the key components in your wraps.
Health Aspects of Key Ingredients
– Lean Protein from Chicken: Chicken breast is an excellent source of lean protein, essential for muscle building and repair. It also helps keep you feeling full longer, aiding in weight management.
– Nutritional Value of Romaine Lettuce and Cherry Tomatoes: Romaine lettuce provides fiber, vitamins A and C, and is low in calories, making it a great addition to any meal. Cherry tomatoes are rich in antioxidants, particularly lycopene, which supports heart health.
– Healthy Fats from Olive Oil and Cheese: While cheese adds flavor and creaminess, when consumed in moderation, it provides calcium and protein. Olive oil, a staple in Caesar dressing, is packed with healthy monounsaturated fats that support heart health and reduce inflammation.
Variations and Customizations
One of the best aspects of Crunchy Mini Chicken Caesar Wraps is their adaptability. Here are some variations to cater to different dietary needs.
Suggestions for Gluten-Free Alternatives
If you’re looking for gluten-free options, consider using:
– Corn Tortillas: These provide a great alternative and are naturally gluten-free. They may be a bit more fragile, so handle them gently.
– Lettuce Wraps: For a low-carb option, large lettuce leaves like butter or iceberg lettuce can serve as wraps. They are crunchy, refreshing, and gluten-free.
Vegetarian Options
For vegetarians, substitute the chicken with plant-based proteins such as:
– Grilled Tofu: Marinated and grilled tofu can add a satisfying texture and flavor to the wraps.
– Chickpeas: Roasted chickpeas seasoned with your favorite spices can provide a protein-rich alternative that is both filling and delicious.
Vegan Adaptations
To adapt the recipe for vegans, consider these swaps:
– Dairy-Free Dressing: Use a homemade or store-bought vegan Caesar dressing made with cashews or tahini.
– Vegan Cheese Alternatives: Many brands offer dairy-free cheeses that can be used in place of traditional cheese, allowing you to enjoy the same creamy texture without the dairy.
Conclusion: Enjoying Crunchy Mini Chicken Caesar Wraps
Crunchy Mini Chicken Caesar Wraps offer a perfect combination of flavor, texture, and convenience, making them an excellent meal option for any occasion. By following the steps outlined in this article, you can create a delicious and satisfying wrap that caters to various tastes and dietary needs. Whether enjoyed at home or on the go, these wraps are a delightful way to incorporate fresh ingredients into your diet while keeping meal preparation simple and quick. Embrace the joy of cooking and the satisfaction of homemade meals with this easy-to-follow recipe. With endless possibilities for customization, your Crunchy Mini Chicken Caesar Wraps can be tailored to fit any dietary requirement or personal preference, ensuring everyone can enjoy a delicious and nutritious meal.
