Introduction
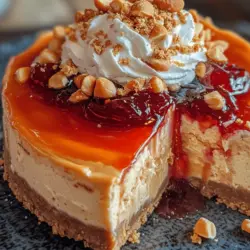
The Peanut Butter & Jelly Cheesecake is a delightful fusion of nostalgia and indulgence, bringing together two beloved American flavors that have graced the lunchboxes of generations. While a simple peanut butter and jelly sandwich evokes memories of childhood afternoons and carefree days, transforming these classic flavors into a creamy cheesecake elevates the experience into something truly special. The combination of rich, velvety cheesecake paired with the iconic taste of peanut butter and jelly not only satisfies the sweet tooth but also evokes a sense of comfort and familiarity that resonates with many.
Peanut butter, with its nutty richness, and jelly, with its sweet and fruity essence, are staples in American cuisine, frequently featured in snacks and desserts alike. This dessert takes those familiar elements and melds them into a decadent cheesecake that is sure to impress at any gathering, from birthday parties to potlucks. The creamy texture of the cheesecake, combined with the sweet and slightly tart jelly topping, creates a symphony of flavors that is hard to resist.
In this article, we aim to provide a comprehensive, step-by-step guide to crafting your very own Peanut Butter & Jelly Cheesecake. Whether you are an experienced baker looking to try something new or a novice eager to impress your friends and family, this recipe will walk you through each stage of the process, ensuring that your cheesecake turns out perfectly every time.
The Allure of Peanut Butter & Jelly Cheesecake
The history of peanut butter and jelly in American culture dates back to the early 1900s. Peanut butter, believed to have originated from South America, became popular in the United States when it was mass-produced in the late 1800s. Jelly, on the other hand, has long been a favorite spread for enhancing flavors in various dishes. The pairing of these two ingredients led to the creation of the quintessential peanut butter and jelly sandwich, which quickly became a staple for children and adults alike.
Cheesecake, originally a dish from ancient Greece, has evolved over the centuries to become a versatile dessert enjoyed in various forms around the world. From New York-style cheesecake to fluffy Japanese varieties, this dessert has captured the hearts of many due to its creamy texture and ability to complement a myriad of flavors. The Peanut Butter & Jelly Cheesecake stands out by combining the richness of traditional cheesecake with the playful and nostalgic flavors of peanut butter and jelly, making it a unique addition to any dessert table.
The synergy between peanut butter and jelly is not just a stroke of luck; it’s an intentional pairing that works beautifully in this cheesecake. The rich, savory notes of peanut butter balance perfectly with the sweetness of jelly, creating a flavor profile that is both comforting and exciting. This dessert encapsulates the playful spirit of childhood while delivering a sophisticated taste that pleases the palate of adults.
Ingredients Breakdown
Before diving into the preparation of your Peanut Butter & Jelly Cheesecake, it’s essential to understand the role of each ingredient that will come together to create this delicious dessert. Here’s a closer look at the ingredients you’ll need:
For the Crust:
– Graham Crackers: The classic choice for cheesecake crusts, graham crackers provide a sweet and slightly crumbly base. They add a wonderful texture and flavor that perfectly complements the filling.
– Unsalted Butter: Melted butter binds the crushed graham crackers together, adding richness and moisture to the crust.
– Sugar: A little sugar enhances the sweetness of the crust, balancing the flavors of the cheesecake filling.
For the Filling:
– Cream Cheese: The star of the show, cream cheese creates the rich and creamy texture that cheesecake is known for. Make sure to use full-fat cream cheese for the best results.
– Peanut Butter: Choose a creamy, high-quality peanut butter for a smooth filling. Natural peanut butter is a great option, but avoid varieties with added sugar for a more balanced flavor.
– Granulated Sugar: Sugar sweetens the filling, contributing to the overall taste and enhancing the flavors of the peanut butter.
– Sour Cream: This adds a slight tanginess and creaminess to the filling, making it richer and more decadent.
– Eggs: Eggs are crucial for setting the cheesecake and providing structure. They contribute to the creaminess of the filling while helping it hold its shape during baking.
For the Topping:
– Jelly or Jam: A layer of your favorite jelly or jam crowns the cheesecake, adding a pop of color and flavor. Options like grape, strawberry, or raspberry work wonderfully, but feel free to choose whatever flavor you prefer.
– Peanuts (optional): Chopped peanuts can be sprinkled on top for added crunch and a nutty finish.
Selecting High-Quality Ingredients
When it comes to baking, the quality of your ingredients can make all the difference. For the crust, opt for graham crackers that are free from artificial flavors and preservatives. For the peanut butter, a natural choice with minimal added ingredients will yield the best flavor. When selecting jelly or jam, look for options with real fruit and less sugar for a more authentic taste. Investing in high-quality ingredients will elevate your Peanut Butter & Jelly Cheesecake to new heights, ensuring a dessert that is as delicious as it is impressive.
Crafting the Perfect Crust
Creating the perfect crust for your Peanut Butter & Jelly Cheesecake is a vital step in achieving a well-balanced dessert. A well-made crust provides texture and flavor while serving as the foundation for the creamy filling. Here’s a step-by-step guide to crafting the ideal graham cracker crust:
Step 1: Prepare Your Ingredients
Gather your graham crackers, melted unsalted butter, and sugar. You’ll need approximately 1 ½ cups of graham cracker crumbs, ½ cup of melted butter, and ¼ cup of granulated sugar.
Step 2: Crush the Graham Crackers
To begin, place your graham crackers in a food processor and pulse until they are finely crushed. If you don’t have a food processor, you can place the crackers in a zip-top bag and crush them using a rolling pin. Aim for a fine crumb texture to ensure even mixing with the butter.
Step 3: Mix the Crust Ingredients
In a mixing bowl, combine the graham cracker crumbs, melted butter, and sugar. Stir until the mixture resembles wet sand and all crumbs are evenly coated with butter. This step is crucial, as it helps the crust hold together during baking.
Step 4: Press the Mixture into a Springform Pan
Transfer the crumb mixture into a 9-inch springform pan. Using your fingers or the bottom of a measuring cup, press the mixture firmly and evenly across the bottom and up the sides of the pan. Ensure the crust is compact to prevent it from crumbling later.
Step 5: Pre-Bake the Crust
Preheating your oven to 350°F (175°C) is essential at this stage. Once the oven is ready, place the crust in the oven and bake for about 8-10 minutes, or until it is lightly golden and fragrant. This pre-baking step is crucial as it helps set the crust, preventing it from becoming soggy once the cheesecake filling is added.
Step 6: Allow to Cool
Once baked, remove the crust from the oven and let it cool while you prepare the cheesecake filling. Cooling the crust allows it to firm up and ensures a sturdy base for your cheesecake.
Variations on the Crust
While a classic graham cracker crust is a fantastic choice, don’t hesitate to get creative! You can try using different types of cookies, such as Oreos or digestive biscuits, for a unique flavor twist. Adding spices like cinnamon or nutmeg can also enhance the crust, giving it an extra layer of flavor.
—
By following these detailed steps, you’ll create a deliciously crisp and flavorful crust for your Peanut Butter & Jelly Cheesecake. This foundational element is essential for achieving a perfect balance of textures, setting the stage for the creamy filling that follows. In the next section, we’ll dive into creating the silky cheesecake filling that will make your dessert truly unforgettable.
Baking Process and Knowing When Your Cheesecake is Done
Baking a cheesecake requires careful attention to ensure that it turns out perfectly. As you approach the end of the baking time, it’s essential to keep an eye on your cheesecake. The traditional method for checking doneness is to gently shake the pan; the center of the cheesecake should have a slight jiggle but should not appear liquid. Additionally, the edges should be firm and set, while the center will continue to firm up as it cools.
One key aspect of baking a cheesecake is to avoid overbaking, which can lead to a dry texture and cracks. Ideally, you want to pull the cheesecake from the oven when it is still slightly undercooked in the center. The residual heat will continue to cook the cheesecake once it is out of the oven.
Importance of Cooling Gradually in the Oven
Once you’ve determined that your cheesecake is done, it’s crucial to cool it gradually in the oven. This method helps prevent the sudden temperature change that can lead to cracks on the surface. To do this, turn off the oven and crack the oven door open slightly, allowing the cheesecake to cool in the warm environment for about an hour. After that, you can transfer it to the countertop to cool completely before refrigerating. This gradual cooling process not only helps maintain the integrity of the cheesecake but also enhances its creamy texture.
Tips for Preventing Cracks
Preventing cracks on the surface of your cheesecake can be a challenge, but there are several strategies to help you achieve a flawless finish:
1. Use Room Temperature Ingredients: Ensure all your ingredients, especially the cream cheese, are at room temperature before mixing. This allows for a smoother batter, reducing the risk of air bubbles that can cause cracks.
2. Mix on Low Speed: When combining your ingredients, mix on low speed to avoid incorporating too much air. Overmixing can lead to a puffed center that cracks as it cools.
3. Add a Water Bath: Baking your cheesecake in a water bath can help regulate the temperature. Wrap the outside of the springform pan with aluminum foil to prevent water from seeping in, and place it in a larger pan filled with hot water while baking.
4. Don’t Open the Oven Door: Avoid opening the oven door during the baking process, as sudden temperature changes can cause the cheesecake to crack.
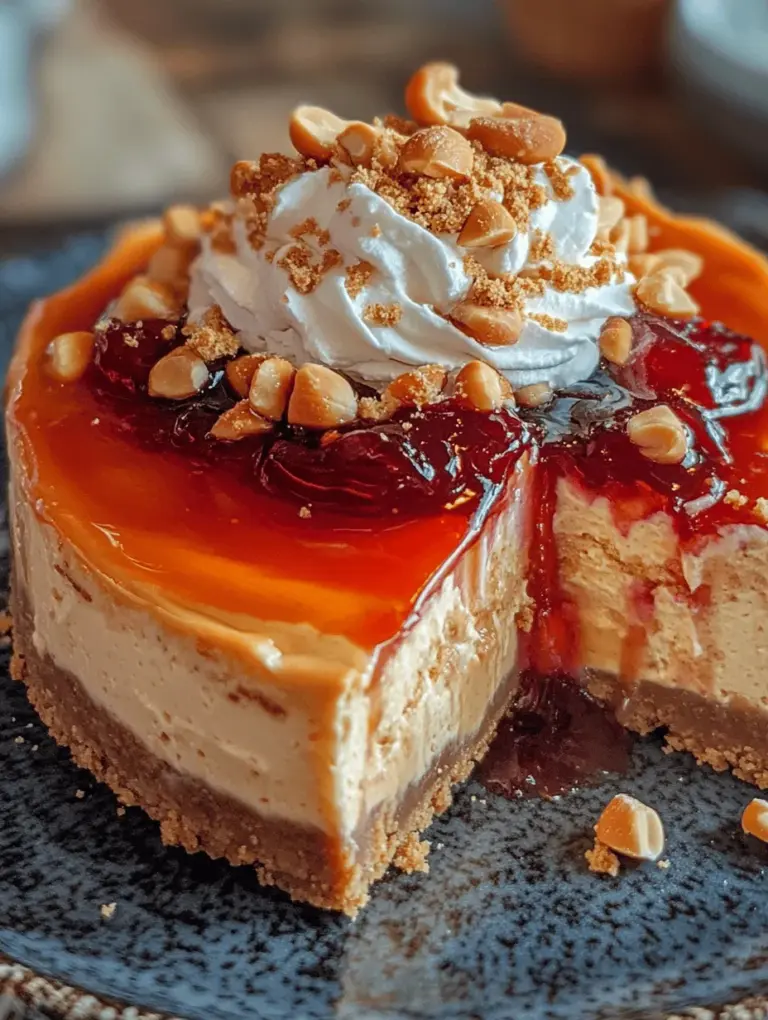
Preparing the Jelly Topping
The jelly topping is what makes this cheesecake reminiscent of a classic peanut butter and jelly sandwich. You can choose between grape or strawberry jelly, depending on your preference.
Instructions for Making the Jelly Topping:
1. Choose Your Jelly: Decide whether you want grape or strawberry jelly. You can use store-bought jelly or make your own for a fresher taste.
2. Heat the Jelly: In a small saucepan over low heat, gently heat 1 cup of your chosen jelly until it becomes more liquid. This will make it easier to spread over the cheesecake.
3. Add Lemon Juice: To balance the sweetness of the jelly and enhance its flavor, add 1 tablespoon of fresh lemon juice. This acidity cuts through the sweetness and adds a delightful brightness to the topping.
4. Achieving a Smooth Topping: Stir the jelly mixture thoroughly until it is smooth and combined. If you desire an even finer texture, you can strain the mixture through a fine-mesh sieve to remove any lumps or fruit bits.
Assembling the Cheesecake
Once your cheesecake has cooled and is ready for the jelly topping, it’s time to assemble!
Step-by-Step Guide:
1. Prepare the Cheesecake: Ensure the cheesecake has completely cooled and is firmly set in the refrigerator.
2. Spread the Jelly: Gently pour the prepared jelly topping over the center of the cheesecake. Using a spatula, spread it evenly, reaching the edges without overflowing.
3. Ensure Even Distribution: To achieve an even layer, start from the center and work your way outwards. You can tilt the cheesecake slightly to help the jelly reach the edges.
4. Chill Again: After applying the jelly topping, return the cheesecake to the refrigerator for at least 2 hours to set completely. This step is crucial for achieving a nice texture and for the flavors to meld together.
Serving Suggestions and Pairings
When it comes to serving your Peanut Butter & Jelly Cheesecake, presentation and pairing can elevate the experience.
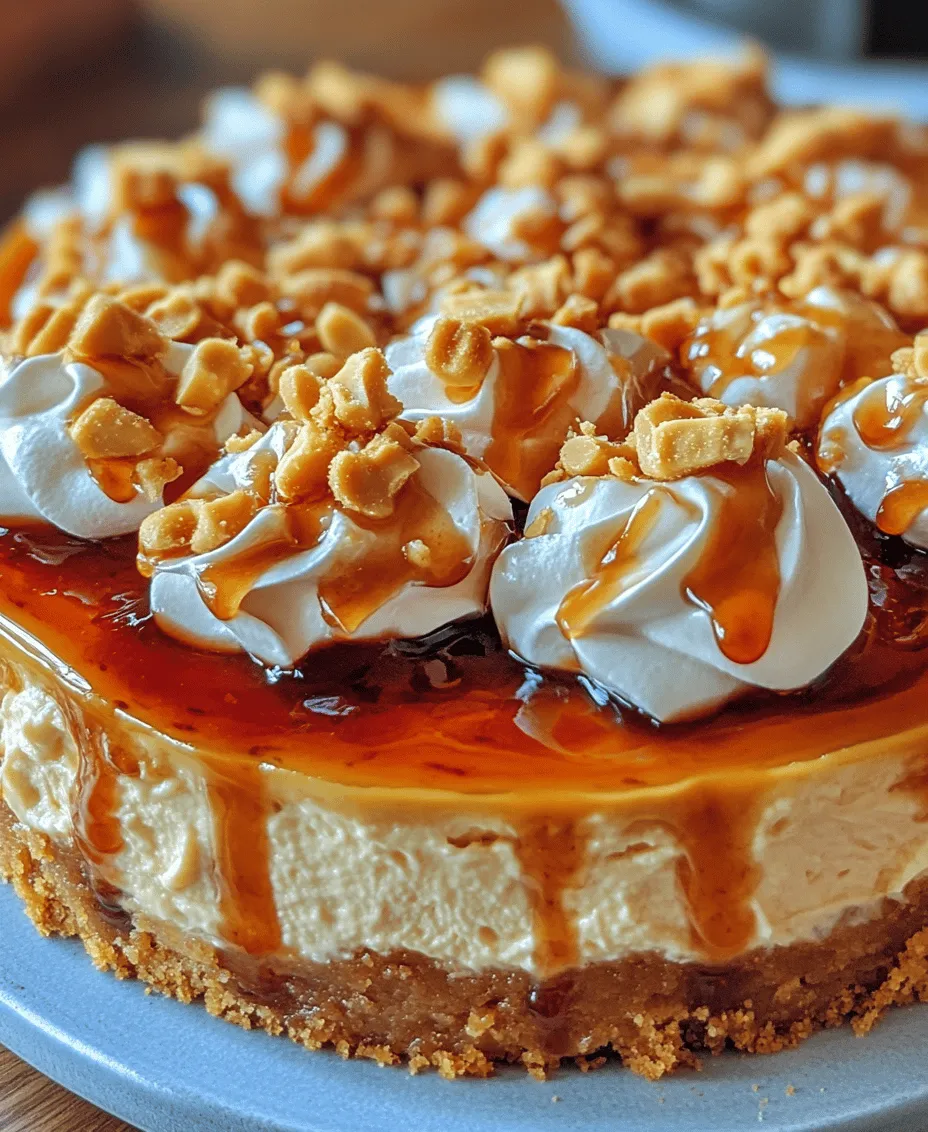
Garnishing Ideas:
– Whipped Cream: Add dollops of freshly whipped cream on top for a light, airy touch.
– Crushed Peanuts: Sprinkle crushed peanuts around the edges for added crunch and flavor.
– Graham Cracker Crumbs: A light dusting of graham cracker crumbs adds texture and enhances the peanut butter flavor.
Beverage Pairings:
To complement your cheesecake, consider pairing it with:
– Coffee: A rich cup of coffee enhances the flavors of the cheesecake beautifully.
– Dessert Wine: A sweet dessert wine like a late harvest Riesling or a Moscato pairs wonderfully with the sweetness of the cheesecake.
Creative Serving Options:
– Individual Slices: For a more personal touch, serve individual slices with a small dollop of jelly on top.
– Mini Cheesecakes: Consider making mini cheesecakes in muffin tins for a fun, bite-sized dessert option.
Storing and Reheating the Cheesecake
Proper storage is essential to keep your Peanut Butter & Jelly Cheesecake fresh for when you want to enjoy it again.
Best Practices for Storing:
– Refrigerator: Cover the cheesecake with plastic wrap or aluminum foil to prevent it from absorbing odors. It will keep well in the refrigerator for up to one week.
– Freezing: If you want to store it for a longer period, you can freeze the cheesecake. Wrap it tightly in plastic wrap and then in aluminum foil to prevent freezer burn. It will last up to three months.
Thawing Properly:
When you’re ready to enjoy a slice of frozen cheesecake, transfer it to the refrigerator and let it thaw overnight. This slow thawing ensures that the texture remains creamy and delicious.
Refreshing Before Serving:
If the cheesecake appears slightly dry after thawing, you can refresh it by adding a drizzle of fresh jelly or whipped cream on top before serving.
Conclusion
Making and enjoying Peanut Butter & Jelly Cheesecake is a delightful experience that combines nostalgia with a modern twist. The creamy texture of the cheesecake, paired with the sweet and tangy jelly topping, creates a dessert that is both comforting and indulgent. Whether you’re celebrating a special occasion or looking for a comforting treat to share with family and friends, this cheesecake is sure to impress.
The joy of baking this cheesecake lies not only in the process but also in the smiles it brings to those who enjoy it. So, gather your ingredients, follow the steps, and indulge in this delicious treat that is bound to become a favorite in your dessert repertoire. Whether it’s for a birthday, holiday gathering, or simply a weekend treat, this Peanut Butter & Jelly Cheesecake is one recipe you won’t want to miss out on.