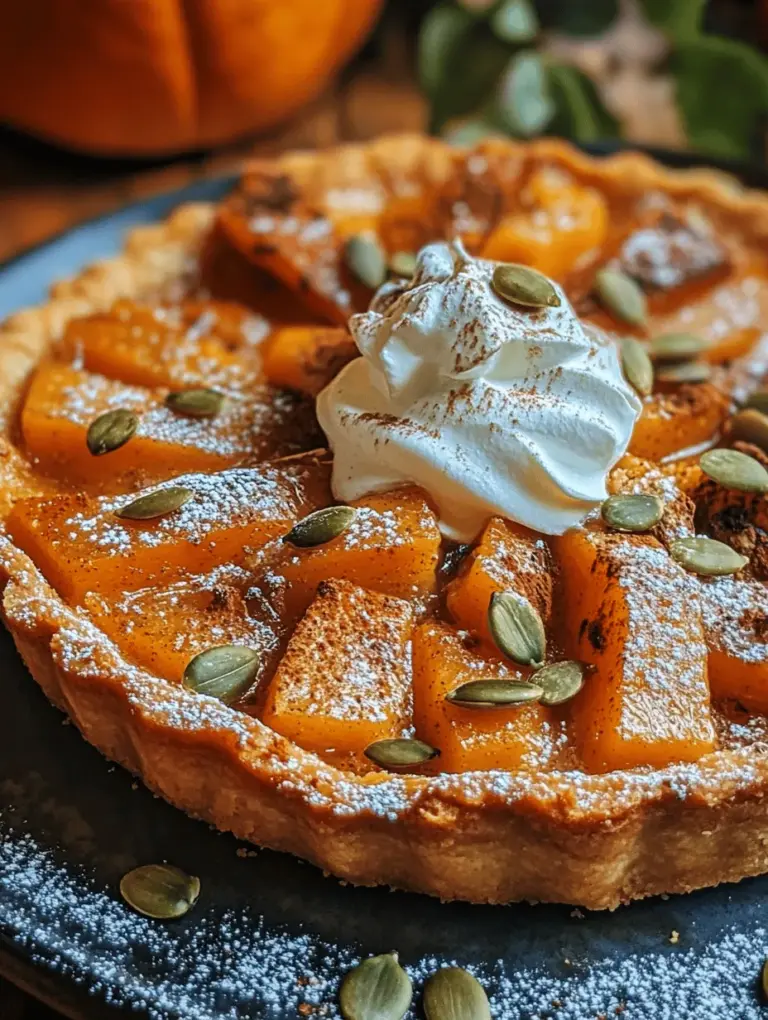
Harvest Harmony Pumpkin Tart: A Seasonal Delight

WANT TO SAVE THIS RECIPE?

Introduction

As the leaves turn vibrant shades of orange and gold, and the air grows crisp, autumn invites us to indulge in its bountiful harvest. One of the most iconic symbols of this season is the pumpkin, a versatile ingredient that has carved its niche in various culinary traditions. From savory soups to sweet pies, pumpkins embody the essence of fall, offering a rich, earthy flavor that resonates with cozy gatherings and festive celebrations. Among the myriad of pumpkin-inspired dishes, the Harvest Harmony Pumpkin Tart stands out as a warm, inviting dessert that perfectly encapsulates the spirit of the season.

This delightful tart not only showcases the creamy, spiced filling of pumpkin but also features a buttery, flaky crust that cradles it all. Whether you’re hosting a holiday dinner or a casual family get-together, this pumpkin tart serves as a beautiful centerpiece that is sure to impress your guests. Its harmonious blend of flavors and textures makes it a crowd-pleaser, enticing everyone to savor each bite. As we explore the intricacies of this recipe, you’ll discover why the Harvest Harmony Pumpkin Tart is a must-have addition to your autumnal repertoire.

Understanding the Ingredients

To create the perfect Harvest Harmony Pumpkin Tart, it’s essential to understand the role each ingredient plays. This tart relies on a combination of simple yet impactful components, each contributing to its signature taste and texture.

All-Purpose Flour

The foundation of any tart is its crust, and all-purpose flour is the primary ingredient that creates this structure. When choosing flour, it’s crucial to select a high-quality all-purpose option. This flour provides the necessary gluten content needed for a sturdy yet tender crust. The right balance ensures that the tart holds its shape while remaining light and flaky, making each slice a delight.

Unsalted Butter

Butter is another critical player in the crust-making process. Using unsalted butter is recommended, as it allows you to control the saltiness of the dish. Chilled butter is essential for creating a flaky texture; when cold butter is cut into flour, it forms small pockets of fat. As the tart bakes, these pockets melt, resulting in a light and airy crust. Avoid using softened butter for this recipe, as it can lead to a dense, less desirable texture.

Pumpkin Puree

The star of the Harvest Harmony Pumpkin Tart is undoubtedly the pumpkin puree. You have the option of using either fresh or canned pumpkin, each offering distinct benefits. Canned pumpkin puree is convenient and consistently delivers a smooth texture, while fresh pumpkin allows for a more robust flavor. If you choose to go the fresh route, consider roasting or steaming the pumpkin to enhance its natural sweetness before pureeing it. Regardless of your choice, ensure that the pumpkin is pureed until completely smooth for optimal results.

Spices

No pumpkin dessert would be complete without the warm, aromatic spices that elevate its flavor. In this recipe, cinnamon, nutmeg, and ginger are essential for creating a depth of flavor that complements the natural sweetness of the pumpkin. Cinnamon adds a comforting warmth, nutmeg contributes a subtly sweet and nutty note, while ginger introduces a hint of spiciness that rounds out the profile beautifully. Adjust the amounts of these spices according to your taste preferences, but be sure to include them for that quintessential autumn flavor.

Optional Garnishes

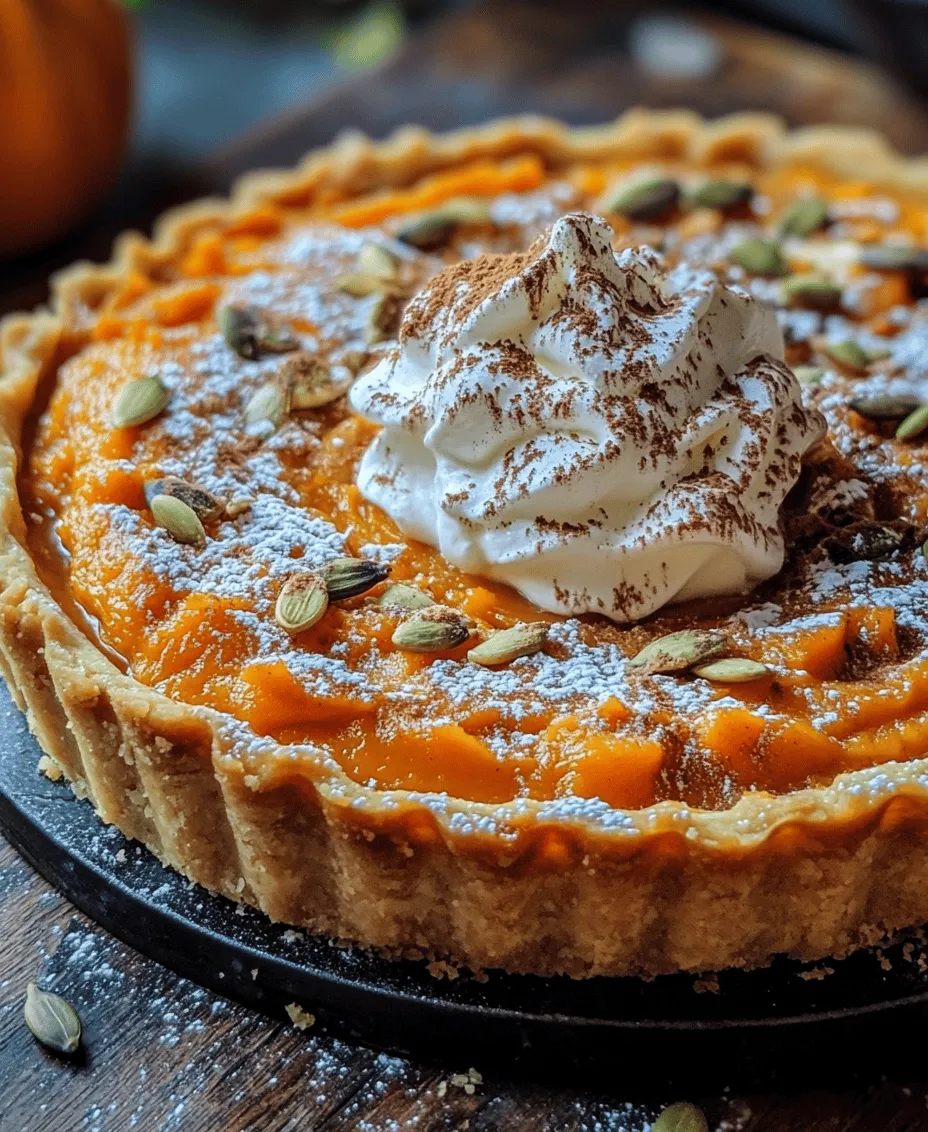
While the tart is delightful on its own, optional garnishes can add a touch of elegance and extra flavor. Whipped cream is a classic accompaniment, bringing a light, airy texture that balances the richness of the filling. For a crunchy contrast, consider sprinkling toasted pumpkin seeds over the top. These seeds not only enhance the visual appeal but also add a nutty flavor that complements the tart beautifully.

Creating the Perfect Tart Crust

A well-made crust is the backbone of a successful tart, contributing to its overall texture and flavor. Here, we’ll delve into the detailed steps for preparing the perfect tart crust that will cradle your delicious pumpkin filling.

Step 1: Combining the Dry Ingredients and Butter

Begin by gathering all your dry ingredients, which include the all-purpose flour and a pinch of salt. The salt enhances the flavor of the crust and balances the sweetness of the filling. In a large mixing bowl, combine the flour and salt, whisking them together to ensure they are evenly distributed.

Next, cut the chilled unsalted butter into small cubes. Adding the butter to the flour mixture, use a pastry cutter or your fingertips to blend the two. Aim for a crumbly texture where the mixture resembles coarse crumbs, with pea-sized pieces of butter still visible. This process is crucial, as it helps create the flaky layers when baked.

Step 2: Adding the Egg Yolk and Cold Water

Once the flour and butter are well combined, it’s time to add the egg yolk. Incorporating an egg yolk not only enriches the dough, adding flavor and a beautiful golden hue, but it also helps bind the ingredients together. After adding the egg yolk, mix gently until just combined.

To achieve the right consistency, you’ll need to add cold water gradually. Start with one tablespoon and mix until the dough holds together. The goal is to hydrate the flour without making the dough too wet, so be cautious not to overmix. If the dough feels crumbly, add more cold water, one teaspoon at a time, until it comes together.

Step 3: Chilling the Dough

Once your dough is formed, it’s important to chill it before rolling it out. Wrap the dough in plastic wrap and flatten it into a disk shape. This step is essential for achieving a flaky crust, as it allows the gluten to relax and the butter to firm up. Refrigerate the dough for at least 30 minutes.

While the dough chills, preheat your oven to 375°F (190°C) to ensure it’s hot and ready for baking once you’re finished preparing the tart.

Step 4: Rolling Out the Dough

After your dough has chilled, it’s time to roll it out. On a lightly floured surface, use a rolling pin to roll the dough into a circle, roughly 1/8 inch thick. If the dough sticks to the surface, sprinkle a bit more flour to prevent it from adhering.

Once the dough is rolled out, gently transfer it to your tart pan. You can do this by rolling it around the rolling pin and then unrolling it over the pan. Carefully press the dough into the edges of the pan, ensuring it fits snugly. Trim any excess dough hanging over the edges, but leave a little overhang to account for shrinkage during baking.

Step 5: Pre-baking the Crust

To ensure a crisp crust, pre-bake the tart shell before adding the filling. Use a fork to poke small holes in the bottom of the crust to prevent bubbling. Then, line the crust with parchment paper and fill it with pie weights or dried beans. This will keep the crust from puffing up while it bakes.

Place the tart shell in the preheated oven and bake for about 15-20 minutes, or until the edges are lightly golden. Remove the crust from the oven, carefully take out the weights and parchment, and allow it to cool slightly before adding the pumpkin filling.

With the crust prepared and cooling, you’re now ready to move on to filling it with the delightful pumpkin mixture that will create the heart of the Harvest Harmony Pumpkin Tart. Stay tuned for the next steps as we explore how to put together this seasonal masterpiece.
As the leaves turn vibrant shades of orange and gold, and the air grows crisp, autumn invites us to indulge in its bountiful harvest. One of the most iconic symbols of this season is the pumpkin, a versatile ingredient that has carved its niche in various culinary traditions. From savory soups to sweet pies, pumpkins embody the essence of fall, offering a rich, earthy flavor that resonates with cozy gatherings and festive celebrations. Among the myriad of pumpkin-inspired dishes, the <strong>Harvest Harmony Pumpkin Tart</strong> stands out as a warm, inviting dessert that perfectly encapsulates the spirit of the season.” /></p>
</p>
<h3>Explanation of Blind Baking and Its Benefits in Preventing a Soggy Bottom</h3>
</p>
<p>Blind baking is a crucial technique in tart making that involves pre-baking the crust before adding the filling. This method helps ensure that the crust remains crisp and prevents the dreaded soggy bottom that can occur when moist fillings are added. By partially baking the crust first, you create a barrier that protects the pastry from absorbing excess moisture during the baking process.</p>
</p>
<p>When blind baking, it is essential to use pie weights or dried beans to weigh down the crust, preventing it from puffing up and losing its shape. The result is a perfectly baked, flaky crust that holds up beautifully against the rich pumpkin filling. This technique is particularly beneficial in recipes like the Harvest Harmony Pumpkin Tart, where the filling is custard-like and can introduce moisture into the crust.</p>
</p>
<h3>Crafting the Pumpkin Filling</h3>
</p>
<h4>Importance of Texture and Flavor Balance in the Filling</h4>
</p>
<p>For an exceptional pumpkin tart, the filling must achieve a fine balance between texture and flavor. The ideal filling is creamy, smooth, and rich, with a harmonious blend of spices that highlight the natural sweetness of the pumpkin.</p>
</p>
<h4>Step-by-Step Guide to Preparing the Filling</h4>
</p>
<p>1. <strong>Combine the Base Ingredients</strong>: In a large mixing bowl, combine your pumpkin puree and heavy cream. The heavy cream is vital for adding richness and a velvety texture to your filling. Stir until well combined.</p>
</p>
<p>2. <strong>Add Sweetness</strong>: Gradually mix in brown sugar. Brown sugar not only sweetens the filling but also adds depth and a subtle caramel flavor that complements the pumpkin beautifully.</p>
</p>
<p>3. <strong>Spice It Up</strong>: Next, incorporate your chosen spices (typically cinnamon, nutmeg, and ginger) along with a pinch of salt. The spices are essential for creating that warm, autumnal flavor profile, and the salt enhances all the other flavors.</p>
</p>
<p>4. <strong>Incorporate Eggs</strong>: Slowly add in the eggs, one at a time, mixing gently after each addition. This step is crucial; incorporating the eggs gradually helps maintain a smooth consistency in your filling, preventing any lumps that can disrupt the creamy texture.</p>
</p>
<p>5. <strong>Blend Until Smooth</strong>: Once all ingredients are combined, blend the mixture on low speed until smooth and creamy. You can also use a whisk to combine everything by hand if you prefer a bit of workout in the kitchen.</p>
</p>
<h4>Combining Pumpkin Puree and Heavy Cream for Creaminess</h4>
</p>
<p>Using a combination of pure pumpkin and heavy cream is the key to achieving that luscious mouthfeel. The pumpkin puree provides a rich flavor and a beautiful orange hue, while the heavy cream adds a luxurious texture. For an even creamier filling, consider substituting a portion of the heavy cream with evaporated milk.</p>
</p>
<h4>The Role of Brown Sugar in Sweetness and Depth</h4>
</p>
<p>Brown sugar is a crucial component in crafting the perfect pumpkin filling. Its molasses content not only enhances sweetness but also introduces a layer of complexity to the flavor. This depth is particularly important in balancing the natural earthiness of the pumpkin.</p>
</p>
<h4>Mixing Spices and Salt for a Harmonious Flavor Profile</h4>
</p>
<p>The spices you choose can significantly impact the overall flavor of your tart. A mix of cinnamon, nutmeg, ginger, and allspice creates a warm and inviting taste that embraces the essence of autumn. The salt, though seemingly minor, enhances the sweetness and rounds out the flavors, making every bite a delight.</p>
</p>
<h4>Importance of Incorporating Eggs Slowly to Maintain a Smooth Filling</h4>
</p>
<p>Incorporating the eggs slowly is a technique that ensures the filling remains homogeneous. If added too quickly or without proper mixing, the eggs can clump and create an undesirable texture. A smooth filling is essential for the best pumpkin tart experience, allowing the flavors to meld beautifully.</p>
</p>
<h3>Baking the Tart to Perfection</h3>
</p>
<h4>Optimal Baking Temperature and Time for the Filling</h4>
</p>
<p>Once your filling is ready and your crust is blind-baked, it’s time to pour the mixture into the crust. Preheat your oven to 350°F (175°C) for optimal baking. Pour the pumpkin filling into the prepared crust and bake for approximately 45-50 minutes.</p>
</p>
<h4>How to Test for Doneness: The Toothpick Method</h4>
</p>
<p>To ensure your tart is baked to perfection, use the toothpick method to test for doneness. Insert a toothpick into the center of the filling; if it comes out clean or with just a few moist crumbs, your tart is ready. If it comes out with wet batter, give it a few more minutes in the oven, checking regularly.</p>
</p>
<h4>Cooling and Setting: Why Letting the Tart Cool is Crucial for Presentation</h4>
</p>
<p>Once baked, allow the tart to cool in the pan for about 15-20 minutes before transferring it to a wire rack. Cooling is essential not only for setting the filling but also for making slicing easier. A hot tart can lead to messy, uneven slices. Allowing it to cool completely will ensure that your presentation is as beautiful as the flavor.</p>
</p>
<h3>Serving Suggestions and Presentation</h3>
</p>
<h4>Ideas for Serving the Tart: Slicing and Garnishing</h4>
</p>
<p>When it comes to serving your Harvest Harmony Pumpkin Tart, presentation is key. Once cooled, slice the tart into wedges and serve on a decorative plate. A dusting of powdered sugar can add an elegant touch, while a dollop of whipped cream enhances the visual appeal and richness.</p>
</p>
<h4>The Visual Appeal of Whipped Cream and Toasted Pumpkin Seeds</h4>
</p>
<p>Whipped cream is a classic accompaniment for pumpkin tart, providing a light and airy contrast to the dense filling. For an added crunch and a hint of nuttiness, consider sprinkling toasted pumpkin seeds on top, which not only elevate the flavor but also add an attractive texture.</p>
</p>
<h4>Pairing Suggestions for Drinks or Other Desserts</h4>
</p>
<p>Pair your pumpkin tart with a warm spiced apple cider or a robust coffee for a comforting autumn dessert experience. If you’re feeling indulgent, a scoop of vanilla ice cream complements the tart beautifully, creating a delightful contrast of temperatures.</p>
</p>
<h3>Conclusion</h3>
</p>
<p>Creating and sharing the Harvest Harmony Pumpkin Tart is a joyful experience that embodies the essence of autumn. The process of blending rich flavors, experimenting with spices, and perfecting the baking technique is rewarding and satisfying.</p>
</p>
<p>Embrace the seasonal ingredients that fall has to offer and let the aroma of baking pumpkin fill your kitchen. This tart is versatile enough to be enjoyed at casual gatherings, festive holidays, or as a comforting treat on a chilly evening.</p>
</p>
<p>The Harvest Harmony Pumpkin Tart not only brings together the flavors of the season but also creates lasting memories with family and friends. So, gather your ingredients and get ready to enjoy this delightful treat that celebrates the spirit of harvest. Happy baking!</p>
</div>

As the leaves turn vibrant shades of orange and gold, and the air grows crisp, autumn invites us to indulge in its bountiful harvest. One of the most iconic symbols of this season is the pumpkin, a versatile ingredient that has carved its niche in various culinary traditions. From savory soups to sweet pies, pumpkins embody the essence of fall, offering a rich, earthy flavor that resonates with cozy gatherings and festive celebrations. Among the myriad of pumpkin-inspired dishes, the Harvest Harmony Pumpkin Tart stands out as a warm, inviting dessert that perfectly encapsulates the spirit of the season.

Pumpkin Tart

Fall in love with autumn flavors through the Harvest Harmony Pumpkin Tart! This delightful dessert features a creamy, spiced pumpkin filling encased in a flaky, buttery crust. Perfect for holiday gatherings or cozy family nights, it's sure to impress your guests. Enhance your tart with whipped cream or toasted pumpkin seeds for added flair. Embrace the season's bounty and make this tart a staple in your fall baking lineup! #PumpkinTart #FallBaking #AutumnRecipes #HarvestDelight

Ingredients
  

1 ½ cups all-purpose flour

½ cup chilled unsalted butter, cubed

¼ cup powdered sugar

1 large egg yolk

3-4 tablespoons cold water

2 cups pumpkin puree (fresh or canned)

1 cup heavy cream

¾ cup brown sugar

¾ teaspoon ground cinnamon

½ teaspoon ground nutmeg

¼ teaspoon ground ginger

¼ teaspoon salt

4 large eggs

Whipped cream and toasted pumpkin seeds for garnish (optional)

Instructions
 

Prepare the crust: In a food processor, combine the flour, cubed butter, and powdered sugar. Pulse until the mixture resembles coarse crumbs.

    Add egg yolk: Add the egg yolk and pulse again. Gradually add cold water, one tablespoon at a time, until the dough forms a ball.

      Chill the dough: Shape the dough into a disk, wrap in plastic wrap, and refrigerate for at least 30 minutes.

        Preheat oven: Preheat your oven to 375°F (190°C).

          Roll out the dough: On a lightly floured surface, roll out the chilled dough to fit a 9-inch tart pan. Press the dough into the pan and trim any excess.

            Blind bake: Place a sheet of parchment paper on the crust and fill with pie weights or dried beans. Bake for 15 minutes, then remove weights and parchment, baking for an additional 5 minutes until lightly golden.

              Prepare the filling: In a large mixing bowl, whisk together the pumpkin puree, heavy cream, brown sugar, spices, and salt until smooth.

                Add eggs: Add the eggs one at a time, mixing until just combined.

                  Fill the crust: Pour the pumpkin filling into the baked crust, smoothing the top.

                    Bake the tart: Place in the oven and bake for 45-50 minutes or until the filling is set and a toothpick inserted in the center comes out clean.

                      Cool: Remove from the oven and let the tart cool to room temperature before refrigerating for at least 2 hours.

                        Serve: Slice and serve garnished with whipped cream and toasted pumpkin seeds if desired.

                          Prep Time: 30 min | Total Time: 2 hrs 30 min | Servings: 8

                            WANT TO SAVE THIS RECIPE?

                            Leave a Comment

                            Recipe Rating