Introduction
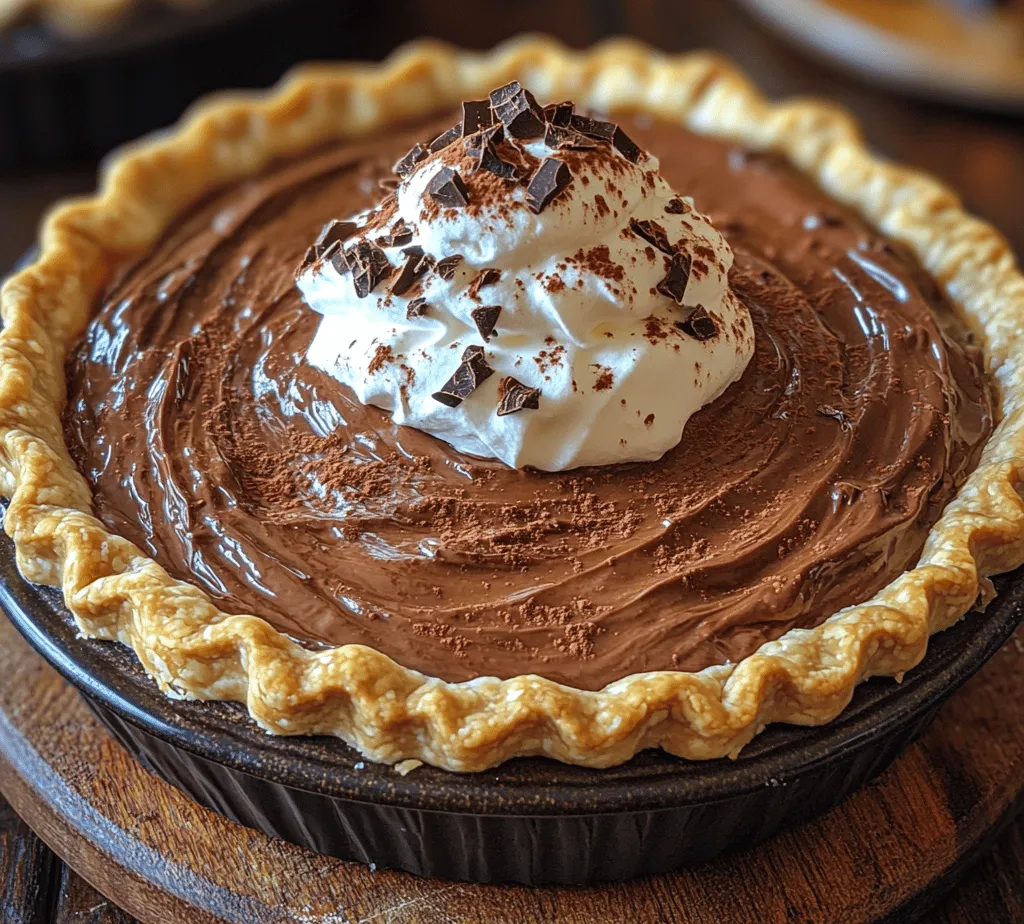
There’s something undeniably special about the recipes we inherit from our grandmothers. These cherished dishes are often steeped in nostalgia, evoking warm memories of family gatherings and celebrations. They are the heart of our culinary history, passed down through generations, often with a few personal twists and flourishes. Among these treasured recipes, Grandma’s Decadent Chocolate Pie stands out as a comforting symbol of love and indulgence.
Chocolate desserts have a unique allure that transcends age and occasion. Whether it’s a festive holiday gathering, a birthday celebration, or a simple family dinner, chocolate pie has a way of bringing people together. Its rich, velvety filling nestled in a flaky crust is an invitation to savor and delight in the moment. This pie isn’t just a dessert; it’s an experience that evokes laughter, stories, and shared joy around the dining table.
In this article, we will guide you step-by-step through the process of creating this rich, indulgent chocolate pie. From the perfect pie crust to the creamy filling, you’ll learn how to bring a piece of your grandmother’s kitchen into your own home, creating sweet memories that can be shared with loved ones.
The Allure of Chocolate Desserts
Chocolate has long been celebrated as a universal favorite. Its comforting qualities and rich flavor have made it a staple in many cultures around the world. The mere mention of chocolate can evoke feelings of happiness, making it an essential ingredient in many beloved desserts. Chocolate pie, in particular, holds a special place in the hearts of many, often being the centerpiece of gatherings where family and friends come together to celebrate life’s moments—big and small.
Homemade desserts, especially those that have been passed down through generations, carry a unique significance. They are not just about taste; they are about tradition, love, and the memories created around the kitchen table. When we bake a pie that our grandmothers made, we are not just following a recipe; we are connecting with our roots and honoring the culinary legacy they have gifted us. Grandma’s Decadent Chocolate Pie is more than just a dessert; it’s a slice of history, a taste of nostalgia, and a celebration of togetherness.
Understanding the Components of Grandma’s Decadent Chocolate Pie
To master Grandma’s Decadent Chocolate Pie, it’s essential to understand its components: the crust, the filling, and the toppings. Each part plays a crucial role in creating the delightful experience this pie offers.
The Crust
The foundation of any great pie is its crust. A flaky, buttery crust provides the perfect balance to the rich chocolate filling. It is essential to use quality ingredients, including all-purpose flour, unsalted butter, and a touch of salt, to achieve the ideal texture. The crust should be tender yet sturdy enough to hold the decadent filling.
The Filling
The chocolate filling is where the magic truly happens. It is a luscious blend of rich chocolate, eggs, sugar, and cream, creating a velvety texture that melts in your mouth. The choice of chocolate—whether dark, semi-sweet, or a combination—will affect the flavor profile, making it important to select high-quality chocolate to enhance the pie’s overall taste.
The Toppings
While the crust and filling are the stars of the show, the toppings can elevate this dessert to new heights. Whipped cream, chocolate shavings, or even a sprinkle of sea salt can add an extra layer of flavor and presentation. These finishing touches not only enhance the visual appeal but also provide a delightful contrast to the rich chocolate.
Creating the Perfect Pie Crust
A pie crust is more than just a vessel for the filling; it is an integral part of the pie’s overall success. The following section outlines the ingredients used in the pie crust and the step-by-step process to create a flaky, delicious crust that will cradle the decadent filling perfectly.
Ingredients for the Pie Crust
To make the perfect pie crust, you will need the following ingredients:
– All-purpose flour: The base of the crust, providing structure.
– Unsalted butter: Adds richness and flavor. Cold butter is key to achieving flakiness.
– Salt: Enhances flavor and balances the sweetness of the filling.
– Ice water: Helps bind the dough together without making it tough.
Step-by-Step Process of Making the Pie Crust
1. Combining Dry Ingredients: In a large mixing bowl, combine 1 ½ cups of all-purpose flour and ½ teaspoon of salt. Whisk them together until well blended.
2. Incorporating Butter for Texture: Cut 1 stick (½ cup) of cold unsalted butter into small cubes. Add the butter to the flour mixture. Using a pastry cutter or your fingertips, work the butter into the flour until the mixture resembles coarse crumbs. The key is to leave small pieces of butter intact, as this will create a flaky texture once baked.
3. The Role of Ice Water in Dough Formation: Gradually add about 3 to 4 tablespoons of ice water to the mixture, one tablespoon at a time. Mix gently with a fork until the dough begins to come together. Be careful not to overwork the dough; it should be slightly crumbly but hold together when pressed.
4. Importance of Chilling the Dough and Pre-Baking for a Flaky Crust: Form the dough into a disk, wrap it in plastic wrap, and refrigerate for at least 30 minutes. Chilling the dough helps to relax the gluten, making it easier to roll out.
5. Rolling Out the Dough: Once chilled, dust a clean surface with flour. Roll out the dough into a circle about 12 inches in diameter and about ¼ inch thick.
6. Transferring and Shaping the Crust in the Pie Dish: Carefully transfer the rolled-out dough to a 9-inch pie dish. You can do this by gently rolling it around the rolling pin and unrolling it over the dish. Press the dough into the dish, making sure it fits snugly against the sides and bottom. Trim any excess dough hanging over the edges, leaving about 1 inch to fold under and crimp the edges for a decorative finish.
7. Pre-baking the Crust: To ensure a crisp, flaky crust, pre-bake it. Preheat your oven to 375°F (190°C). Line the crust with parchment paper and fill it with pie weights or dried beans to prevent it from puffing up. Bake for about 15 minutes, then remove the weights and parchment and bake for an additional 5-10 minutes until the crust is lightly golden. Allow it to cool completely before adding the chocolate filling.
By following these steps, you will create a pie crust that serves as the perfect base for Grandma’s Decadent Chocolate Pie, offering a delightful crunch that complements the creamy filling.
Crafting the Rich Chocolate Filling
Now that you have prepared the perfect pie crust, it’s time to focus on the star of the show—the rich chocolate filling. This filling is what makes Grandma’s pie so decadent and memorable. It combines simple yet high-quality ingredients to create a smooth, irresistible chocolate experience.
Breakdown of the Filling Ingredients and Their Functions
To make the chocolate filling, you will need the following ingredients:
– High-quality chocolate: Opt for semi-sweet or dark chocolate for a rich flavor. The chocolate should be chopped into small pieces for easy melting.
– Granulated sugar: Adds sweetness to balance the bitterness of the chocolate.
– Eggs: Provide structure and richness, helping the filling set as it bakes.
– Heavy cream: Contributes to the smooth, creamy texture of the filling.
– Butter: Adds richness and a glossy finish to the filling.
– Vanilla extract: Enhances the overall flavor, elevating the chocolate’s depth.
Making the Chocolate Filling
1. Melting the Chocolate: In a heatproof bowl, combine 8 ounces of chopped chocolate and 1 cup of heavy cream. Set the bowl over a saucepan of simmering water (double boiler method) and gently stir until the chocolate is completely melted and smooth. Alternatively, you can melt the chocolate in the microwave in short bursts, stirring in between.
2. Mixing in the Sugar and Eggs: Remove the bowl from heat and let it cool slightly. Once the chocolate mixture is warm but not hot, add ½ cup of granulated sugar and 3 large eggs, one at a time, whisking until well combined. The mixture should be smooth and glossy.
3. Incorporating Butter and Vanilla: Stir in 2 tablespoons of unsalted butter and 1 teaspoon of vanilla extract until fully incorporated. The butter will add a luscious quality to the filling, while the vanilla enhances the chocolate flavor.
4. Pouring the Filling into the Crust: Pour the prepared chocolate filling into the cooled pie crust, smoothing the top with a spatula.
As you prepare the filling, the rich aroma of melting chocolate will fill your kitchen, setting the stage for the indulgent dessert that awaits. The combination of these simple yet high-quality ingredients is what makes Grandma’s Decadent Chocolate Pie not just a dessert, but a cherished experience that captures the essence of family gatherings and sweet memories.
In the next section, we will delve into additional tips for baking, serving, and storing your pie, ensuring that every slice is as delightful as the first.

The Balance of Milk and Cream for Creaminess
The secret to achieving that luscious, velvety texture in Grandma’s Decadent Chocolate Pie lies in the perfect balance of milk and cream. The combination of whole milk and heavy cream not only enhances the creaminess of the filling but also contributes to the overall richness of the pie. Whole milk provides a lighter base, while the heavy cream adds that luxurious mouthfeel that makes each bite a heavenly experience.
The Significance of Semi-Sweet Chocolate in Flavor Depth
When it comes to chocolate pie, the choice of chocolate plays a crucial role in the overall flavor profile. Semi-sweet chocolate strikes the perfect balance between sweetness and richness. It offers a deep, intense chocolate flavor without being overwhelmingly sweet. This chocolate complements the creaminess of the filling, creating a decadent dessert that is both satisfying and indulgent.
Step-by-Step Instructions for Preparing the Chocolate Filling
Heating the Milk and Cream Mixture
1. Combine Ingredients: In a medium saucepan, combine 1 cup of whole milk and 1 cup of heavy cream. Whisk them together until well blended.
2. Heat Over Medium: Place the saucepan over medium heat. Stir occasionally to prevent the mixture from scorching and to ensure even heating.
3. Heat to Simmer: Allow the mixture to heat until it begins to simmer gently. You’ll see small bubbles forming around the edges, but do not let it come to a full boil.
Properly Tempering the Egg Yolks to Prevent Curdling
4. Prepare Egg Yolks: In a separate bowl, whisk together 4 large egg yolks and ½ cup of granulated sugar until the mixture is pale and fluffy.
5. Temper the Yolks: Once the milk and cream mixture is simmering, gradually pour a small amount of it into the egg yolk mixture while whisking continuously. This process, known as tempering, helps to raise the temperature of the yolks without cooking them.
6. Combine Mixtures: Once tempered, slowly pour the egg yolk mixture back into the saucepan with the remaining milk and cream, whisking constantly.
The Process of Thickening the Filling on the Stove
7. Thicken the Filling: Place the saucepan back on the stove over medium heat. Continue to stir constantly as the mixture thickens. This should take about 5–7 minutes. You’ll know it’s ready when it coats the back of a spoon.
8. Add Chocolate: Remove the saucepan from the heat and add 8 ounces of chopped semi-sweet chocolate. Stir until the chocolate is fully melted and the mixture is smooth and glossy.
The Addition of Flavor Enhancers Like Vanilla and Instant Coffee
9. Enhance the Flavor: To elevate the flavor of your filling, add 1 teaspoon of pure vanilla extract and 1 teaspoon of instant coffee granules. The coffee will enhance the chocolate flavor without imparting a distinct coffee taste. Stir until well combined.
Assembling the Pie with Care
Importance of Letting the Crust Cool Before Filling
Before pouring the chocolate filling into the pie crust, it is essential to let the crust cool completely. A hot crust could cause the filling to separate, leading to a less-than-perfect texture. Allowing the crust to cool also ensures that the filling sets properly.
Techniques for Pouring and Smoothing the Filling into the Crust
1. Pour Carefully: Gently pour the chocolate filling into the cooled pie crust. Use a spatula to guide it and minimize splashing.
2. Smooth the Surface: After pouring, use the back of a spoon or an offset spatula to smooth the surface of the filling for an even appearance.
Recommended Cooling Time for Optimal Texture and Setting
3. Cool to Room Temperature: Allow the pie to cool at room temperature for about 30 minutes before transferring it to the refrigerator.
4. Chill: Refrigerate the pie for at least 4 hours, or overnight if possible. This chilling time allows the filling to firm up and sets the flavors beautifully.
Garnishing and Serving Suggestions
Ideas for Topping the Chocolate Pie with Whipped Cream and Chocolate Shavings
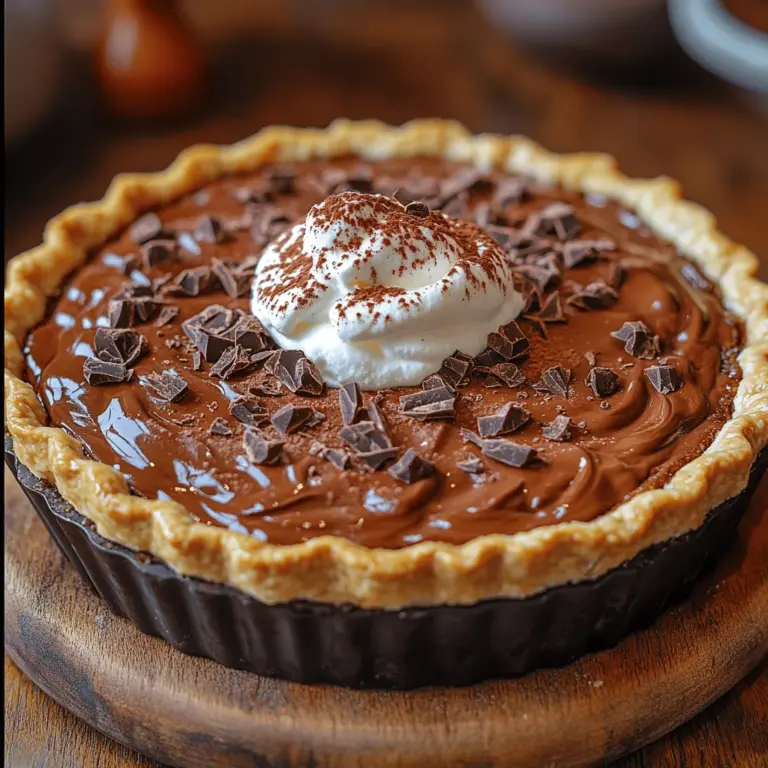
Once the pie is set, it’s time to add some finishing touches. Generously top the pie with freshly whipped cream. You can make your own by whipping heavy cream with a bit of sugar and vanilla until soft peaks form. For an extra touch of indulgence, sprinkle chocolate shavings or curls on top. You can easily create chocolate shavings by using a vegetable peeler on a chocolate bar.
Serving Suggestions: Pairing with Fresh Berries or a Scoop of Vanilla Ice Cream
For a beautiful contrast in both flavor and presentation, consider serving slices of pie with fresh berries, such as raspberries or strawberries. Their tartness cuts through the richness of the chocolate, creating a delightful balance. Alternatively, a scoop of vanilla ice cream on the side adds a creamy element that complements the pie perfectly.
Presentation Tips to Enhance Visual Appeal and Indulgence
To enhance the visual appeal, serve the pie on a decorative platter. Drizzle some chocolate sauce or a berry coulis on the plate before placing a slice of pie on top. A sprig of mint can also add a pop of color and freshness to the presentation.
The Joy of Sharing Grandma’s Recipe
There’s something truly special about sharing Grandma’s Decadent Chocolate Pie with family and friends. Each slice brings back memories of laughter and togetherness, reminding us of the love baked into every layer. This pie is more than just a dessert; it’s a vessel for creating cherished memories and traditions.
As you bake this pie, encourage your loved ones to join in the process. Whether it’s measuring ingredients, mixing the filling, or decorating the pie, these shared moments will foster a sense of connection that transcends generations.
Encouraging Readers to Create Their Own Memories While Baking This Pie
Invite your family and friends to experience the joy of baking together. Share stories from your childhood about how this recipe came to be, and encourage them to add their own touch. This way, each time you make Grandma’s pie, it becomes a unique creation filled with personal memories and love.
The Significance of Family Recipes in Preserving Traditions
Family recipes like Grandma’s Decadent Chocolate Pie are invaluable treasures that preserve our culinary heritage. They connect us to our roots and remind us of the people who came before us. By passing down these recipes, we keep the spirit of our loved ones alive in our kitchens, ensuring that their legacy continues for future generations.
Conclusion
In conclusion, the joy and satisfaction derived from making and sharing Grandma’s Decadent Chocolate Pie are immeasurable. This recipe not only delivers a rich and delicious dessert but also serves as a reminder of the connections we share with those we love.
Embrace the art of baking, for it has the power to create lasting memories and bring people together. As you indulge in this timeless chocolate pie, take a moment to reflect on the traditions that shape our culinary heritage and the flavors that unite us all. Enjoy the sweetness of life, one slice at a time.

