Introduction
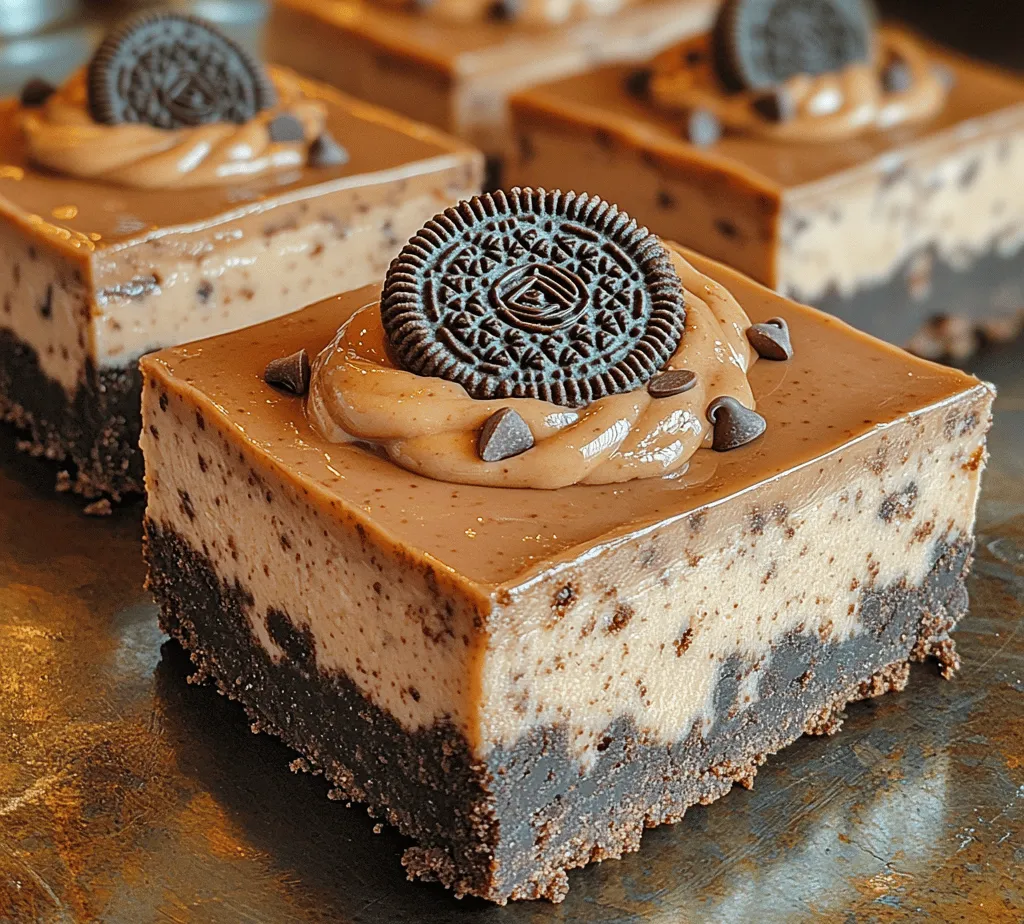
If you’re on the lookout for a simple yet indulgent dessert, look no further than these dreamy no-bake Oreo cheesecake bars. Combining the classic flavors of creamy cheesecake and rich chocolate, these bars are sure to be a hit at any gathering or simply enjoyed on a cozy night in. The allure of no-bake recipes lies in their ability to deliver scrumptious results with minimal effort, making them perfect for busy individuals and families who appreciate a delightful treat without spending hours in the kitchen.
The key to achieving the perfect no-bake Oreo cheesecake bars lies in the harmonious blend of a few essential ingredients. The star of the show, of course, is the Oreo cookie, which not only lends its distinctive flavor but also forms the delicious crust. Coupled with cream cheese, heavy whipping cream, and a dash of vanilla extract, this recipe creates a luscious filling that is both creamy and light. Whether you are entertaining guests or simply treating yourself, these no-bake cheesecake bars will surely satisfy your sweet cravings.
Understanding the Appeal of No-Bake Desserts
No-bake desserts have gained immense popularity, and for good reason. First and foremost, they offer unparalleled convenience. With quick preparation times and no need for baking, you can whip up a dessert in under an hour, allowing for more time to focus on other aspects of your day or event. This ease of preparation makes no-bake desserts particularly appealing during the hot summer months when turning on the oven can feel like a chore. Instead, you can create a refreshing treat that requires minimal fuss and cleanup.
Furthermore, no-bake cheesecake bars are incredibly versatile. They can be adapted to suit various tastes and occasions, whether you’re hosting a birthday party, a holiday celebration, or simply enjoying a casual family dinner. The rich, creamy texture, combined with the crunch of the Oreo crust, makes these bars a universal crowd-pleaser. You can even experiment with different toppings or add-ins to make the dessert uniquely yours. The possibilities are truly endless!
Ingredient Breakdown
To achieve the rich flavor and creamy texture of the Dreamy No-Bake Oreo Cheesecake Bars, you will need the following key ingredients:
Oreo Cookies
Oreo cookies are undoubtedly the star ingredient in this dessert. Their iconic chocolate flavor and crunchy texture not only provide the base for the crust but also infuse the cheesecake filling with a delightful chocolatey taste. When crushed, the cookies create a firm and flavorful crust that complements the creamy filling perfectly.
Unsalted Butter
Unsalted butter plays a crucial role in binding the crust together. It adds richness and helps the crushed Oreo cookies adhere, ensuring that your crust maintains its structural integrity. Using unsalted butter allows you to control the saltiness of the dessert, ensuring a balanced flavor profile.
Cream Cheese
As the base of the cheesecake filling, cream cheese is vital for achieving that classic creamy texture we all love. Its smooth consistency adds richness and depth to the filling, creating a luxurious mouthfeel. Be sure to use softened cream cheese for easy blending, which will help avoid any lumps in your cheesecake mixture.
Powdered Sugar
Powdered sugar is used to sweeten the filling without adding any graininess. Its fine texture allows it to dissolve easily into the cream cheese, ensuring a smooth and creamy consistency. This ingredient enhances the overall flavor while keeping the dessert pleasantly sweet.
Vanilla Extract
A splash of vanilla extract enhances the flavor profile of the cheesecake filling, adding warmth and complexity. It complements the chocolatey notes of the Oreos and elevates the overall taste of the dessert.
Heavy Whipping Cream
Heavy whipping cream is essential for creating the light and airy texture of the cheesecake filling. When whipped, it adds volume and richness, making the cheesecake bars incredibly luscious and satisfying. The heavy cream balances the denser cream cheese, resulting in a delightful contrast in texture.
Optional Mini Chocolate Chips
For those who crave an extra burst of chocolate flavor, mini chocolate chips can be added to the filling. They provide a delightful texture and an additional layer of sweetness, making these cheesecake bars even more indulgent.
Step-by-Step Instructions for Making Dreamy No-Bake Oreo Cheesecake Bars
Making the Crust
1. Crush the Oreos: Start by placing the Oreo cookies in a food processor. Pulse them until you achieve fine crumbs, ensuring there are no large pieces remaining. If you don’t have a food processor, you can also place the cookies in a sealed plastic bag and crush them using a rolling pin.
2. Mix with Butter: In a mixing bowl, combine the crushed Oreos with melted unsalted butter. Stir until the mixture resembles wet sand and is evenly coated with butter. This is a crucial step, as the butter will help the crumbs stick together to form a solid crust.
3. Press the Mixture into a Pan: Line an 8×8-inch or 9×9-inch square baking pan with parchment paper for easy removal later. Pour the Oreo crumb mixture into the pan and firmly press it down into an even layer using the back of a measuring cup or your hands. A well-pressed crust will provide the structural integrity needed for the cheesecake bars.
4. Chill the Crust: Place the crust in the refrigerator for at least 15-20 minutes to allow it to set. This step is essential for ensuring that the crust holds its shape when the cheesecake filling is added.
Preparing the Cheesecake Filling
1. Beat the Cream Cheese: In a large mixing bowl, beat the softened cream cheese with an electric mixer until smooth and creamy. This should take about 1-2 minutes on medium speed. Make sure there are no lumps, as this will affect the texture of your cheesecake bars.
2. Add Powdered Sugar and Vanilla: Gradually add the powdered sugar and vanilla extract to the cream cheese mixture. Beat until well combined and smooth. The sweetness should balance nicely with the cream cheese tang.
3. Whip the Heavy Cream: In a separate bowl, whip the heavy cream until stiff peaks form. This step is crucial for achieving that light, airy texture. Be careful not to overwhip, as this can turn the cream into butter.
4. Fold in the Whipped Cream: Gently fold the whipped cream into the cream cheese mixture in three additions. Use a spatula to carefully combine the two mixtures, taking care not to deflate the whipped cream. This will ensure your cheesecake filling is light and fluffy.
5. Add Optional Chocolate Chips: If you’re using mini chocolate chips, fold them into the filling now for added texture and flavor.
6. Spread the Filling Over the Crust: Once the filling is well combined, pour it over the chilled Oreo crust. Use a spatula to spread it evenly across the surface, smoothing it out as you go.
7. Chill Again: Cover the pan with plastic wrap or foil and return it to the refrigerator. Allow the cheesecake bars to chill for at least 4 hours, or overnight for best results. This chilling time is crucial for the filling to set properly, allowing for clean cuts when serving.
By following these steps, you are well on your way to creating a batch of Dreamy No-Bake Oreo Cheesecake Bars that will impress friends and family alike. The combination of a rich, creamy filling and a crunchy Oreo crust is simply irresistible, making these bars the perfect dessert for any occasion. Stay tuned for the next section, where we will explore tips for achieving the best results and answer some common questions about this delightful recipe.

Step-by-Step Process of Mixing Cream Cheese and Powdered Sugar
To create a luscious filling for your Dreamy No-Bake Oreo Cheesecake Bars, the first step involves combining the cream cheese and powdered sugar. Start by ensuring your cream cheese is at room temperature. This is crucial because softened cream cheese blends more easily, resulting in a smooth and creamy texture that avoids lumps. If you forget to take your cream cheese out ahead of time, a quick method is to cut it into smaller cubes and microwave it for about 10-15 seconds. Just be cautious not to overheat it!
In a large mixing bowl, add one package (8 ounces) of softened cream cheese along with 1 cup of powdered sugar. Using an electric mixer or a whisk, beat the mixture on medium speed until it becomes completely smooth and creamy. This should take about 2-3 minutes. The key here is to scrape down the sides of the bowl periodically to ensure all the ingredients are well incorporated. A well-mixed cream cheese base is the foundation of your cheesecake bars, so take your time to achieve that velvety consistency.
Whipping the Cream
The next step is to whip the heavy cream, which will add a light and airy texture to the cheesecake filling. Start with 1 cup of cold heavy whipping cream. Using a clean mixing bowl and whisk or an electric mixer, begin whipping the cream on medium speed. Gradually increase the speed to high, and watch closely as it begins to thicken.
To achieve stiff peaks, continue whipping until the cream holds its shape when you lift the whisk or beaters out of the bowl. This is a critical step; stiff peaks will help the cheesecake maintain its form after chilling. If you over-whip the cream, it can become grainy and turn into butter, so keep a close eye on it. Typically, reaching stiff peaks takes about 3-5 minutes. Once you achieve this, set the whipped cream aside.
Combining the Filling and Crust
Now it’s time to incorporate the whipped cream into the cream cheese mixture, which will create a perfectly light and fluffy cheesecake filling. Gently fold the whipped cream into the cream cheese mixture using a rubber spatula. Start by adding about one-third of the whipped cream to the bowl and mix it until just combined. This first addition lightens the cream cheese mixture, making it easier to fold in the rest without deflating the whipped cream.
Continue to add the remaining whipped cream in two more batches, folding gently each time. The folding technique is important here; use a gentle motion to combine the mixtures without losing the airiness of the whipped cream. Overmixing can lead to a denser filling, so be patient and careful. Once combined, your filling should look fluffy and creamy.
Next, pour the cheesecake filling over the prepared Oreo crust, using a spatula to spread it evenly across the top. To achieve a smooth surface, you can gently shake the pan or use the spatula to level off the filling. This will ensure that each bar has an even layer of creamy goodness.
Chilling and Setting
After you’ve spread the cheesecake filling, it’s time to chill the dessert. Cover the pan with plastic wrap or aluminum foil to prevent any odors from the fridge from affecting the flavor. Refrigerate the bars for at least 4 hours, though overnight is even better. Chilling allows the cheesecake to set properly, ensuring that when you cut into it, the bars hold their shape without being too soft or gooey.
The chilling time is essential not just for setting but also for allowing the flavors to meld together beautifully. The longer it chills, the better the taste will be, as the cream cheese flavor develops and becomes more pronounced.
Serving Suggestions
When you’re ready to serve your Dreamy No-Bake Oreo Cheesecake Bars, remove the pan from the fridge and carefully lift the bars out using the parchment paper overhang. Cut them into squares or rectangles using a sharp knife; for cleaner edges, run the knife under hot water and wipe it dry between cuts.
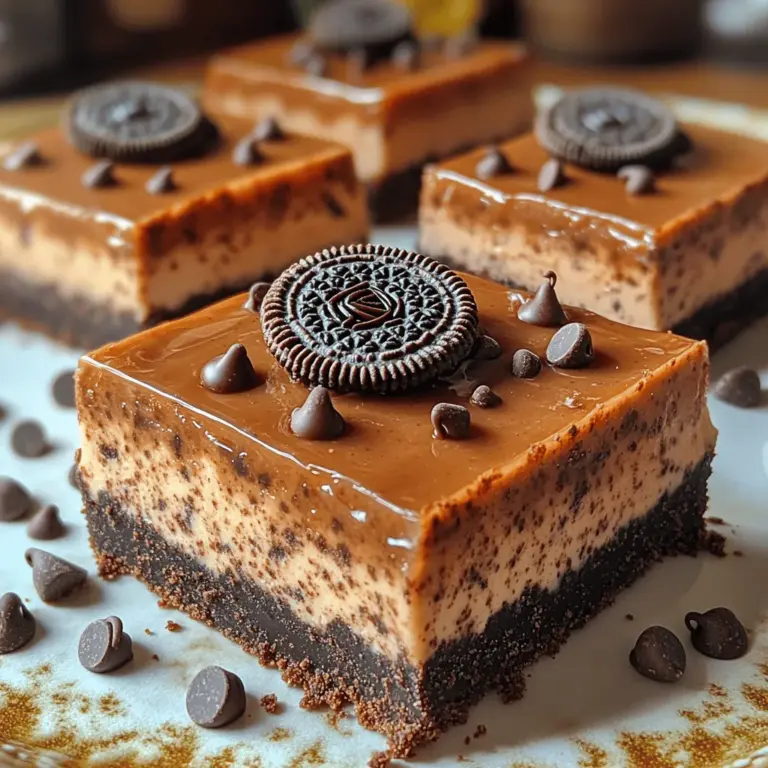
For presentation, consider garnishing each bar with extra crushed Oreos sprinkled on top. You can also add a dollop of whipped cream or a drizzle of chocolate sauce for an extra touch of indulgence. Fresh berries, such as raspberries or strawberries, can lend a lovely contrast to the rich cheesecake, making it visually appealing and adding a refreshing flavor.
Nutritional Information and Serving Size
Each serving of these Dreamy No-Bake Oreo Cheesecake Bars (approximately 1 square) contains around 250 calories, 18 grams of fat, 20 grams of carbohydrates, and 3 grams of protein. This delightful dessert can be enjoyed in moderation, making it suitable for various dietary preferences. While the recipe is not gluten-free due to the Oreos, you can easily adapt it by using gluten-free cookies for the crust.
When serving, consider portion sizes based on your guests and the occasion. For gatherings, cutting smaller squares can allow everyone to enjoy a taste without overindulging. This dessert is perfect for potlucks, birthday parties, or just a cozy night in.
Variations and Customizations
While the classic Oreo cheesecake bars are undeniably delicious, there’s plenty of room for creativity! Here are a few suggestions for adapting the recipe to suit your tastes:
1. Alternative Crust Options: If you prefer a different flavor or dietary need, try using crushed graham crackers, vanilla wafers, or even gluten-free cookies for the crust. Each option will impart a unique flavor profile to your cheesecake.
2. Flavor Variations: For a twist, consider adding a few tablespoons of peanut butter to the cream cheese mixture for a rich and nutty flavor. Alternatively, you could incorporate melted chocolate or mint extract for a refreshing change.
3. Seasonal Adaptations: Take advantage of seasonal fruits by incorporating them into the filling or as a topping. For instance, adding diced strawberries or a hint of cinnamon for fall can elevate the dish to match the season’s essence.
Conclusion
Making Dreamy No-Bake Oreo Cheesecake Bars is not only simple but also incredibly satisfying. This dessert is a crowd-pleaser that requires no baking, making it perfect for any occasion, from casual gatherings to festive celebrations. The creamy texture combined with the crunchy Oreo crust provides a delightful contrast that keeps everyone coming back for more.
Encourage your creativity by exploring variations and customizations, whether through alternative ingredients or different flavor profiles. Enjoy the process of making this delicious dessert and share it with friends and family, as it’s sure to become a favorite in your recipe collection. The ease and deliciousness of these cheesecake bars will have everyone asking for the recipe, so be prepared to share your culinary secret!

