Introduction
S’mores are undeniably one of the most cherished treats in American culture, evoking memories of camping trips, backyard bonfires, and warm summer nights. The simple yet delightful combination of gooey marshmallows, rich chocolate, and crunchy graham crackers has made them a staple of outdoor gatherings for generations. However, in today’s fast-paced world, there’s often little time to fire up a campfire or prepare a traditional s’mores setup. Enter the S’mores Cookie Dough Bars—a modern twist on the classic treat that captures all the nostalgic flavors without the need for baking.
These no-bake bars embody everything we love about s’mores, offering an easy and delicious way to enjoy that beloved flavor combination. Perfect for parties, potlucks, or even a cozy night in, they provide the ultimate convenience, allowing you to whip up a batch of sweet indulgence in just a short amount of time. The best part? No baking means no worrying about turning on the oven, making these bars a go-to recipe for any occasion.
In this article, we will explore the background and allure of s’mores, delve into the ingredients that make these cookie dough bars so delectable, and guide you through the initial steps of preparation. So, grab your mixing bowls and get ready to indulge in a treat that will have everyone coming back for more!
Understanding S’mores and Their Allure
The term “s’mores” is derived from the phrase “some more,” reflecting the irresistible nature of this sweet treat. The first recorded recipe for s’mores appeared in a Girl Scouts’ publication in the 1920s, though it is likely that the combination of chocolate, marshmallows, and graham crackers predates this formal recognition. Over the years, s’mores have become synonymous with summer evenings and outdoor adventures, symbolizing carefree moments shared with friends and family around a crackling fire.
Traditional s’mores are made with just three key ingredients: graham crackers, chocolate bars, and toasted marshmallows. The graham crackers provide a crispy and slightly sweet base, while the chocolate adds a rich, creamy layer. Toasting the marshmallows over an open flame introduces a smoky element and transforms them into a luscious filling that beautifully melds with the other components. Together, these ingredients create a delightful contrast of textures and flavors—crispy, gooey, and sweet.
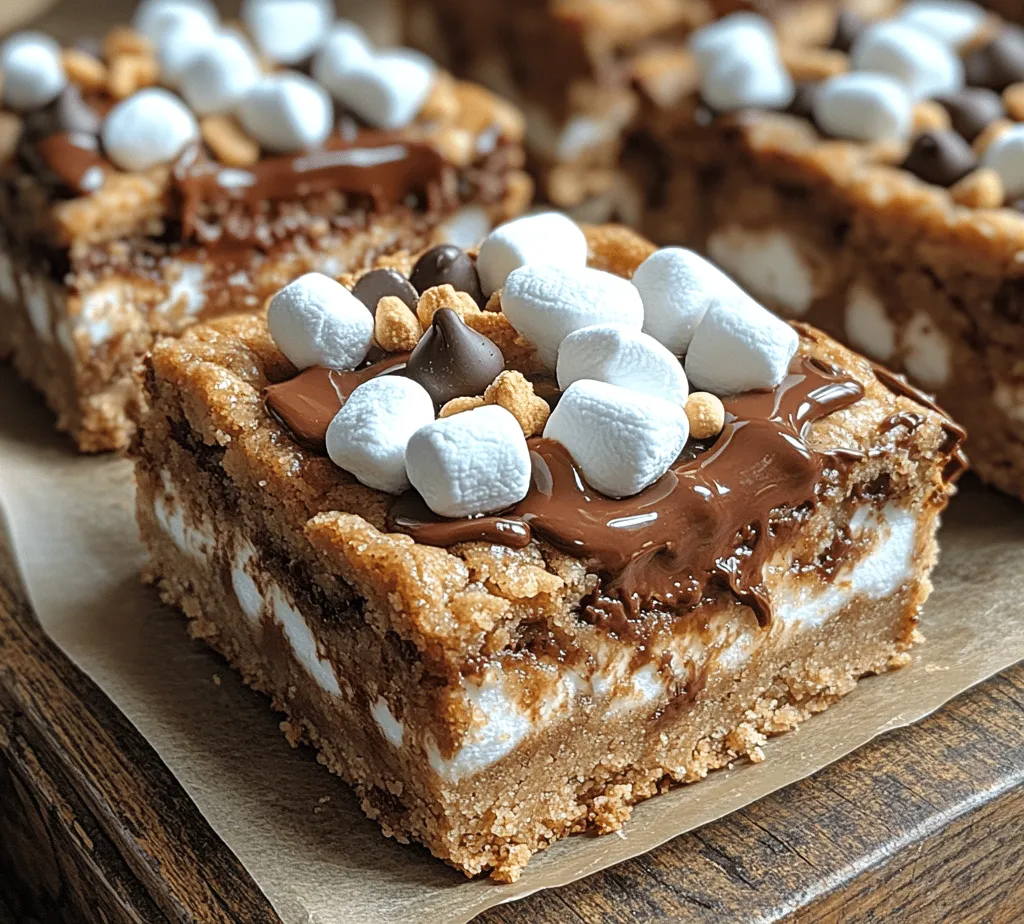
S’mores Cookie Dough Bars maintain the essence of this beloved treat while offering a convenient and modern format. Instead of toasting marshmallows and assembling individual s’mores, these bars combine all the classic flavors into a rich, no-bake cookie dough base. This means you can enjoy the same great taste without the fuss of roasting marshmallows or melting chocolate. The bars are perfect for satisfying your sweet tooth on a busy weeknight or impressing guests at your next gathering.
Ingredients Breakdown
To create these delightful S’mores Cookie Dough Bars, you will need a selection of key ingredients that work together to deliver that signature s’mores flavor. Let’s break down the essential components:
Unsalted Butter
Unsalted butter is crucial in achieving the right texture for the cookie dough base. It adds richness and moisture, resulting in a soft and chewy bar that holds together perfectly. Using unsalted butter allows you to control the overall saltiness of the recipe, ensuring that the sweetness of the bars is balanced.
Brown Sugar and Granulated Sugar
A combination of brown sugar and granulated sugar is used to sweeten the cookie dough. Brown sugar adds a hint of molasses flavor, contributing to the overall depth of taste and moisture content. Granulated sugar, on the other hand, helps achieve the perfect level of sweetness without overpowering the other flavors. Together, these sugars create a well-rounded sweetness that complements the chocolate and marshmallows.
Vanilla Extract
Vanilla extract is an essential ingredient in many dessert recipes, and for good reason. It enhances the overall taste profile of the cookie dough, adding warmth and complexity. A splash of vanilla extract elevates the flavor, making each bite even more satisfying.
All-Purpose Flour and Salt
All-purpose flour serves as the backbone of the cookie dough, providing structure and stability to the bars. When combined with the other ingredients, it helps create a cohesive dough that holds its shape. A pinch of salt is also added to balance the sweetness and enhance the flavors of the other ingredients, ensuring a well-seasoned treat.
Mini Chocolate Chips, Mini Marshmallows, and Graham Cracker Crumbs
The star ingredients that truly embody the essence of s’mores are mini chocolate chips, mini marshmallows, and graham cracker crumbs. Mini chocolate chips provide bursts of chocolatey goodness throughout the cookie dough, while the mini marshmallows add that iconic gooey texture. Graham cracker crumbs bring the necessary crunch and flavor that ties it all together, making these bars reminiscent of traditional s’mores.
Optional Melted Chocolate
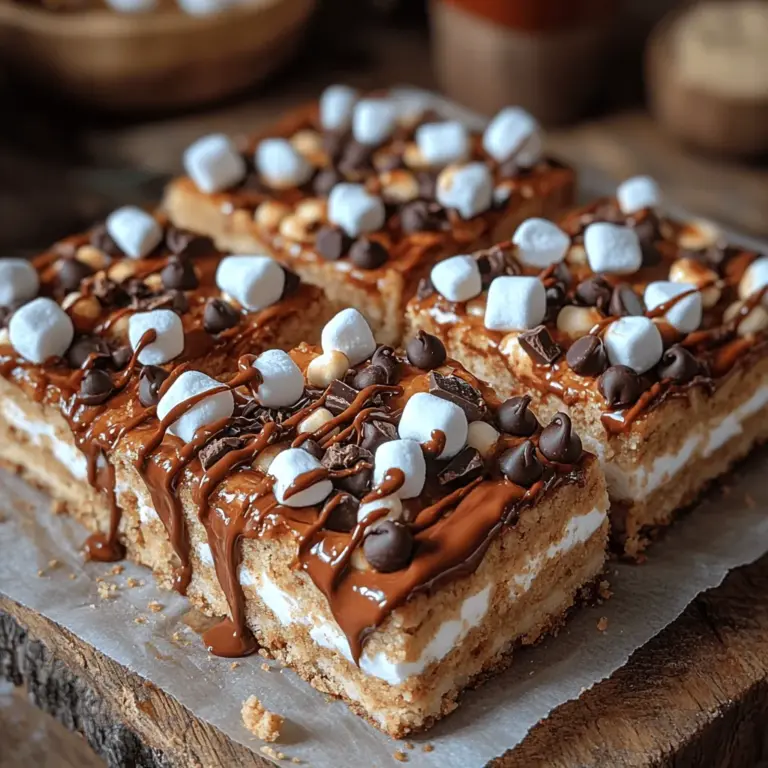
For an extra touch of indulgence, you may choose to drizzle melted chocolate over the finished bars. This optional step not only adds a decorative flair but also enhances the chocolate flavor, making the bars even more decadent. It’s the finishing touch that can take your S’mores Cookie Dough Bars from delicious to truly irresistible.
Step-by-Step Preparation
Now that we’ve gathered our ingredients, it’s time to dive into the preparation process. The beauty of these S’mores Cookie Dough Bars lies in their simplicity, making them an ideal choice for both novice and experienced bakers alike. Let’s begin by preparing the base.
Preparing the Base
1. Cream the Butter and Sugars: In a large mixing bowl, beat the unsalted butter until it becomes creamy and smooth. This step is crucial, as creaming the butter introduces air into the mixture, resulting in a light and fluffy texture. Once the butter is softened, gradually add both the brown sugar and granulated sugar. Continue to beat the mixture until it is well combined and fluffy, about 2-3 minutes. This process helps dissolve the sugars and creates a uniform dough.
2. Add Vanilla Extract: Next, add the vanilla extract to the butter and sugar mixture. Mix well until the extract is fully incorporated, enhancing the sweetness and aroma of the dough.
3. Incorporate Dry Ingredients: In a separate bowl, whisk together the all-purpose flour and salt. Gradually add the dry ingredients to the creamed mixture, mixing until just combined. Be careful not to overmix, as this can lead to a dense texture.
4. Fold in the Goodies: Gently fold in the mini chocolate chips, mini marshmallows, and graham cracker crumbs. The goal is to evenly distribute these ingredients throughout the dough, ensuring that every bite is packed with the classic s’mores flavors.
5. Press into a Pan: Prepare an 8×8-inch baking dish by lining it with parchment paper for easy removal. Transfer the cookie dough mixture into the prepared pan and use your hands or a spatula to press it down evenly. Make sure to pack it tightly to create a solid base that will hold together once chilled.
With the base prepared, the next steps will involve chilling the bars and adding any optional toppings. Stay tuned for the continuation of this delicious recipe as we explore how to finish off these S’mores Cookie Dough Bars and make them an instant hit at any gathering.

Explanation of the Creaming Process and Its Impact on the Dough
The creaming process is a crucial step in baking that involves beating together butter and sugar until light and fluffy. This technique is essential for S’mores Cookie Dough Bars because it incorporates air into the mixture, resulting in a lighter texture. When you cream the butter, you’re not just mixing ingredients; you’re creating tiny air pockets that help the dough rise during baking. As the cookies bake, these air pockets expand, yielding a chewy yet tender bar.
To achieve the best results, use room-temperature butter, which allows for easier mixing and better incorporation of sugar. Begin by beating the butter alone until creamy, then gradually add the sugar, continuing to beat until the mixture is pale and fluffy. This usually takes about 3 to 5 minutes with an electric mixer. Pay attention to the texture—if it feels grainy, continue mixing until it becomes smooth. This step ensures that your S’mores Cookie Dough Bars will have the perfect consistency.
Adding Flavorings: Significance of Incorporating Vanilla Extract
Vanilla extract is often considered the heart of many dessert recipes, including S’mores Cookie Dough Bars. Adding vanilla enhances the overall flavor profile, providing a warm, sweet essence that complements the chocolate and marshmallows beautifully. It’s important to use pure vanilla extract for the best taste; imitation vanilla can lack depth and richness.
When adding vanilla to your mixture, do so after creaming the butter and sugar. This timing allows the vanilla to integrate fully into the mixture, ensuring that every bite of your bars is infused with that delightful flavor. Typically, 1 to 2 teaspoons of vanilla extract is sufficient for this recipe, but feel free to adjust according to your personal taste preferences.
Combining Dry Ingredients: Techniques for Proper Mixing to Avoid Overmixing
Properly combining your dry ingredients is a vital step to ensure your S’mores Cookie Dough Bars achieve the right texture. In a separate bowl, whisk together the flour, baking soda, and a pinch of salt. This step not only evenly distributes the leavening agent but also helps prevent clumps of flour in your dough.
When it’s time to combine the dry ingredients with the wet mixture, do so gradually. Start by adding one-third of the flour mixture to the creamed butter and sugar. Gently fold the ingredients together using a spatula or wooden spoon. Repeat this process until all the dry ingredients are incorporated. Be cautious not to overmix, as this can develop the gluten in the flour and lead to tough bars. Mix just until you see no more flour streaks, ensuring the dough remains soft and tender.
Mixing in Chocolate and Marshmallows: Tips for Gentle Folding to Maintain Dough Integrity
One of the most exciting aspects of S’mores Cookie Dough Bars is the addition of chocolate and marshmallows. To maintain the integrity of the dough, it’s essential to fold these ingredients in gently. After your dough is well mixed, add in semi-sweet chocolate chips and mini marshmallows. The chocolate should be slightly melted to ensure even distribution, but avoid overheating it, as that can lead to a clumpy texture.
Using a spatula, fold the chocolate and marshmallows into the dough carefully. The goal is to distribute them evenly without breaking down the dough’s structure. This gentle folding will keep the bars chewy and help the marshmallows retain their shape, providing delightful pockets of gooeyness in every bite. Aim for a well-combined mixture, but remember it’s okay if some marshmallows remain whole.
Forming the Bars: Best Practices for Pressing the Dough into the Baking Dish
Once you have your dough mixed with chocolate and marshmallows, it’s time to form the bars. This step requires a bit of finesse to ensure that the dough is evenly distributed in your baking dish. Start by lining a 9×9-inch baking pan with parchment paper, leaving some overhang on the sides for easy removal later.
Using your hands or a spatula, press the dough evenly into the bottom of the pan. It’s important to apply gentle but firm pressure, ensuring that the dough is compact without being overly packed. This will help the bars hold their shape after baking. If you notice any inconsistencies, use your spatula to smooth the top. If desired, you can create a slight dip in the center for a more rustic look, which will help with even baking.
Adding Toppings: Creative Ways to Customize the Bars for Visual Appeal and Taste
Now that your bars are formed, it’s time to get creative with toppings. The classic S’mores flavor profile can be enhanced by sprinkling additional chocolate chips, crushed graham crackers, or even drizzling melted chocolate on top before baking. For a festive touch, consider adding colored sprinkles or a dollop of caramel sauce.
If you want to elevate the visual appeal, press some mini marshmallows into the top layer of the dough. They will toast beautifully in the oven, giving your bars an inviting golden finish. This not only enhances the taste but also makes for an attractive presentation when serving to guests.
Chilling: Importance of Refrigeration for Setting the Bars
After adding your toppings, it’s essential to chill the dough before baking. Refrigerating the bars for about 30 minutes helps firm up the dough, which can prevent them from spreading too much during baking. This step is particularly important for maintaining the texture of your S’mores Cookie Dough Bars, ensuring they bake evenly and result in a perfect chewy consistency.
Chilling also allows the flavors to meld together, enriching the overall taste of the bars. If you’re in a hurry, you can place them in the freezer for about 15 minutes, but be cautious not to freeze them solid.
Cutting and Serving: Techniques for Achieving Clean Cuts and Serving Suggestions
Once baked to a golden perfection, allow your S’mores Cookie Dough Bars to cool in the pan for about 10-15 minutes. This will help them set before cutting. For clean cuts, use a sharp knife and cut the bars while they are still slightly warm. You can also run the knife under hot water before cutting to make the process smoother.
To serve, consider placing the bars on a decorative platter and garnishing with additional chocolate drizzle or a sprinkling of graham cracker crumbs. These bars are perfect for gatherings or as a sweet treat after dinner. Pair them with a scoop of vanilla ice cream for an indulgent dessert experience, or enjoy them on their own for a delightful snack.
Nutritional Information
S’mores Cookie Dough Bars are a delicious dessert, but it’s also essential to be mindful of their nutritional content. Each bar typically contains around 200-250 calories, depending on the size and specific ingredients used. They are rich in carbohydrates due to the flour and sugar, while the chocolate and marshmallows add fats and sugars that contribute to the overall calorie count.
When indulging in treats like these, portion control is key. Consider cutting smaller squares to satisfy your sweet tooth without overdoing it. If you’re looking to make healthier adjustments, you can substitute regular flour with whole wheat flour for added fiber or use sugar substitutes like coconut sugar or stevia to reduce calorie content without sacrificing flavor.
Storing and Serving Suggestions
To keep your S’mores Cookie Dough Bars fresh, store them in an airtight container at room temperature for up to a week. If you want to extend their shelf life, you can refrigerate them, though this might slightly alter the texture. For longer storage, consider freezing the bars. Wrap them individually in plastic wrap and place them in a freezer-safe container. They can last for up to three months in the freezer.
For serving, these bars are incredibly versatile. Enjoy them as a snack with your morning coffee, or serve them at parties and gatherings. They pair wonderfully with ice cream, whipped cream, or even a drizzle of chocolate sauce. You can also crumble them over yogurt for a delicious breakfast treat or a sweet topping for a dessert parfait.
Conclusion
S’mores Cookie Dough Bars are a delightful treat that captures the essence of the classic campfire experience in a convenient and easy-to-make dessert. With their chewy texture, rich chocolate flavor, and gooey marshmallows, these bars are perfect for any occasion, from family gatherings to holiday festivities.
They are not only simple to prepare but also offer countless opportunities for customization, allowing you to adapt the recipe to suit your tastes. Whether you’re sharing them with friends or enjoying them as a personal indulgence, these bars are sure to bring joy to every bite.
So, gather your ingredients, follow the steps, and create these delicious S’mores Cookie Dough Bars to elevate your dessert game. Remember, the joy of baking is not just in the end result but also in the experience of sharing sweet creations with loved ones, enhancing those precious moments together.

