Introduction
There’s an undeniable joy that comes with making homemade ice cream. The anticipation of a cool, creamy treat on a hot day is a delightful experience, and the knowledge that you’ve crafted it yourself only adds to the pleasure. Today, we’re diving into the world of homemade indulgence with our featured recipe: Creamy Dreams Ice Cream. This recipe stands out not just for its rich flavor and velvety texture, but also for its simplicity and the quality of ingredients used.
Creating ice cream at home allows you to have complete control over the ingredients, ensuring that every scoop is as fresh and flavorful as possible. By using high-quality components, you can elevate your ice cream from a mere dessert to a true culinary delight. This recipe will guide you through the process of making Creamy Dreams Ice Cream, showcasing how to achieve the perfect balance of creaminess and sweetness that will leave your taste buds dancing with joy.
Understanding the Basics of Ice Cream Making
Before we get into the nitty-gritty of our recipe, it’s essential to understand the science behind ice cream making. At its core, ice cream is a frozen dessert made from a mixture of cream, milk, sugar, and flavorings. The unique texture of ice cream is achieved through a combination of churning and freezing. Churning incorporates air into the mixture, giving it that light and airy quality, while freezing solidifies the mixture into a creamy delight.
There are various methods to make ice cream, from hand-cranked churns to electric ice cream makers. Each method has its benefits, with manual churning often requiring a bit more elbow grease but offering a sense of nostalgia and craftsmanship. On the other hand, machine methods can expedite the process and yield consistent results with minimal effort. Regardless of the method you choose, the result is the same: a creamy, dreamy dessert that rivals any store-bought option.
One of the significant benefits of making ice cream at home is the ability to customize flavors and ingredients. Unlike store-bought varieties, which often contain preservatives, artificial flavors, and stabilizers, homemade ice cream is made with wholesome ingredients that you can trust. You can experiment with flavors, adjust sweetness levels, and introduce unique mix-ins, resulting in a dessert that truly reflects your personal taste.
Ingredient Breakdown for Creamy Dreams Ice Cream
Every great recipe begins with great ingredients, and Creamy Dreams Ice Cream is no exception. Let’s explore the key components that will make this ice cream a standout.
Heavy Cream
Heavy cream is the backbone of this creamy delight. It contains a higher fat content than regular cream, typically around 36-40%, which is crucial for achieving that luxurious mouthfeel. The fat in heavy cream not only contributes to the creaminess but also helps to create a smoother texture by minimizing the formation of ice crystals during freezing. A rich base of heavy cream is what gives your ice cream that delightful richness that melts in your mouth.
Whole Milk
While heavy cream provides the primary creaminess, whole milk plays a vital role in balancing the overall fat content and enhancing the flavor. The fat content in whole milk (about 3.25%) complements the heavy cream, ensuring that your ice cream isn’t overly rich. Additionally, whole milk contributes to the ice cream’s smooth texture while allowing the flavors to shine through without being overwhelming.
Granulated Sugar
Sugar is not just a sweetener; it also plays a critical role in the texture of your ice cream. Granulated sugar helps lower the freezing point of the mixture, preventing it from becoming too hard and icy. This results in a softer, scoopable texture that’s perfect for serving. Moreover, it balances the richness of the cream and milk, enhancing the overall flavor profile. The right amount of sugar will ensure that your Creamy Dreams Ice Cream is sweet but not overly so, allowing the other flavors to come through.
Pure Vanilla Extract
Vanilla is often referred to as the “secret ingredient” in many dessert recipes, and for good reason. Pure vanilla extract adds a depth of flavor that elevates your ice cream to new heights. It complements the creaminess of the heavy cream and milk, creating a harmonious blend of flavors. When selecting vanilla, opt for pure extract over imitation for the best results. The rich, aromatic notes of real vanilla will enhance your ice cream, making each bite a delightful experience.
Salt
While it may seem counterintuitive to add salt to a sweet dessert, a pinch of salt is essential in enhancing the overall flavor profile of your ice cream. Salt acts as a flavor enhancer, bringing out the natural sweetness of the sugar and the richness of the cream. It also helps to improve the texture by balancing the sweetness, resulting in a more rounded and complex flavor. Just a small amount can make a significant difference.
Optional Mix-Ins
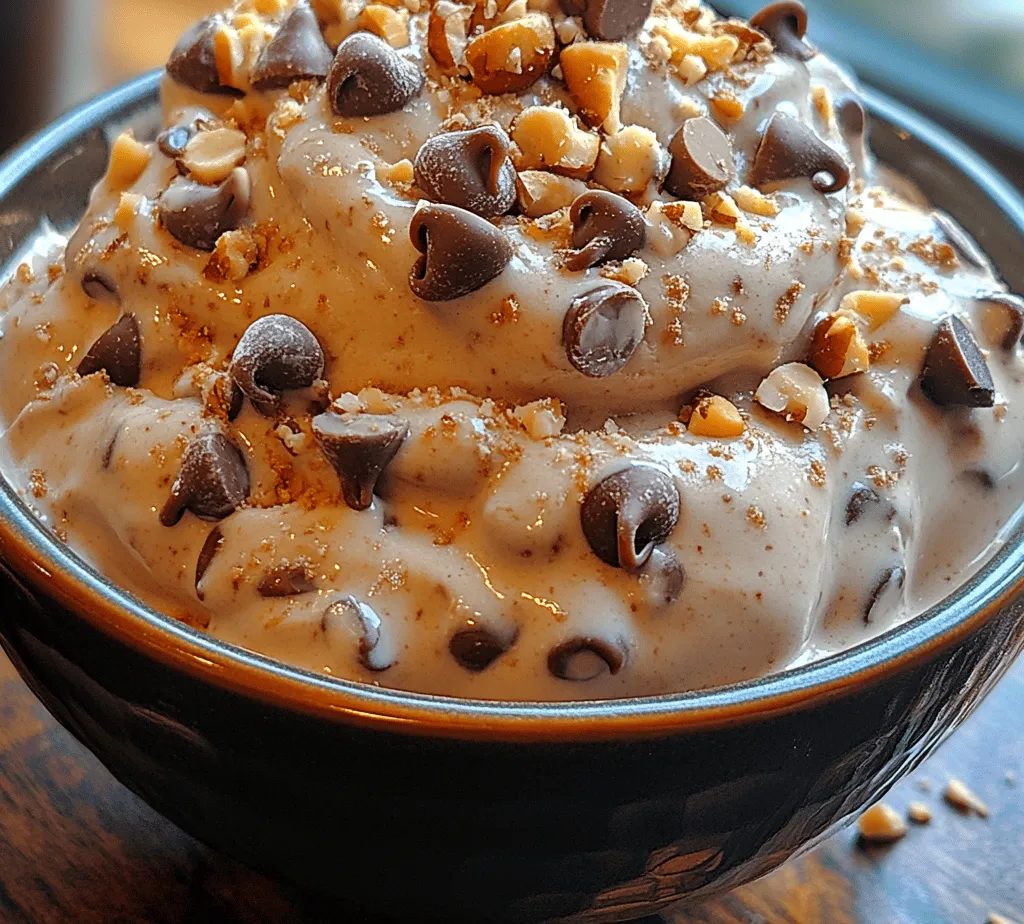
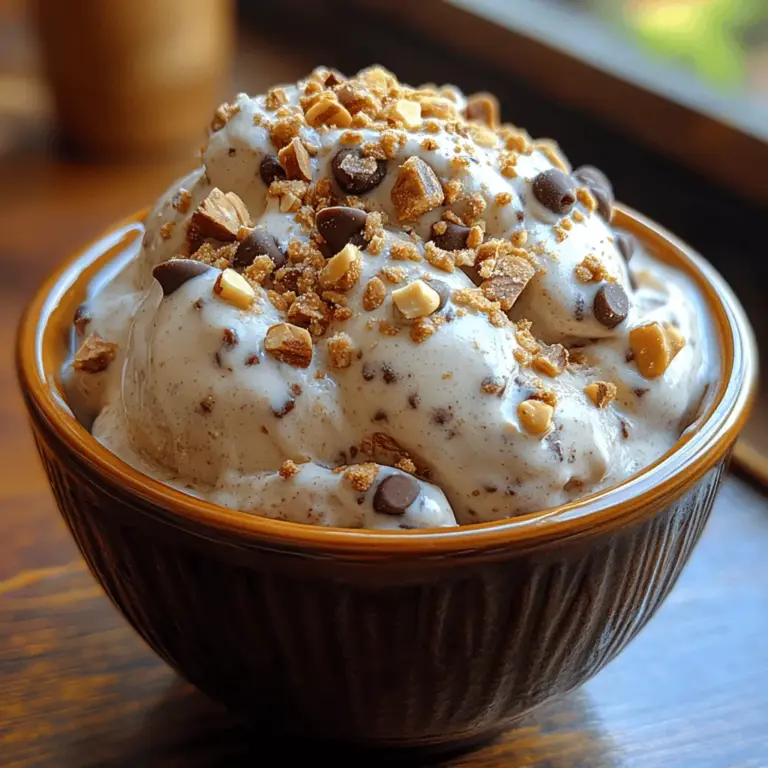
One of the most exciting aspects of making ice cream at home is the ability to customize it with optional mix-ins. Whether you’re a fan of chocolate chips, crushed cookies, fresh fruit, or nuts, the possibilities are endless. You can personalize your Creamy Dreams Ice Cream to suit your tastes and preferences, making it a fun and creative endeavor. Mix-ins can be added during the last few minutes of churning or folded in after the base has been made, allowing for a delightful surprise in every scoop.
Step-by-Step Instructions for Making Creamy Dreams Ice Cream
Now that we have a solid understanding of the ingredients and their roles in our creamy creation, it’s time to get started on the actual process of making Creamy Dreams Ice Cream.
Preparing the Mixture
Begin by gathering all your ingredients and ensuring you have a clean, spacious work area. This preparation will help streamline the process and ensure that you don’t miss any steps along the way.
1. Whisking the Base: In a large mixing bowl, combine the heavy cream and whole milk. Use a whisk to blend them together until smooth. This step is crucial, as proper whisking ensures that the two creams are well integrated, creating a uniform base for your ice cream.
2. Incorporating Sugar and Vanilla: Gradually add the granulated sugar and pure vanilla extract to the cream mixture. Continue whisking until the sugar is fully dissolved. This may take a few minutes, but it’s essential for achieving a smooth texture. You’ll know it’s ready when the mixture feels slightly thicker and the sugar is no longer gritty.
3. Adding a Pinch of Salt: Don’t forget to add a pinch of salt to the mixture. This will enhance the flavors and bring out the best in your ice cream. Stir it in gently until it’s fully incorporated.
With the mixture prepared, you are well on your way to creating your own batch of Creamy Dreams Ice Cream. The next steps will involve churning and freezing, but before we dive into that, take a moment to appreciate the rich, creamy base you’ve just created. This is the foundation of your delicious homemade ice cream, and it’s about to become something extraordinary.
Stay tuned for the next part, where we will cover the churning process, freezing techniques, and tips for achieving the perfect scoop every time.

Churning Process: Mastering the Ice Cream Maker
To achieve that luxurious, creamy texture that every ice cream aficionado craves, the churning process is crucial. If you own an ice cream maker, you’re in for a delightful experience. Start by ensuring that your ice cream maker’s bowl is completely frozen; most models require at least 12-24 hours in the freezer before use. This step is essential to ensure that your mixture freezes quickly as it churns, preventing the formation of large ice crystals that can ruin the smoothness of your ice cream.
Once your mixture (the base you prepared earlier) is chilled and your ice cream maker is ready, pour the mixture into the bowl of the ice cream maker. Follow the manufacturer’s instructions for churning time; typically, it will take about 20 to 30 minutes. You’ll want to keep an eye on the ice cream as it churns. As it starts to thicken and increase in volume, you’ll see it transform from a liquid to a soft-serve consistency. This is the perfect moment to stop the machine if you prefer a softer texture, or you can continue churning until it reaches a firmer state.
The Importance of Patience in the Freezing Stage
Once your ice cream has reached the desired consistency, it’s time for the freezing stage. Transfer the churned ice cream to an airtight container and smooth the top with a spatula. Seal the container tightly and place it in the freezer for at least 4 hours, or until it is firm enough to scoop. This step is vital—while it may be tempting to dig in right away, patience is key. The freezing process allows the flavors to meld and the texture to stabilize, resulting in a far superior ice cream experience.
Serving Suggestions: Creative Ideas for Presentation and Enjoyment
When it comes to serving your homemade creamy dreams ice cream, creativity can elevate the entire experience. Consider serving it in waffle cones or artisanal bowls for a touch of sophistication. A sprinkle of colorful sprinkles, crushed nuts, or a drizzle of chocolate or caramel sauce can enhance both the flavor and presentation.
For a delightful dessert, layer your ice cream in a parfait glass with fresh berries, whipped cream, and granola. This not only makes for a visually appealing dish but also adds texture and complementary flavors. You can also create ice cream sandwiches using your favorite cookies or brownies, making a fun treat for gatherings.
Another exciting way to serve your ice cream is by creating milkshakes. Blend a scoop or two of your creamy dreams ice cream with milk and a splash of vanilla extract for a rich, indulgent shake. Top it off with whipped cream and a cherry for an old-school diner vibe.
Exploring Mix-Ins and Customization Options
One of the most enjoyable aspects of making homemade ice cream is the ability to customize flavors and add mix-ins. Consider popular mix-ins like chocolate chips, crushed cookies, or toffee bits, which can add delightful textures and flavor contrasts. Fresh fruits such as strawberries, raspberries, or bananas can be folded into the ice cream during the last few minutes of churning for a fresh burst of flavor.
For a themed ice cream, think about what flavors might pair well together. A chocolate lover’s dream could include chocolate chips, fudge swirls, and chunks of brownie. For fruity delights, consider mixing in fresh mango chunks, coconut flakes, and a splash of lime juice to create a tropical sensation.
Seasonal ingredients can also inspire your ice cream creations. In the summer, ripe peaches or watermelon can bring a refreshing quality, while autumn calls for spices like cinnamon, nutmeg, and pumpkin to create a fall-inspired flavor.
The Joy of Homemade Ice Cream: Benefits and Experience
Making ice cream at home is not just about the end product; it’s about the experience. One of the primary benefits of creating your own ice cream is the ability to control what goes into it. You can manage the sugar content, avoid artificial additives, and even incorporate healthier ingredients like almond milk or coconut cream for those seeking a lighter option.
Homemade ice cream can also be a fun activity for families. Involve your kids in the process—let them help measure ingredients, mix them together, and choose their favorite mix-ins. This not only teaches them valuable kitchen skills but also creates bonding moments that they’ll cherish.
The joy of sharing homemade ice cream with loved ones cannot be overstated. Whether it’s a casual summer evening or a special celebration, serving a bowl of your creamy dreams ice cream fosters connection and happiness. The smiles on faces as they enjoy a delicious treat you’ve made will be truly satisfying.
Storing and Preserving Your Ice Cream
Proper storage is crucial for maintaining the quality of your homemade ice cream. To keep it fresh, always store it in an airtight container. This helps prevent freezer burn and keeps unwanted odors from affecting the flavor. Using a container that’s just the right size for your batch will minimize the amount of air trapped in, which can also contribute to a better texture.
Homemade ice cream can last in the freezer for about 2 to 3 weeks. However, for the best flavor and texture, it’s recommended to consume it within the first week. Over time, ice crystals can form, leading to a grainy texture that no one wants in their creamy treat.
How can you tell if your ice cream has gone bad? Signs include a significant change in texture, an off smell, or freezer burn (which appears as icy patches or discoloration on the surface). If you notice any of these signs, it’s best to discard the ice cream.
Conclusion
In conclusion, making creamy dreams ice cream is not just about enjoying a delicious dessert; it’s about the entire experience—from the churning process to the joy of sharing with loved ones. Remember, the key steps to success include proper preparation of your ingredients, patience during the freezing stage, and creativity in serving.
With the options for customization, the joy of engaging family in the ice cream-making process, and the satisfaction of creating a healthier alternative, this homemade treat can become a cherished tradition. So gather your ingredients, unleash your creativity, and make your own creamy dreams ice cream a staple in your household. Embrace the joy and satisfaction that comes with every scoop, and don’t hesitate to experiment with flavors and mix-ins to make it uniquely yours. Enjoy the journey of crafting this delightful treat!

