Introduction
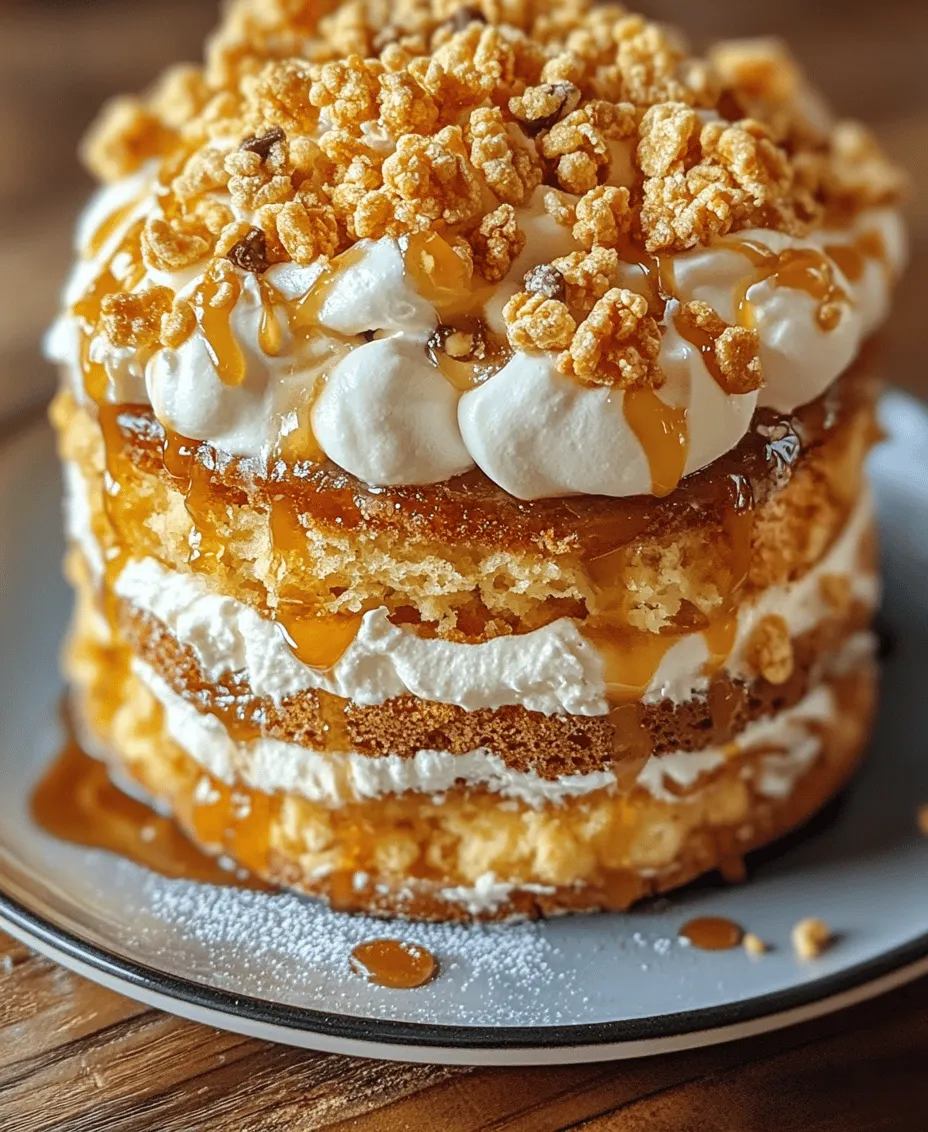
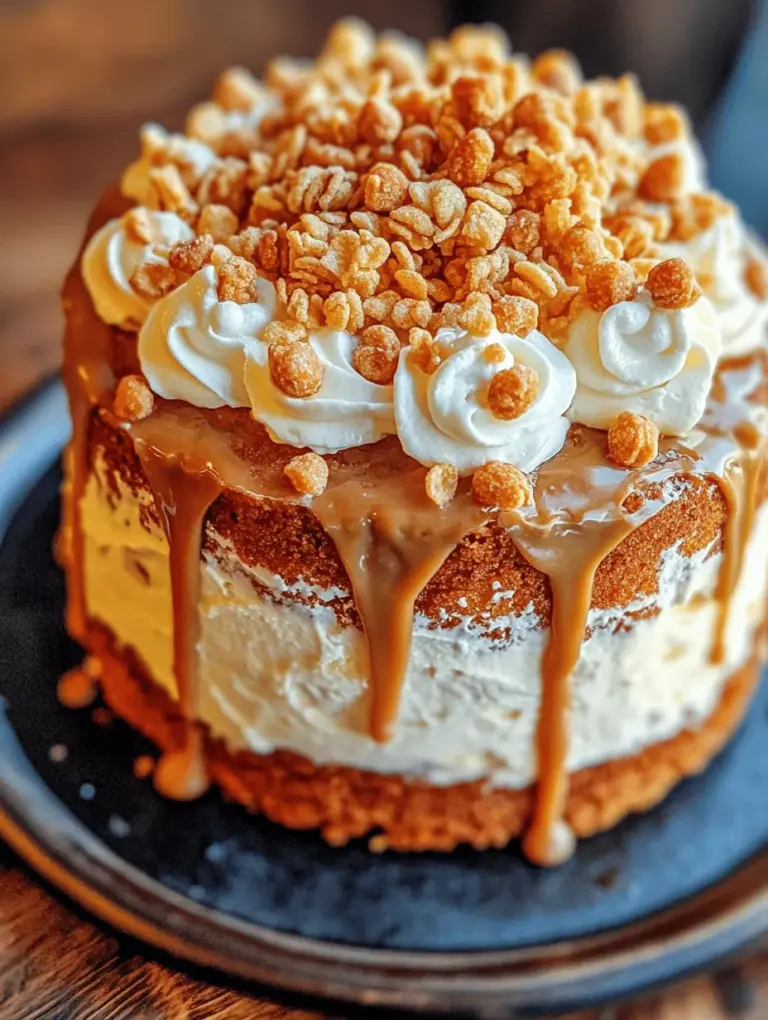
Butterscotch Crunch Cake is a delightful dessert that perfectly blends rich butterscotch flavors with a satisfying crunch. This cake stands out not only for its appealing golden hue but also for its unique texture, which combines moist cake layers with a delightful crunch from the addition of butterscotch chips and crispy rice cereal. With its inviting aroma and decadent taste, Butterscotch Crunch Cake is an ideal treat for any occasion, whether it be a birthday party, a holiday celebration, or simply a cozy family gathering.
In this article, we will explore every facet of this recipe, from the essential ingredients to detailed instructions for baking the cake. We will delve into the nuances of the baking process, offering tips and tricks to ensure that your cake turns out perfectly, regardless of whether you are a seasoned baker or a novice. This guide is designed to empower you to create a cake that is not only delicious but also visually stunning, making it sure to impress everyone who has the pleasure of tasting it.
Understanding the Key Ingredients
To create a successful Butterscotch Crunch Cake, it’s essential to understand the role that each ingredient plays in the overall flavor and texture of the cake. Let’s break down the key components that will help you master this recipe.
The Role of Butter in Baking
Butter is a fundamental ingredient in many cake recipes, and for good reason. In Butterscotch Crunch Cake, softened unsalted butter serves several purposes:
– Texture: Butter contributes to the cake’s tender crumb. When creamed with sugars, it creates air pockets that expand during baking, resulting in a light and fluffy texture.
– Flavor: Unsalted butter provides a rich, creamy flavor that enhances the overall taste of the cake. Using unsalted butter allows you to control the amount of salt in the recipe, ensuring a balanced flavor profile.
– Moisture: The fats in butter help retain moisture in the cake, preventing it from drying out.
To achieve the best results, make sure your butter is softened to room temperature, allowing it to cream easily with the sugars and incorporate air effectively.
Sweeteners and Their Impact
In this recipe, brown sugar plays a starring role alongside granulated sugar. Here’s how the choice of sweeteners affects your cake:
– Brown Sugar: This type of sugar contains molasses, which adds moisture and a deeper flavor to the cake. The caramel notes in brown sugar complement the butterscotch flavor beautifully.
– Granulated Sugar: While it provides sweetness, granulated sugar also helps create a light and airy structure in the cake. The combination of both sugars ensures a perfect balance between moisture and fluffiness.
When baking Butterscotch Crunch Cake, using a blend of brown and granulated sugar will yield a cake that is both sweet and rich, with a satisfying texture that melts in your mouth.
Eggs: The Binding Agent
Eggs are essential in cake baking for several reasons:
– Binding: They help hold the ingredients together, providing structure to the cake.
– Leavening: Eggs introduce air into the batter when beaten, contributing to the cake’s rise and fluffiness.
– Moisture: They add moisture and richness to the cake.
For optimal results, incorporate eggs at room temperature, allowing them to blend more easily into the batter. Be sure to add them one at a time, mixing well after each addition to achieve a uniform mixture.
Flour Choices for Structure
Flour is the backbone of any cake, providing the necessary structure. In Butterscotch Crunch Cake, all-purpose flour is the go-to choice:
– All-Purpose Flour: This versatile flour strikes the right balance between strength and tenderness, creating a cake that is fluffy yet holds its shape.
– Gluten-Free Alternatives: If you require a gluten-free version, consider using a gluten-free all-purpose flour blend. Ensure that the blend contains xanthan gum, which mimics the binding properties of gluten.
When measuring flour, use the spoon and level method to avoid adding too much, which can lead to a dry cake.
The Magic of Buttermilk
Buttermilk is a secret ingredient that adds moisture and a subtle tang to the cake, enhancing its flavor profile:
– Moisture: The acidity in buttermilk helps to tenderize the gluten in the flour, resulting in a softer cake.
– Flavor: It adds a slight tanginess that balances the sweetness of the cake.
If you don’t have buttermilk on hand, you can make a quick substitute by mixing one cup of milk with one tablespoon of vinegar or lemon juice. Let it sit for about five minutes until it thickens slightly.
Butterscotch Chips and Crunch Factor
The star of the show in this cake is undoubtedly the butterscotch chips:
– Flavor Profile: Butterscotch chips add a sweet, buttery flavor that intensifies the overall taste of the cake. They melt slightly during baking, creating pockets of gooey goodness.
– Crunch Factor: The addition of crushed rice cereal not only provides a satisfying crunch but also enhances the texture contrast in the cake. This unexpected element makes each bite delightful.
When choosing butterscotch chips, look for high-quality brands that ensure a rich flavor. You can also mix in some chopped nuts for additional crunch if desired.
Step-by-Step Instructions for Butterscotch Crunch Cake
Now that we’ve covered the essential ingredients and their roles, let’s dive into the step-by-step process for creating your Butterscotch Crunch Cake. Following these instructions will help ensure that your cake turns out perfectly every time.
Preparing Your Kitchen and Equipment
Before you begin baking, it’s essential to prepare your kitchen and gather all necessary equipment. Here’s how to set yourself up for success:
1. Clean and Organize: Clear your workspace of any clutter. Make sure all utensils and tools are clean and ready for use.
2. Gather Ingredients: Assemble all your ingredients in one area. This includes softened unsalted butter, brown sugar, granulated sugar, eggs, buttermilk, all-purpose flour, baking powder, baking soda, butterscotch chips, and crushed rice cereal.
3. Tools: You will need a mixing bowl, a whisk or electric mixer, measuring cups and spoons, a spatula, and a cake pan. Consider using a stand mixer for ease, especially when creaming the butter and sugars.
Preheating and Greasing the Pans
Proper preparation of your baking pans is crucial for achieving a cake that releases easily without sticking:
1. Preheat the Oven: Set your oven to 350°F (175°C) to ensure it reaches the ideal baking temperature by the time you’re ready to bake your cake. A properly preheated oven is essential for even baking and achieving the desired rise.
2. Grease and Flour the Pans: Use a non-stick spray or butter to grease the bottom and sides of your cake pans. Then, dust them with flour to create a barrier that prevents sticking. You can also line the bottom of the pans with parchment paper for extra insurance.
Creaming the Butter and Sugars
The creaming method is a vital step in cake baking that impacts the texture and flavor:
1. Combine Butter and Sugars: In a large mixing bowl, add the softened butter, brown sugar, and granulated sugar. Using an electric mixer on medium speed, cream the mixture until it becomes light and fluffy—about 3-5 minutes. This process incorporates air, contributing to the cake’s leavening.
2. Check Consistency: The mixture should be pale in color and have a soft, airy texture. If it appears dense or grainy, continue mixing until you reach the desired consistency.
Incorporating Eggs and Vanilla
After the butter and sugars are creamed, it’s time to add the eggs and vanilla extract:
1. Add Eggs One at a Time: Beat in the eggs one at a time, ensuring each egg is fully incorporated before adding the next. This helps maintain the emulsion and prevents the batter from curdling.
2. Mix in Vanilla: Once all the eggs are added, pour in the vanilla extract and mix until combined. The vanilla enhances the overall flavor of the cake and pairs beautifully with the butterscotch.
By following these steps, you are well on your way to creating a delicious Butterscotch Crunch Cake that will delight your family and friends. The next part of this article will guide you through the remaining steps to complete the baking process, along with essential tips for achieving the best results. Stay tuned as we continue exploring this irresistible dessert!

Understanding the Role of Vanilla Extract in Enhancing Flavor
Vanilla extract is a key ingredient in many dessert recipes, including our Butterscotch Crunch Cake. Its role goes beyond merely adding sweetness; it enriches the flavor profile of the cake, enhancing the butterscotch and creamy notes. When combined with the other ingredients, vanilla extract contributes a warm, aromatic essence that balances the richness of the batter. Always opt for pure vanilla extract over imitation varieties for the best flavor. A teaspoon is typically sufficient to elevate your cake, making it more complex and inviting.
Mixing Dry Ingredients
Before diving into the heart of the cake, we need to focus on the dry ingredients. Whisking the dry components thoroughly is crucial, as it ensures even distribution of the leavening agents and flavors. This step helps in achieving a uniform texture throughout the cake.
1. Importance of Whisking Dry Ingredients Thoroughly: Using a fine mesh sieve or a whisk, combine the flour, baking powder, baking soda, and salt in a large bowl. Whisking helps to aerate the flour, which is essential for a light and fluffy cake. Take your time with this step; a well-mixed dry mixture leads to a more consistent batter.
2. How to Avoid Overmixing When Combining with Wet Ingredients: Once the dry ingredients are mixed, it’s time to combine them with the wet ingredients. Pour the dry mixture into the bowl containing the wet ingredients—made from eggs, melted butter, vanilla extract, and brown sugar—and stir gently. Use a spatula or a wooden spoon and mix just until combined. Overmixing will develop gluten in the flour and result in a dense cake. It’s okay if a few lumps remain; they will bake out.
The Art of Folding in Chips
Once your batter is combined, it’s time to add the butterscotch chips. This step may seem simple, but there’s an art to it.
1. Techniques for Gently Folding Ingredients Without Deflating the Batter: To fold in the butterscotch chips, use a rubber spatula. Start by cutting down through the center of the batter, then lift and turn the mixture over itself. Rotate the bowl as you fold, ensuring that the chips are evenly distributed without beating the batter down. This gentle approach helps maintain the volume of the cake.
2. The Significance of Even Distribution of Butterscotch Chips: Ensuring that the butterscotch chips are evenly distributed throughout the batter is crucial for consistent flavor in each slice. If the chips are clumped together, some bites will be overly sweet while others may lack that delightful butterscotch flavor. A careful folding process helps achieve that perfect balance.
Baking and Cooling the Cakes
With the batter ready, it’s time to bake! Proper baking and cooling are key to achieving a perfect cake.
1. Signs That Your Cake is Perfectly Baked: Preheat your oven to 350°F (175°C) and pour the batter into prepared cake pans. Bake for about 25-30 minutes. The cake is done when it springs back to the touch and a toothpick inserted into the center comes out clean or with a few moist crumbs. Avoid opening the oven door too often, as this can cause the cake to sink.
2. Cooling Techniques to Prevent Sogginess: Once baked, remove the cakes from the oven and allow them to cool in the pans for about 10 minutes. This resting time helps the cakes to settle. Then, turn them out onto a wire rack to cool completely. Cooling on a wire rack is essential, as it allows air to circulate around the cakes and prevents excess moisture from building up, which could make them soggy.
Creating the Whipped Cream and Crunch Layer
The Butterscotch Crunch Cake shines not only because of its rich flavor but also due to its delightful texture, which is achieved through the addition of a whipped cream layer and a crunchy topping.
Preparing the Crunch Layer
1. Steps to Combine Rice Cereal and Butterscotch Chips: In a bowl, mix together equal parts of crispy rice cereal and butterscotch chips. Melt a small amount of butter and drizzle it over the mixture, tossing gently to coat. This combination will create a crunchy layer that adds texture and richness to the cake.
2. How This Layer Adds a Unique Texture to the Cake: The crunch layer not only enhances the cake’s visual appeal but also provides a satisfying contrast to the smooth whipped cream and soft cake layers. It introduces a delightful crunch that makes each bite interesting and enjoyable.
Whipping Cream to Perfection
1. Techniques for Whipping Heavy Cream: To prepare the whipped cream, begin with a chilled mixing bowl and beaters. Pour in heavy whipping cream and beat on medium-high speed until soft peaks form. Be cautious not to over-whip, as this can lead to butter instead of cream.
2. Understanding the Importance of Powdered Sugar in Stabilization: Gradually add powdered sugar to the whipped cream. The sugar not only sweetens the cream but also helps stabilize it, allowing it to hold its shape longer. A teaspoon of vanilla extract can also be added during this process for an extra flavor boost.
Assembling the Butterscotch Crunch Cake
Now that all components are prepared, it’s time to assemble your masterpiece.
Layering for Maximum Flavor
1. Methods for Stacking Cake Layers Without Them Sliding: Start by placing one layer of cake on a serving plate or cake stand. Spread a layer of whipped cream evenly over the top, ensuring it reaches the edges. Carefully place the second cake layer on top, pressing down slightly to secure it in place. Repeat this process if you have multiple layers.
2. Tips for Evenly Spreading Whipped Cream: When spreading whipped cream, use an offset spatula for a smooth finish. Start from the center and work your way outwards. The goal is to have a uniform layer that enhances both the appearance and flavor of the cake.
Finishing Touches and Presentation
1. Creative Ways to Decorate with Remaining Butterscotch Chips: Use the remaining butterscotch chips to sprinkle on top of the whipped cream layer. For an added touch, consider drizzling warm butterscotch sauce over the top, giving it a glossy finish. Freshly grated chocolate or a dusting of cocoa powder can also enhance the cake’s visual appeal.
2. The Importance of Refrigerating Before Serving for Texture: Once assembled, refrigerate the cake for at least an hour before serving. This chilling time allows the whipped cream to firm up slightly, making it easier to slice and serve while enhancing the overall flavor as the layers meld together.
The Enjoyment of Butterscotch Crunch Cake
This cake is not just a treat; it’s a celebration of flavors perfect for various occasions.
Serving Suggestions
1. Best Occasions to Serve This Cake: The Butterscotch Crunch Cake is versatile and can be served at birthdays, holidays, or any special gathering. Its rich flavors make it a delightful centerpiece for festive occasions or an everyday indulgence.
2. Pairing Ideas with Beverages: Pair your cake with a cup of coffee, tea, or even a glass of dessert wine. The bitterness of coffee or the aromatic notes of tea beautifully complement the sweetness of the butterscotch, enhancing the overall experience.
Storage and Shelf Life
1. How to Store Leftover Cake to Maintain Freshness: Any leftover cake can be stored in an airtight container in the refrigerator for up to three days. Ensure it’s well covered to prevent it from absorbing other flavors in the fridge.
2. Freezing Options for Long-Term Storage: For longer storage, you can freeze the assembled cake. Wrap it tightly in plastic wrap followed by aluminum foil to prevent freezer burn. It can be frozen for up to three months. When ready to serve, allow it to thaw in the refrigerator overnight.
Conclusion
Butterscotch Crunch Cake is more than just a dessert; it is a celebration of flavors and textures that can elevate any occasion. By following the detailed steps and understanding the science behind each ingredient, you can create a cake that not only tastes fantastic but also showcases your baking skills. This recipe is sure to become a beloved staple in your baking repertoire, delighting friends and family alike with its comforting flavors and delightful crunch. Enjoy the journey of baking and the sweet rewards that come with it!

