Introduction to Crispy Baked Chicken Chimichangas
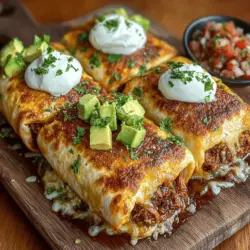
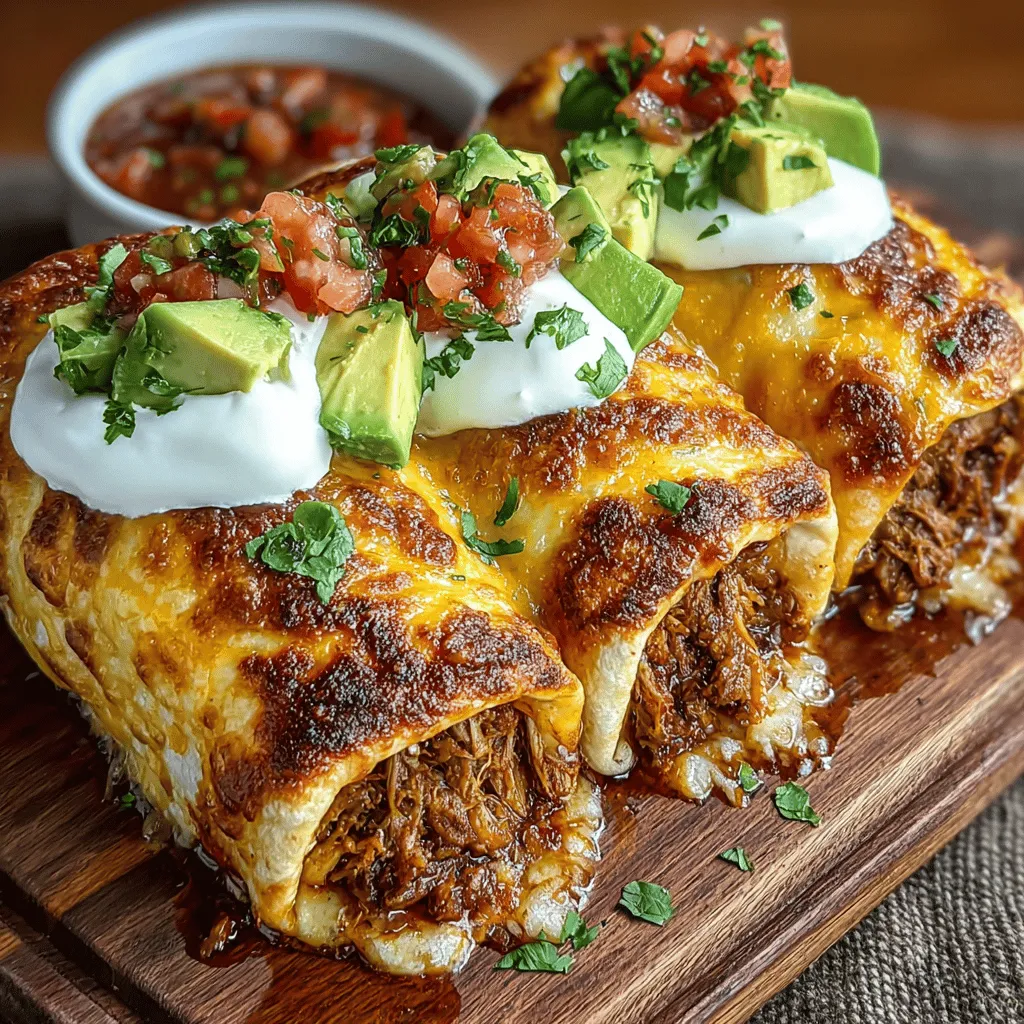
If you’re looking to indulge in a dish that perfectly marries convenience and rich, vibrant flavors, then Crispy Baked Chicken Chimichangas are sure to satisfy your cravings. This mouthwatering treat brings together the essence of traditional Mexican cuisine with the ease of a baked cooking method, making it ideal for both busy weeknights and festive gatherings. Imagine biting into a crispy wrapper that encases tender, shredded chicken, creamy refried beans, and a melty blend of cheeses, all seasoned to perfection. It’s a culinary experience that promises delight in every bite.
Chimichangas, which are deep-fried or baked burritos typically filled with meat and cheese, have carved out their niche in Mexican-American cuisine. Their roots are often debated, with some claiming they originated in Arizona while others suggest a more widespread influence across the southern United States. Regardless of their precise beginnings, what remains consistent is their popularity and adaptability. Crispy Baked Chicken Chimichangas offer a healthier alternative to the traditional fried version, allowing you to savor the same delicious flavors without the extra oil and calories.
As we venture deeper into this recipe, we’ll explore the ingredients that make these chimichangas so special, the step-by-step preparation methods, and their cultural significance. You’ll come to appreciate not just the dish itself, but the story and tradition behind it.
Understanding Chimichangas: A Culinary Journey
Exploration of the Origin of Chimichangas
The history of chimichangas is as colorful as the dish itself. While the exact origin is subject to various tales, it is widely believed that chimichangas were born in the southwestern United States, particularly in Arizona. One popular legend attributes their creation to a woman named Monica Flin, who accidentally dropped a burrito into a deep fryer in the 1920s, leading to the crispy, golden treat we know today. Over time, chimichangas have evolved from a simple street food into a beloved staple in many Mexican-American households, often served at celebrations and family gatherings.
When comparing fried and baked chimichangas, the two versions vary not only in cooking method but also in texture and nutritional content. Fried chimichangas boast a satisfying crunch but can often be heavy and greasy. On the other hand, baked chimichangas provide a lighter alternative that retains the essential flavors and textures without the excess oil. This makes them not only a healthier choice but also a versatile one that can easily fit into any meal plan.
The Appeal of Baked Versions
Choosing baked over fried chimichangas has become increasingly popular among health-conscious diners. Baking allows for a delightful crispiness that satisfies the craving for crunch without the added fat and calories associated with frying. The oven’s heat evenly cooks the chimichangas, ensuring that the filling remains moist while the outer shell turns golden brown and crispy.
Moreover, baked chimichangas maintain the essence of their traditional counterparts. The combination of flavors from the seasoned chicken, creamy refried beans, and melted cheese comes together beautifully, resulting in a dish that is just as indulgent and satisfying as its fried version. The use of spices such as cumin, chili powder, garlic powder, and onion powder further enhances the flavor profile, ensuring that each chimichanga is bursting with taste.
Ingredients Breakdown and Their Roles
To create the perfect Crispy Baked Chicken Chimichangas, understanding the role of each ingredient is crucial. Let’s take a closer look at what you’ll need and how each component contributes to the overall flavor and texture of the dish.
Key Ingredients and Their Functions
– Cooked Chicken: The star of our chimichangas, shredded chicken brings a tender and juicy element to the dish. Using cooked, shredded chicken ensures that the filling is easy to mix and distribute evenly within the tortillas. You can use rotisserie chicken for convenience or cook your chicken breast or thighs ahead of time for a more homemade touch.
– Refried Beans: This ingredient adds creaminess and a hearty texture, enhancing the overall mouthfeel of the chimichangas. Refried beans are not only rich in flavor, but they also provide a great source of protein and fiber, making your meal more filling.
– Shredded Cheese: The key to binding flavors and ensuring a gooey, delicious filling, shredded cheese is essential in creating that melt-in-your-mouth experience. A mix of cheeses, such as cheddar and Monterey Jack, can elevate the taste and provide a beautiful melting effect when baked.
– Salsa: Infusing freshness and moisture into the filling, salsa is a versatile ingredient that adds depth to the flavors. Whether you prefer mild or spicy salsa, it can also introduce a zesty kick that balances the richness of the chicken and cheese.
– Spices: A blend of cumin, chili powder, garlic powder, and onion powder will impart a warm and aromatic profile to your chimichangas. These spices are the secret to elevating the dish from simple to extraordinary, providing layers of flavor that complement each ingredient.
– Tortillas: The vessel that holds all these delicious components together, choosing the right tortillas is crucial. Flour tortillas are typically used for chimichangas due to their pliability and ability to crisp up nicely in the oven.
Optional Toppings: Enhancing Your Chimichangas
While the chimichangas themselves are bound to impress, the right toppings can take them to the next level. Consider adding diced avocado for a creamy contrast, a dollop of sour cream for tanginess, or a sprinkle of chopped cilantro for freshness. These toppings not only enhance the flavor but also add a beautiful presentation that makes your dish more inviting. Whether you’re serving them at a family dinner or a casual gathering with friends, these delightful touches will elevate your Crispy Baked Chicken Chimichangas into a memorable meal.
Step-by-Step Guide to Making Crispy Baked Chicken Chimichangas
Preparing to make Crispy Baked Chicken Chimichangas begins with organizing your kitchen workspace and gathering all necessary tools and ingredients. This ensures a smooth cooking process and prevents any last-minute scrambles. Here are the initial steps you should take:
Prepping the Kitchen
1. Gather Your Ingredients: Start by collecting all the key ingredients listed above. Having everything on hand will streamline your cooking process and allow you to focus on creating a delicious dish.
2. Prepare Your Tools: You will need a baking sheet or dish, cooking spray or parchment paper, a mixing bowl, and a large skillet for this recipe. Having these tools ready to go will help you move efficiently through the preparation stages.
3. Preheat the Oven: Set your oven to 425°F (220°C) to ensure it’s hot and ready for your chimichangas. A preheated oven is essential for achieving that perfect crispy exterior.
4. Shred the Chicken: If you haven’t already, shred your cooked chicken into bite-sized pieces. This can be done easily with two forks or by using a stand mixer for larger quantities.
5. Mix the Filling: In a large mixing bowl, combine the shredded chicken, refried beans, shredded cheese, salsa, and spices. Mix until well combined, ensuring that each ingredient is evenly distributed.
With your kitchen prepped and your filling ready, you’re now set to move on to the next part of the process—assembling and baking your Crispy Baked Chicken Chimichangas. The excitement of transforming these ingredients into a delicious dish awaits you!
Importance of Preheating the Oven for Optimal Cooking
Before diving into the main preparations for your Crispy Baked Chicken Chimichangas, it’s crucial to preheat your oven. Preheating activates the baking process, ensuring that your chimichangas cook evenly and thoroughly. A properly preheated oven helps achieve that coveted golden-brown exterior while keeping the filling moist and flavorful.
To preheat your oven, set it to 425°F (220°C) and allow it to reach the desired temperature while you prepare the filling and assemble the chimichangas. This step is vital as it not only contributes to the overall cooking time but also promotes even baking, preventing any sogginess in your chimichangas.
Mixing the Filling
Detailed Instructions on Combining the Filling Ingredients
The filling is the heart of your chimichangas, and getting it just right can elevate your dish to new heights. Here’s how to create a delicious filling:
1. Cook the Chicken: If you’re using raw chicken, season it with salt, pepper, and a dash of cumin. Cook it in a skillet over medium heat until it’s fully cooked (internal temperature of 165°F or 75°C). Let it cool slightly, then shred or chop it into small pieces.
2. Combine Ingredients: In a large mixing bowl, combine the shredded chicken with the following ingredients:
– 1 cup of shredded cheese (cheddar or Monterey Jack work best)
– 1 cup of black beans (drained and rinsed)
– 1 cup of corn (frozen or canned)
– 1/2 cup of diced bell peppers (any color)
– 1/4 cup of chopped fresh cilantro
– 1 teaspoon of chili powder
– 1/2 teaspoon of garlic powder
– Salt and pepper to taste
3. Mix Thoroughly: Use a spatula to gently fold the ingredients together until everything is well-coated and evenly distributed. The key to a perfect filling is ensuring that all the ingredients are combined without becoming mushy.
Tips for Achieving the Perfect Texture for the Filling
– Don’t Overmix: While it’s important to combine the ingredients well, avoid overmixing as it can lead to a mushy filling. The texture should remain hearty and recognizable.
– Use Fresh Ingredients: Fresh vegetables not only enhance flavor but also add a delightful crunch to the filling. If you can, opt for in-season produce for the best taste.
– Taste as You Go: Always taste the filling before assembling the chimichangas. Adjust the seasoning to your preference, adding more spices or salt as needed.
Assembling the Chimichangas
Step-by-Step Guide to Rolling and Sealing the Chimichangas
Now that your filling is ready, it’s time to assemble the chimichangas. Follow these steps for a perfect roll:
1. Prepare Tortillas: Warm up the flour tortillas slightly in the microwave (about 10 seconds) to make them more pliable. This prevents cracking when rolling.
2. Add Filling: Place about 1/3 cup of the chicken filling in the center of each tortilla. Be careful not to overfill, as this can make sealing difficult.
3. Roll Carefully: Fold the sides of the tortilla over the filling, then roll from the bottom up, tucking in the sides as you go. Make sure the filling is securely enclosed, and the seam is on the bottom.
4. Seal the Edges: To ensure a tight seal, you can brush a little water along the edges of the tortilla before folding them over. This helps the tortillas stick together during baking.
Common Mistakes to Avoid During Assembly
– Overfilling: One of the most common mistakes is overfilling the chimichangas. This can lead to burst tortillas and filling spilling out during baking.
– Neglecting the Edges: Forgetting to seal the edges properly can result in uneven cooking and leakage. Take the time to ensure each chimichanga is well-sealed.
– Using Cold Tortillas: Cold tortillas are more likely to crack. Always warm them slightly before assembling to maintain flexibility.
Baking for Perfection
Importance of Using Parchment Paper and the Right Baking Technique
Using parchment paper is essential for baking chimichangas. It prevents sticking and facilitates easy cleanup. Line a baking sheet with parchment paper and arrange your assembled chimichangas seam-side down.
Additionally, to achieve that crispy texture, lightly brush the tops with olive oil before baking. This will help them develop a beautiful golden-brown crust while also adding a subtle flavor.
How to Achieve That Golden-Brown Crispy Exterior
1. Bake at the Right Temperature: Ensure your oven is preheated to 425°F (220°C). This high temperature promotes browning and crisping.
2. Rotate for Even Cooking: About halfway through the baking time, rotate the baking sheet to ensure even cooking. This helps all sides of the chimichangas get that desired crispiness.
3. Bake Until Golden: Bake for approximately 25-30 minutes or until the chimichangas are golden brown and crispy. Keep an eye on them towards the end to prevent burning.
Serving Suggestions and Pairings
Cozy Serving Ideas
Crispy Baked Chicken Chimichangas can shine on their own, but pairing them with the right side dishes can enhance your meal experience. Here are some recommendations:
– Mexican Rice: A side of fluffy Mexican rice complements the flavors of the chimichangas perfectly. You can also consider Spanish rice for a twist.
– Refried Beans: Creamy refried beans add a delicious contrast to the crispy texture of the chimichangas.
– Fresh Salad: A simple salad with romaine lettuce, diced tomatoes, and avocado drizzled with lime dressing can add freshness to your meal.
Creating a complete meal experience can be as simple as setting up a buffet-style spread with toppings like sour cream, guacamole, and salsa for guests to customize their chimichangas.
Exploring Beverage Pairings
The right beverage can enhance the flavors of your chimichangas. Here are some drink suggestions:
– Margaritas: A classic pairing, margaritas (both classic and fruit-flavored) can complement the spices and textures of the dish beautifully.
– Mexican Beer: Light beers such as Corona or Pacifico offer a refreshing contrast to the rich flavors of the chimichangas.
– Non-Alcoholic Options: Consider serving a refreshing limeade or horchata for a non-alcoholic pairing that balances the flavors without overwhelming them.
Nutritional Information and Benefits
Balanced Meal Overview
Crispy Baked Chicken Chimichangas not only deliver on flavor but also provide a balanced meal option. Here’s a breakdown of the nutritional benefits:
– Chicken: A great source of lean protein, chicken helps build muscle and maintain a healthy metabolism.
– Black Beans: Rich in fiber and protein, black beans contribute to satiety and digestive health.
– Vegetables: The addition of bell peppers and corn adds essential vitamins and minerals, contributing to overall health and wellness.
– Cheese: While indulgent, cheese provides calcium and can offer some protein.
Discussing the Health Aspects of Using Baked Versus Fried Options
By baking instead of frying, you significantly reduce the amount of oil and calories in your chimichangas. This method not only makes them a healthier option but also allows you to enjoy a satisfying crunch without the added guilt. Baking also helps retain the nutrients in the chicken and vegetables, making every bite more beneficial for your health.
Conclusion: Enjoying Your Crispy Baked Chicken Chimichangas
In conclusion, Crispy Baked Chicken Chimichangas offer a delicious, satisfying, and healthier alternative to traditional fried options. With their rich flavors and customizable nature, they are sure to become a favorite in any household. Whether enjoyed alone or as part of a larger feast, these chimichangas embody the spirit of comfort food while allowing for creativity in the kitchen. Embrace the joy of cooking and savor each crispy bite!
These chimichangas are not just a meal; they are an experience—one that invites you to gather with friends and family, share stories, and create lasting memories over a table filled with delicious food. So, roll up your sleeves, grab your ingredients, and dive into making this delightful dish that promises to please everyone at your table!