Creamy Back To School Cookies: A Delicious Start to the School Year
As the summer sun begins to fade and the days grow shorter, families everywhere prepare for the back-to-school season. This time of year is filled with excitement and anticipation as children transition from lazy summer days to bustling school routines. Whether it’s shopping for new backpacks or setting up study areas, parents and kids alike embrace this change with a sense of purpose and enthusiasm. One delightful way to celebrate the start of a new school year is by baking together, creating treats that can be enjoyed during lunch breaks and after-school snacks. Enter the Creamy Back To School Cookies—an irresistible blend of flavors that promises to bring joy to the entire family.
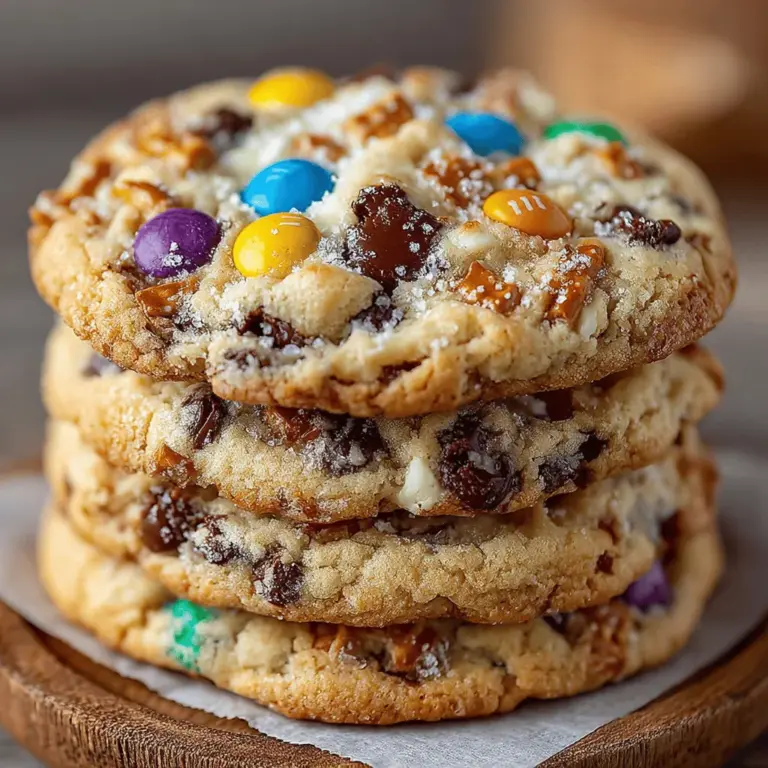
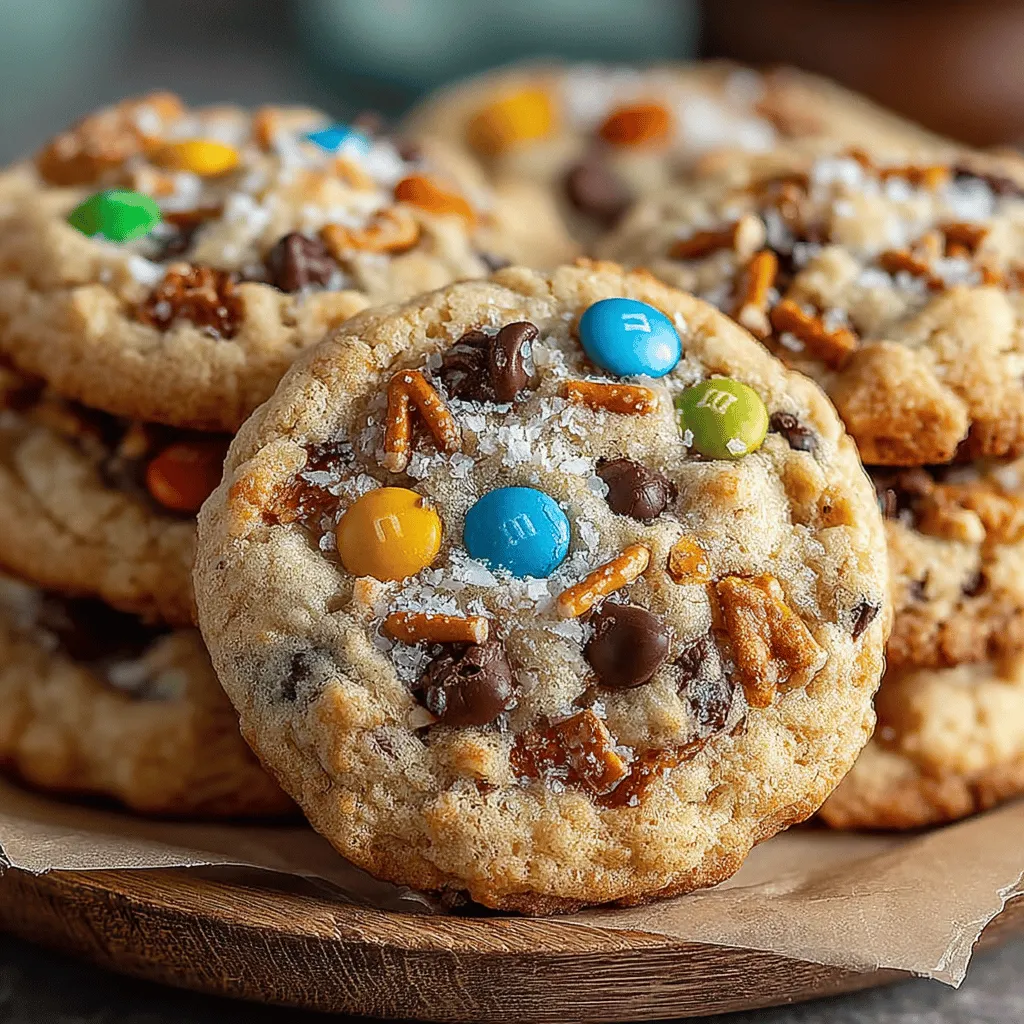
Imagine biting into a warm, chewy cookie that boasts the rich, nutty taste of peanut butter, the sweetness of chocolate, and a satisfying crunch from salty pretzels. These Creamy Back To School Cookies are not only delicious but also a perfect balance of flavors that will cater to the diverse palates of students and parents alike. The combination of sweet and salty creates a delightful experience that keeps everyone coming back for more. This recipe is not just about indulging in treats but also about creating lasting memories in the kitchen as a family.
The Appeal of Creamy Back To School Cookies
What makes these cookies particularly special for the back-to-school season is their versatility and appeal. For many families, the beginning of the school year can be a hectic time filled with busy schedules, homework, and extracurricular activities. These cookies can serve as a sweet reminder of the joy of coming together, even when life gets busy. Baking them as a family can help ease the transition, providing a moment to bond and share laughter over measuring ingredients and mixing dough.
Beyond their nostalgic value, the unique flavor profile of these cookies sets them apart. The creamy peanut butter offers a satisfying richness, while the dark chocolate chips provide an indulgent sweetness that kids adore. The addition of crushed pretzels introduces a delightful crunch and a touch of saltiness, creating a perfect harmony that appeals to both sweet and savory lovers. These cookies are ideal for packed lunches, after-school snacks, or even as a treat to share at school events.
Moreover, some of the ingredients in these cookies come with nutritional benefits. Peanut butter is a great source of protein and healthy fats, making it a nourishing addition to your child’s diet. Dark chocolate, in moderation, can offer antioxidants and improve mood, while the pretzels add a bit of fiber. This combination ensures that while the cookies are a treat, they also contribute some nutritional value, making them a more wholesome option compared to other snacks.
Ingredients Breakdown
To create these Creamy Back To School Cookies, you will need a selection of carefully chosen ingredients, each playing a specific role in achieving the perfect cookie. Here’s a breakdown of what you’ll need:
– Unsalted Butter: The foundation of any great cookie, unsalted butter adds creaminess and rich flavor. It helps create a tender texture that’s essential for achieving that chewy bite.
– Granulated and Brown Sugars: The duo of granulated and brown sugars provides the perfect balance of sweetness and moisture. Granulated sugar helps the cookies spread out, while brown sugar adds depth and chewiness thanks to its molasses content.
– Eggs: Eggs are crucial for binding the ingredients together and providing structure to the cookies. They contribute to a tender crumb and help the cookies rise.
– Vanilla Extract: A splash of vanilla extract enhances the overall flavor of the cookies, giving them a warm, inviting aroma that’s hard to resist.
– All-Purpose Flour: The base for our cookie dough, all-purpose flour gives the cookies their structure. It’s essential for achieving the right texture—soft in the center and slightly crisp on the edges.
– Baking Soda and Salt: Baking soda acts as a leavening agent, ensuring the cookies rise properly. A pinch of salt not only enhances the flavors but also balances the sweetness.
– Creamy Peanut Butter: The star ingredient in this recipe, creamy peanut butter brings an indulgent richness and nutty flavor that elevates the cookies to new heights. It adds moisture while contributing to their unique texture.
– Chocolate Chips: Chocolate chips provide bursts of sweetness and richness throughout the cookies. Opting for dark chocolate can add a more intense flavor that balances the other ingredients well.
– Crushed Pretzels: The addition of crushed pretzels is what sets these cookies apart. They introduce a contrasting texture that adds crunch and a delightful salty note, making each bite a complex flavor experience.
– Optional M&M’s: For an extra pop of color and fun, consider adding M&M’s to the mix. They not only appeal to kids but also make the cookies visually appealing, perfect for back-to-school treats.
Getting Started with Baking
Now that you have a clear understanding of the ingredients and their roles, it’s time to get started on baking these Creamy Back To School Cookies. Begin by preheating your oven to 350°F (175°C) and lining your baking sheets with parchment paper. This preparation step ensures that your cookies bake evenly and won’t stick to the pan.
Next, in a large mixing bowl, cream together the unsalted butter, granulated sugar, and brown sugar using a hand mixer or stand mixer. Beat the mixture until it becomes light and fluffy, which typically takes about 2-3 minutes. This process is crucial as it incorporates air into the dough, resulting in a tender cookie.
Once the butter and sugars are well combined, add in the eggs, one at a time, mixing well after each addition. Follow this with the vanilla extract, blending until smooth. The mixture should be creamy and well-emulsified, setting the stage for the dry ingredients to be added.
In a separate bowl, whisk together the all-purpose flour, baking soda, and salt. Gradually add this dry mixture to the wet ingredients, stirring until just combined. Be careful not to overmix, as this can lead to tough cookies. Finally, fold in the creamy peanut butter, chocolate chips, and crushed pretzels, ensuring they are evenly distributed throughout the dough.
Once your dough is ready, it’s time to scoop and bake. Use a cookie scoop or tablespoon to portion out the dough onto the prepared baking sheets, leaving adequate space between each cookie to allow for spreading.
As you embark on this baking journey, remember that the process is just as enjoyable as the final result. The aroma of freshly baked cookies wafting through your home will create an inviting atmosphere, perfect for welcoming the new school year. Whether you’re making these cookies for after-school snacks or to share with friends and family, the Creamy Back To School Cookies are sure to become a favorite in your household.
Stay tuned for the next part of this article, where we’ll explore baking tips, storage ideas, and ways to customize this delightful recipe to suit your family’s preferences.
Step-by-Step Instructions to Perfect Cookies
Preheating the Oven
Preheating your oven is a critical first step in baking cookies. The ideal temperature for our Creamy Back To School Cookies is 350°F (175°C). This ensures that your cookies bake evenly and rise properly. A hot oven will help create that delightful golden-brown exterior while keeping the inside soft and chewy. Always allow your oven to reach the desired temperature before placing your cookies inside.
Creaming Butter and Sugars
The creaming process is where the magic begins. Start by beating together softened unsalted butter, granulated sugar, and brown sugar in a large mixing bowl. Use an electric mixer on medium speed for about 2-3 minutes until the mixture is light and fluffy. This step is essential because it incorporates air into the mixture, which helps your cookies achieve a tender texture. The sugars also dissolve better, creating a more uniform batter.
Incorporating Eggs and Vanilla
Next, add in your eggs and vanilla extract. It’s important to incorporate them one at a time to ensure even mixing. Continue to beat the mixture until fully combined, scraping down the sides of the bowl with a spatula as needed. This thorough mixing not only enhances the flavor but also contributes to the cookie’s overall structure.
Merging Dry Ingredients
In a separate bowl, whisk together your dry ingredients: all-purpose flour, baking soda, and a pinch of salt. Gradually add this dry mixture to your wet ingredients, mixing on low speed just until combined. Be careful not to over-mix at this stage; too much mixing can lead to tough cookies. A few flour streaks are okay—this ensures that your cookies will remain soft and tender.
Folding in Peanut Butter
Now for the fun part—folding in your creamy peanut butter. Use a spatula to gently incorporate the peanut butter into the dough. Aim for a light swirl effect rather than fully blending it in. This technique will give your cookies delightful pockets of peanut butter flavor without compromising the overall texture of the dough.
Adding Mix-Ins
Now it’s time to enhance your cookies with mix-ins. Whether you opt for chocolate chips, chopped nuts, or dried fruits, ensure they are evenly distributed throughout the dough. A good rule of thumb is to add about one cup of mix-ins for every batch of cookie dough. Gently fold them in to maintain the integrity of your cookie dough.
Forming and Spacing Cookie Dough
When it comes to shaping your cookies, use a cookie scoop or your hands to form dough balls about 1.5 inches in diameter. Place them on a baking sheet lined with parchment paper, ensuring there is enough space between each ball (about 2 inches apart). This spacing is crucial as it allows the cookies to spread and bake evenly without merging into one another.
Baking Time and Indicators of Doneness
Bake your cookies in the preheated oven for 10-12 minutes, or until they are lightly golden around the edges. The centers may appear slightly underbaked, but they will continue to cook on the baking sheet once removed from the oven. A good indicator of doneness is when the edges are set, and the tops look slightly puffed. Avoid opening the oven door too often during baking, as this can affect the temperature.
Cooling Process
Once your cookies are out of the oven, allow them to cool on the baking sheet for about 5 minutes before transferring them to a wire rack. This cooling stage is vital; it allows the cookies to firm up and enhances their flavor. Enjoy the aroma wafting through your kitchen as you wait patiently for the cookies to cool.
Serving Suggestions
Pairing Cookies with Beverages
These Creamy Back To School Cookies are versatile and pair wonderfully with various beverages. A classic choice is a tall glass of cold milk, which complements the richness of the peanut butter and chocolate. For a more indulgent experience, consider pairing them with a steaming cup of coffee or hot chocolate, especially during the cooler months. The warmth of the drink enhances the cookie’s flavors and makes for a comforting treat.
Ideas for Packaging Cookies
If you’re looking to send these cookies off to school or as gifts, presentation is key. Consider packaging them in clear cellophane bags tied with colorful ribbons for a fun lunchbox surprise. You can also layer them in a decorative tin, which keeps them fresh and adds a personal touch. To make them visually appealing, include a handwritten note or a fun sticker to brighten someone’s day.
Suggestions for Enjoying Cookies
These cookies are perfect for various occasions. They make excellent after-school snacks, providing a sweet boost of energy for kids returning home. Alternatively, they can serve as a delightful breakfast treat with a side of fruit or yogurt. Don’t forget about dessert—these cookies can easily satisfy your sweet tooth after dinner, making them a versatile addition to your weekly meal plan.
The Joy of Baking Together
Baking is more than just a method of creating delicious treats; it’s an opportunity to bond as a family. Involving children in the baking process can create lasting memories and teach them valuable skills. Whether it’s measuring ingredients, mixing batter, or placing cookies on the baking sheet, there’s a task for every age.
Tips for Involving Kids in the Baking Process
– Toddlers: Allow them to pour in pre-measured ingredients or help mix. They love to be involved, and it helps build their motor skills.
– School-aged children: Engage them in reading the recipe aloud, measuring, and even decorating the cookies with frosting or sprinkles.
– Teens: Encourage them to take on more responsibility by letting them handle the mixer or oven. This fosters independence and confidence in the kitchen.
The Educational Aspect of Baking
Baking provides a fun way to incorporate learning without it feeling like a chore. Measuring ingredients teaches math skills, while following a recipe encourages reading comprehension and following directions. Timing the baking process also introduces basic concepts of time management. Each step presents an opportunity for discussion and exploration, making baking a rich learning experience.
Conclusion
These Creamy Back To School Cookies are more than just a treat; they’re a celebration of the back-to-school season, a chance to create cherished moments with family, and a source of comfort during this transitional time. The combination of creamy peanut butter, soft cookie dough, and delightful mix-ins creates a treat that will be loved by kids and adults alike.
As you embrace the back-to-school season, consider making these cookies a staple in your home. Not only will they provide a sweet reward after a long day, but they will also serve as a reminder of the joy that comes from baking together. So gather your ingredients, invite your family into the kitchen, and get ready to create delicious cookies that bring comfort and happiness to your home.
