Introduction
No-bake desserts have surged in popularity over the past few years, captivating the hearts of dessert lovers everywhere. They offer a delightful way to enjoy sweet treats without the need for an oven, making them perfect for hot summer days or anytime you want to whip up something special without much fuss. Among the myriad of no-bake options, the No-Bake Banana Pudding Cheesecake stands out as a creamy, luscious dessert that combines the comforting flavors of banana pudding with the rich texture of cheesecake.
This delectable dessert is not only pleasing to the eye but also to the palate, making it a wonderful choice for gatherings, celebrations, or simply as a delicious end to a family meal. Its appeal lies in its simplicity and ease of preparation, allowing both novice and experienced bakers to create a show-stopping treat with minimal effort. In just a few steps, you can achieve a layered masterpiece that will impress your family and friends, leaving them clamoring for seconds.
In this article, we will explore the essential components that make up the No-Bake Banana Pudding Cheesecake, guide you through crafting the perfect graham cracker crust, and provide detailed instructions for creating a smooth and creamy cheesecake filling. Prepare to embark on a culinary journey that will elevate your dessert game!
Understanding the Components of No-Bake Banana Pudding Cheesecake
To appreciate the deliciousness of the No-Bake Banana Pudding Cheesecake, it’s vital to understand the key ingredients that contribute to its unique flavor and texture. Each component plays a significant role in creating this delightful dessert, ensuring that every bite is rich, creamy, and bursting with flavor.
The Importance of Graham Cracker Crust
At the base of this cheesecake is the graham cracker crust, which provides a flavorful and slightly crunchy contrast to the creamy filling. Made from crushed graham crackers, melted butter, and a touch of sugar, this crust is not only easy to prepare but also adds a delightful sweetness and texture to the dessert. The buttery flavor of the melted butter enhances the graham crackers, creating a delicious foundation that holds the cheesecake together.
Cream Cheese: The Creamy Filling’s Secret
The star of the cheesecake filling is undoubtedly cream cheese. This rich ingredient is essential for achieving that smooth, creamy texture that we associate with traditional cheesecakes. When softened to room temperature, cream cheese can be easily blended, creating a luscious filling that melds beautifully with the other ingredients. Its tangy flavor balances the sweetness of the dessert, ensuring it is indulgent without being overly rich.
Heavy Whipping Cream: Light as Air
To achieve the perfect light and airy texture in our cheesecake filling, heavy whipping cream is employed. When whipped to soft peaks, it adds volume and a cloud-like texture that elevates the overall dessert experience. This lightness contrasts beautifully with the density of the cream cheese, making every bite feel decadent yet not overly heavy.
Instant Vanilla Pudding Mix: The Thickening Agent
Instant vanilla pudding mix plays a pivotal role in this recipe, acting as a thickening agent that helps the cheesecake set properly. When combined with milk, it creates a creamy mixture that adds depth of flavor while ensuring the filling holds its shape. The vanilla flavor enhances the overall taste profile, bringing warmth and richness to the dessert.
Ripe Bananas: Flavor and Presentation
No banana pudding cheesecake would be complete without ripe bananas. Their natural sweetness and creamy texture are what make this dessert a celebration of flavor. When incorporated into the filling and layered throughout the cheesecake, bananas not only provide a delicious taste but also add visual appeal with their bright yellow color. The use of ripe bananas ensures that they are at their sweetest, enhancing the overall flavor of the cheesecake.
The Perfect Crust: Creating a Graham Cracker Base
Now that we have explored the key components of our No-Bake Banana Pudding Cheesecake, it’s time to dive into the first crucial step: preparing the graham cracker crust. This step is essential for establishing a solid foundation for your cheesecake, so let’s break it down into easy-to-follow instructions.
Ingredients for the Crust
To make the perfect graham cracker crust, you will need the following ingredients:
– 1 ½ cups graham cracker crumbs
– ½ cup unsalted butter, melted
– ¼ cup granulated sugar
Step-by-Step Guide to Preparing the Crust
1. Preheat the Oven (Optional): While this is a no-bake cheesecake, if you prefer a slightly toasted flavor, you can preheat your oven to 350°F (175°C) and bake the crust for about 5-8 minutes. This step is optional and not necessary for the no-bake aspect of the cheesecake.
2. Combine the Ingredients: In a medium bowl, combine the graham cracker crumbs, melted butter, and granulated sugar. Use a fork or a spatula to mix the ingredients until they are well combined and resemble wet sand. The melted butter should evenly coat the crumbs, helping them bind together.
3. Pressing into the Pan: Choose a 9-inch springform pan for assembling your cheesecake. Pour the graham cracker mixture into the pan and use the back of a measuring cup or your fingers to press the mixture firmly into the bottom and slightly up the sides of the pan. It’s important to apply even pressure to ensure the crust holds together once set.
4. Chill the Crust: Once the crust is pressed into the pan, place it in the refrigerator for at least 30 minutes to allow it to firm up. This chilling period is crucial as it helps the crust maintain its shape when filled with the creamy cheesecake mixture.
Importance of Chilling for the Right Texture
Chilling the crust ensures that it sets properly and holds its shape during assembly. If you skip this step, your crust may crumble when you cut into the cheesecake, resulting in a messy presentation. Taking the time to chill the crust not only enhances its structure but also allows the flavors to meld together, resulting in a more delicious dessert.
Crafting the Cheesecake Filling: A Step-by-Step Guide
With our graham cracker crust ready, it’s time to focus on the star of the show—the cheesecake filling. This creamy mixture is what makes the No-Bake Banana Pudding Cheesecake so irresistible, and we want to ensure it turns out perfectly. Follow these detailed instructions to create a smooth and delectable filling.
Ingredients for the Filling
For the cheesecake filling, gather the following ingredients:
– 16 ounces cream cheese, softened to room temperature
– 1 cup powdered sugar
– 1 teaspoon vanilla extract
– 2 cups heavy whipping cream
– 1 package (3.4 ounces) instant vanilla pudding mix
– 1 ½ cups milk
– 2 ripe bananas, sliced
Detailed Instructions for Making the Cheesecake Filling
1. Soften the Cream Cheese: Ensure your cream cheese is at room temperature before starting. This step is crucial for achieving a smooth filling without lumps. If you forget to take it out ahead of time, you can microwave it in 10-second intervals until softened—just be careful not to melt it.
2. Mixing the Cream Cheese: In a large mixing bowl, beat the softened cream cheese with an electric mixer on medium speed until smooth and creamy, about 2-3 minutes. Scrape down the sides of the bowl as needed to ensure an even texture.
3. Incorporate the Sugar and Vanilla: Gradually add the powdered sugar and vanilla extract to the cream cheese mixture, mixing until fully incorporated. This will add sweetness and flavor to your filling, enhancing the overall taste of the cheesecake.
4. Prepare the Pudding Mixture: In a separate bowl, whisk together the instant vanilla pudding mix and milk until smooth. Allow it to sit for about 2 minutes to thicken. This pudding mixture will contribute to the creamy consistency of the cheesecake while adding a delicious vanilla flavor.
5. Combine the Mixtures: Once the pudding is thickened, gently fold it into the cream cheese mixture using a spatula. Be careful not to over-mix; you want to keep the filling light and airy.
6. Whip the Heavy Cream: In another bowl, beat the heavy whipping cream with an electric mixer until stiff peaks form. This is a crucial step for creating a fluffy texture in your cheesecake filling. The whipped cream will lighten the overall mixture and add that signature creaminess.
7. Fold the Whipped Cream In: Gently fold the whipped cream into the cream cheese and pudding mixture. This should be done in batches, ensuring that the mixture remains light and airy. Be patient and use a gentle folding technique to maintain the volume of the whipped cream.
8. Add the Bananas: Finally, fold in the sliced ripe bananas, distributing them evenly throughout the cheesecake filling. These bananas will add bursts of flavor and delightful texture to the finished dessert.
With the cheesecake filling prepared, you’re well on your way to creating a stunning No-Bake Banana Pudding Cheesecake. In the following sections, we will delve into the assembly of the cheesecake and additional tips to ensure your dessert is a resounding success. So, let’s keep the momentum going!
How to Properly Fold in Whipped Cream for Lightness
Folding in whipped cream is a crucial step in achieving the light and airy texture that defines a perfect no-bake cheesecake. To properly fold whipped cream into the mixture without deflating it, begin by ensuring your whipped cream is at medium peaks—this means it should be thick enough to hold its shape but still have a slight softness.
1. Start with a Base: Begin by adding a small amount of the whipped cream to your cheesecake mixture. This initial addition lightens the batter and makes it easier to incorporate the rest.
2. Use a Wide Spatula: With a rubber spatula, scoop down into the mixture and lift it up and over the whipped cream. Rotate your bowl as you fold to ensure an even distribution.
3. Gentle Motions: Continue this gentle folding motion, turning the bowl frequently, until the whipped cream is just incorporated. Be careful not to over-mix; the goal is to maintain that airy texture.
Layering the Cheesecake: Assembling Your Dessert
Layering is not just about aesthetics; it greatly enhances the flavor and texture of your no-bake banana pudding cheesecake. The combination of creamy cheesecake filling with fresh banana slices and crunchy vanilla wafers creates a delightful experience in every bite.
Step-by-Step Instructions for Layering Bananas and Cheesecake Filling
1. Prepare Your Pan: Ensure your springform pan is ready. If you prefer, you can line the bottom with parchment paper to facilitate easy removal.
2. First Layer of Bananas: Begin by placing a layer of banana slices at the bottom of the pan. Make sure they are evenly distributed for consistent flavor throughout.
3. Add Cheesecake Filling: Using a spatula, carefully spread a portion of the cheesecake filling over the banana layer. Aim for an even layer, smoothing it out gently to avoid disturbing the bananas below.
4. Repeat the Process: Continue layering with more banana slices followed by another layer of cheesecake filling. Depending on the size of your pan, you can create two or three layers, finishing with a layer of cheesecake filling on top.
Techniques for Spreading Filling Evenly
To achieve an even spread of your cheesecake filling, use an offset spatula or the back of a spoon. Start from the center and gently push the filling towards the edges, making sure to cover the bananas completely. A gentle hand is essential here; you want to maintain the integrity of your layers.
Tips for Achieving a Smooth and Beautiful Top Layer
For a smooth top layer, ensure your final layer of cheesecake filling is spread evenly. If you find that the surface is not as smooth as you’d like, dip your spatula in warm water and run it over the surface to create a polished finish. Additionally, a light dusting of crushed vanilla wafers or graham cracker crumbs on top can add texture and visual interest.
Setting the Cheesecake: Refrigeration and Timing
Refrigeration is essential for a no-bake cheesecake to set properly. The cooling process allows the cream cheese and whipped cream to firm up, creating a sliceable texture that holds its shape.
Recommended Chilling Time for Optimal Texture
For best results, chill your assembled cheesecake in the refrigerator for at least 4 hours. However, overnight is ideal. This longer setting time allows the flavors to meld beautifully, resulting in a richer taste.
Benefits of Making the Cheesecake a Day in Advance
Making your no-bake banana pudding cheesecake a day in advance is not only convenient but enhances the overall flavor. The extra time in the fridge allows the bananas to soften slightly while infusing their flavor into the cheesecake. Additionally, it alleviates last-minute stress for gatherings or events, making it a perfect make-ahead dessert.
Finishing Touches: Decorating Your No-Bake Cheesecake
Presentation elevates any dessert, and your no-bake banana pudding cheesecake is no exception. Topping it creatively can enhance its appeal and make it look as delicious as it tastes.
Ideas for Topping the Cheesecake
Consider using a generous dollop of freshly whipped cream on top for a fluffy finish. For added visual appeal, you can create peaks with a piping bag fitted with a star tip.
Using Whipped Cream for a Fluffy Finish
When preparing whipped cream, remember to sweeten it lightly with powdered sugar and a splash of vanilla extract. This not only adds flavor but also stabilizes the cream, ensuring it holds its shape when piped.
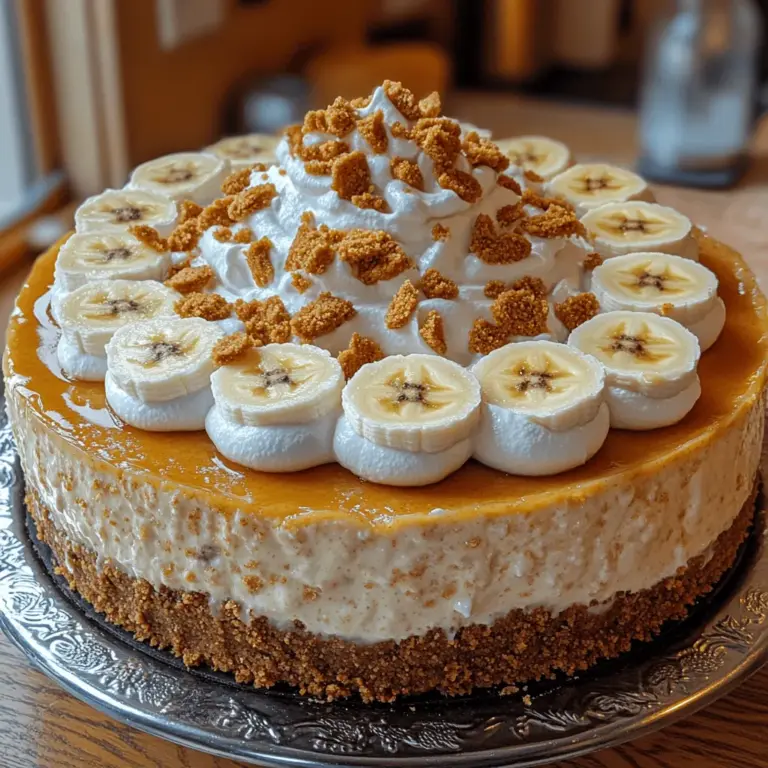
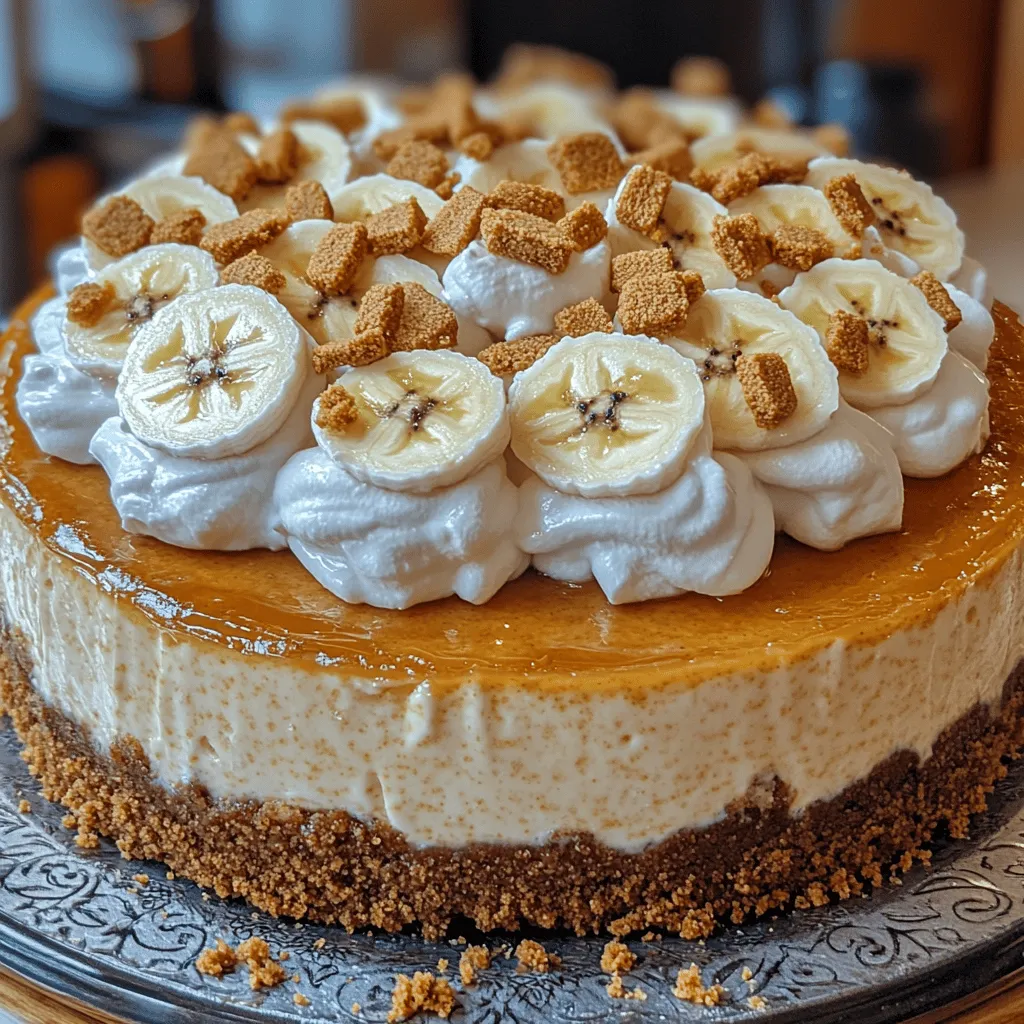
Creative Ways to Arrange Banana Slices and Vanilla Wafers
For a beautiful presentation, arrange banana slices in a circular pattern on top of the cheesecake. You can also place whole vanilla wafers around the edge or crumble them for a decorative border. This not only adds a delightful crunch but also hints at the flavors within.
Importance of Presentation in Enhancing the Dessert’s Appeal
A well-decorated cheesecake is more inviting and can impress your guests. The visual appeal of layers, combined with thoughtful toppings, makes the dessert a centerpiece worthy of any table.
Serving Suggestions and Pairing Ideas
When it comes to serving your no-bake banana pudding cheesecake, presentation is key. Here are some recommendations to enhance your serving experience:
Recommendations for Serving the Cheesecake
For the perfect slice, run a sharp knife under hot water and wipe it dry before cutting. This ensures a clean cut through the layers. Serve each slice on a chilled plate to keep it fresh and appealing.
Pairing Suggestions for Beverages That Complement the Dessert
Pair your cheesecake with a light beverage like iced tea, lemonade, or even a sparkling wine. The refreshing flavors of these drinks contrast beautifully with the creamy richness of the cheesecake, providing a balanced dessert experience.
Ideas for Occasions Where This Cheesecake Would Shine
This no-bake banana pudding cheesecake is versatile enough for various occasions. It’s perfect for summer picnics, family gatherings, birthday parties, or even holiday celebrations. Its crowd-pleasing flavors make it a delightful addition to any dessert table.
Conclusion
In summary, the no-bake banana pudding cheesecake is not only a visual delight but also a treat for the taste buds. Its creamy texture, combined with the sweetness of bananas and the crunch of vanilla wafers, creates a dessert that is sure to impress. The ease of preparation allows you to enjoy the process of making this delectable treat, and sharing it with loved ones makes it even more special.
Whether you’re celebrating a special occasion or simply indulging in a sweet craving, this cheesecake is a delightful choice. Embrace the joy of creating and savoring every bite of your homemade no-bake banana pudding cheesecake, and don’t forget to make it a day in advance for the best results. Enjoy the delicious journey from preparation to presentation!
